Structured Workflow: Entities & Alerts
Sub-sections included below refer to organizations configured with the Structured Workflow Type. If you are unsure which workflow type applies to your organization, please find this information under Account → My Profile → Organization Information.
Alerts
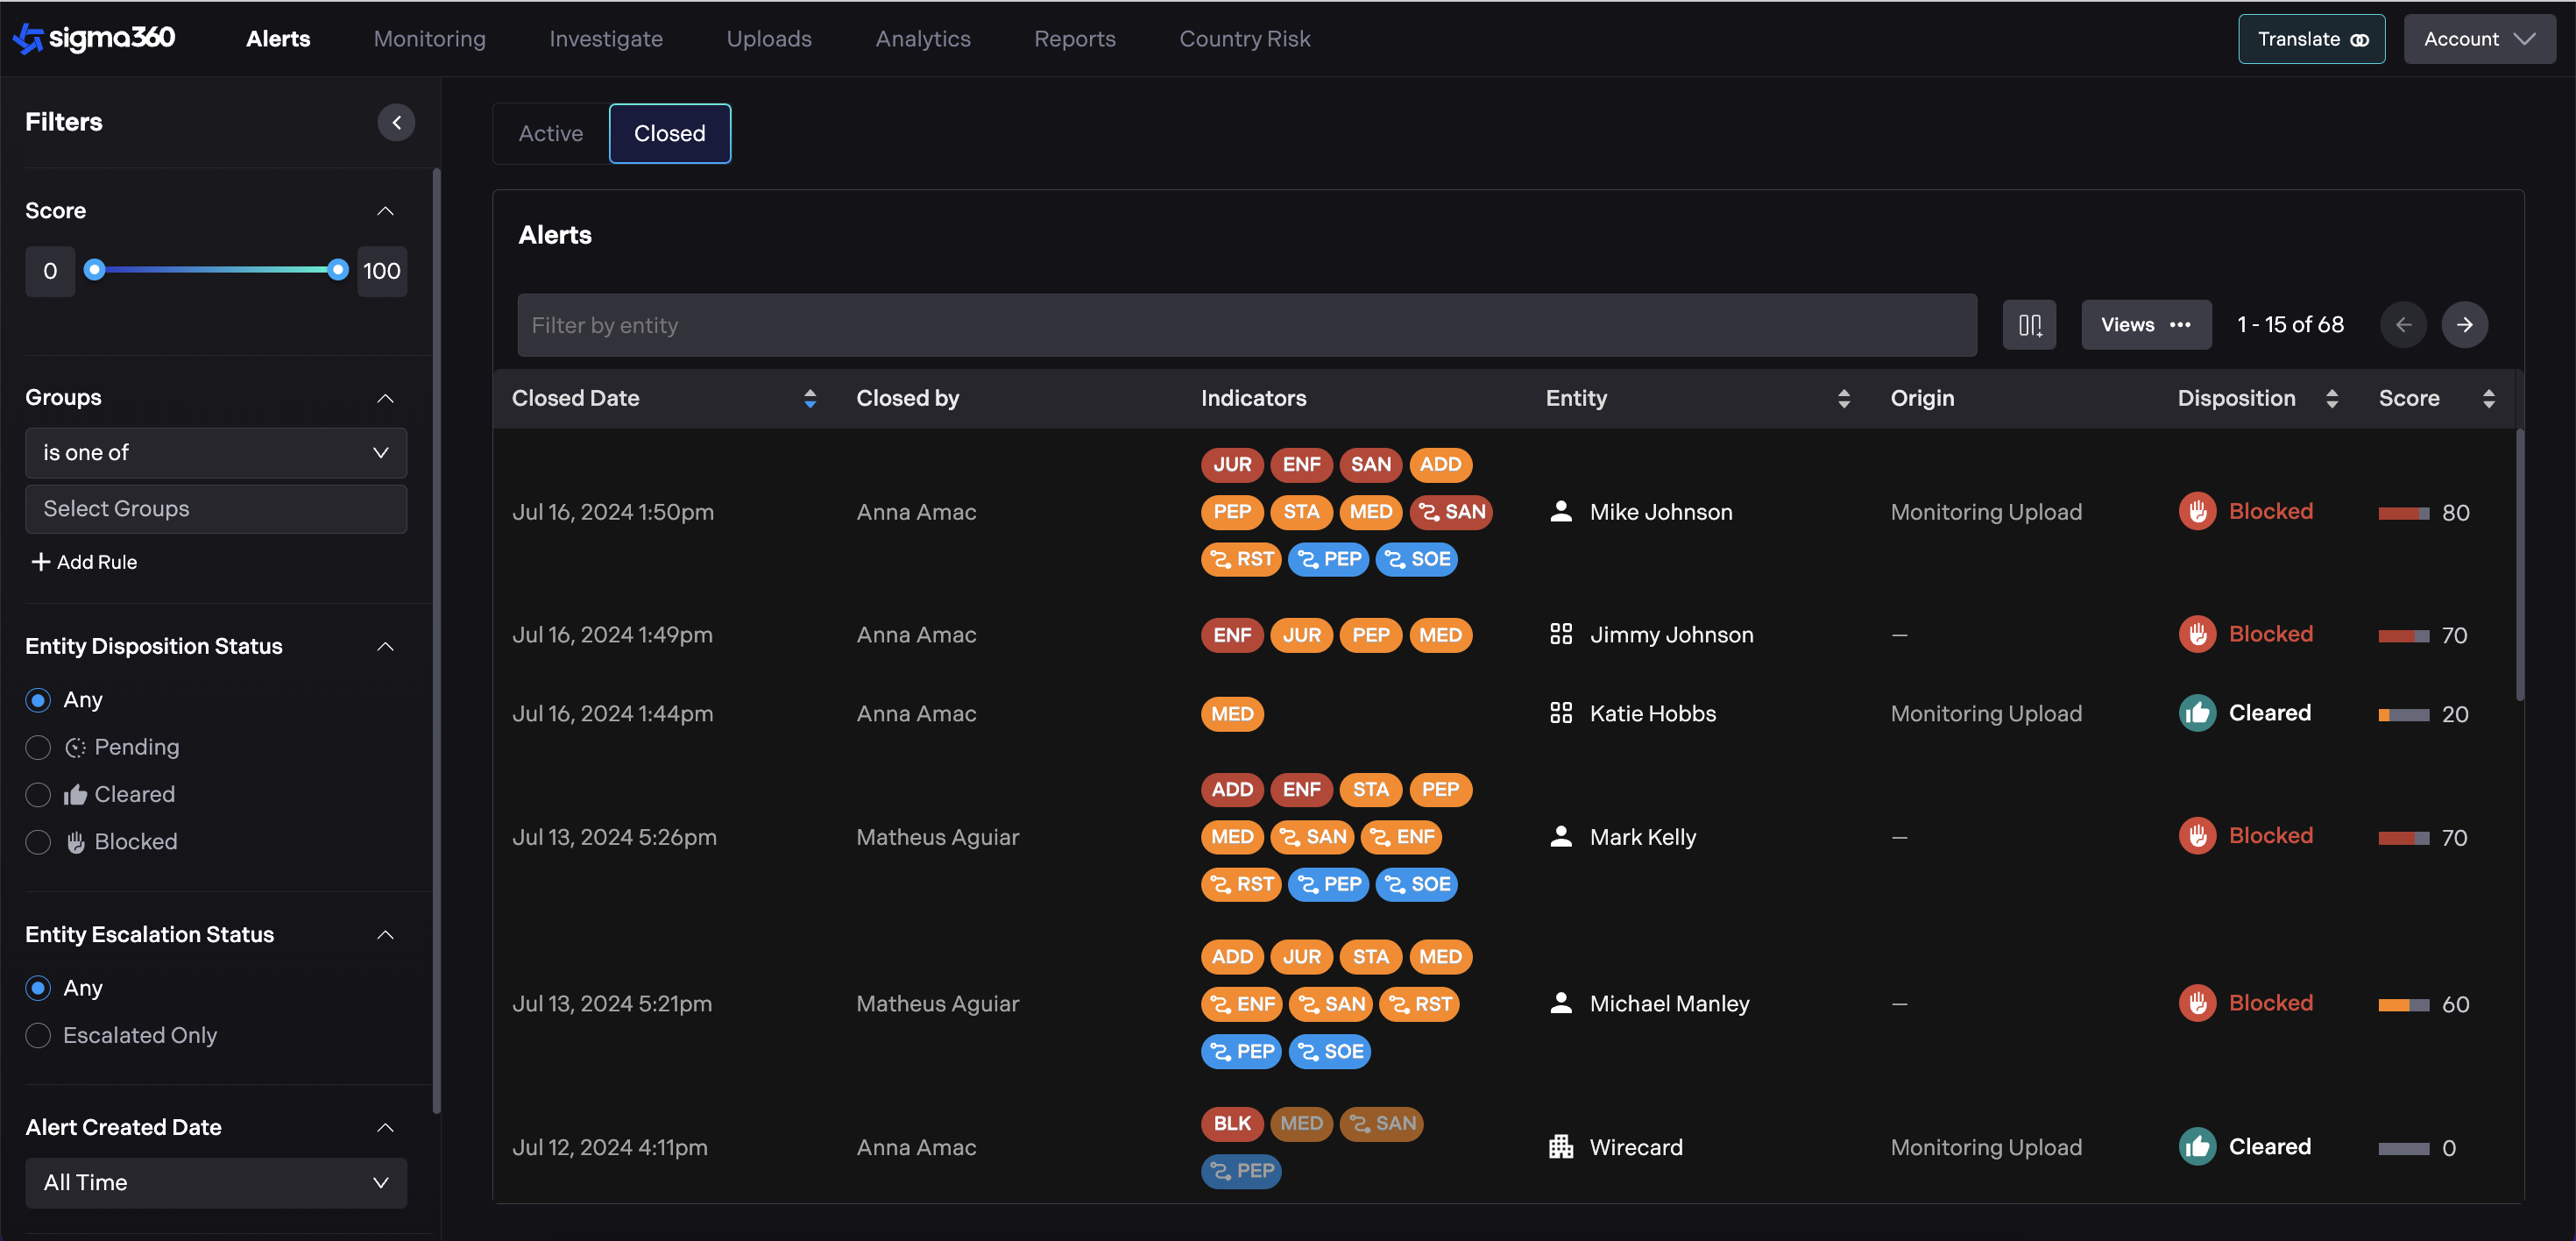
With Alerts, users are able quickly identify and action the most critical issues, ensuring compliance tasks are managed efficiently and effectively. Alerts are accessible directly from the top-level navigation menu.
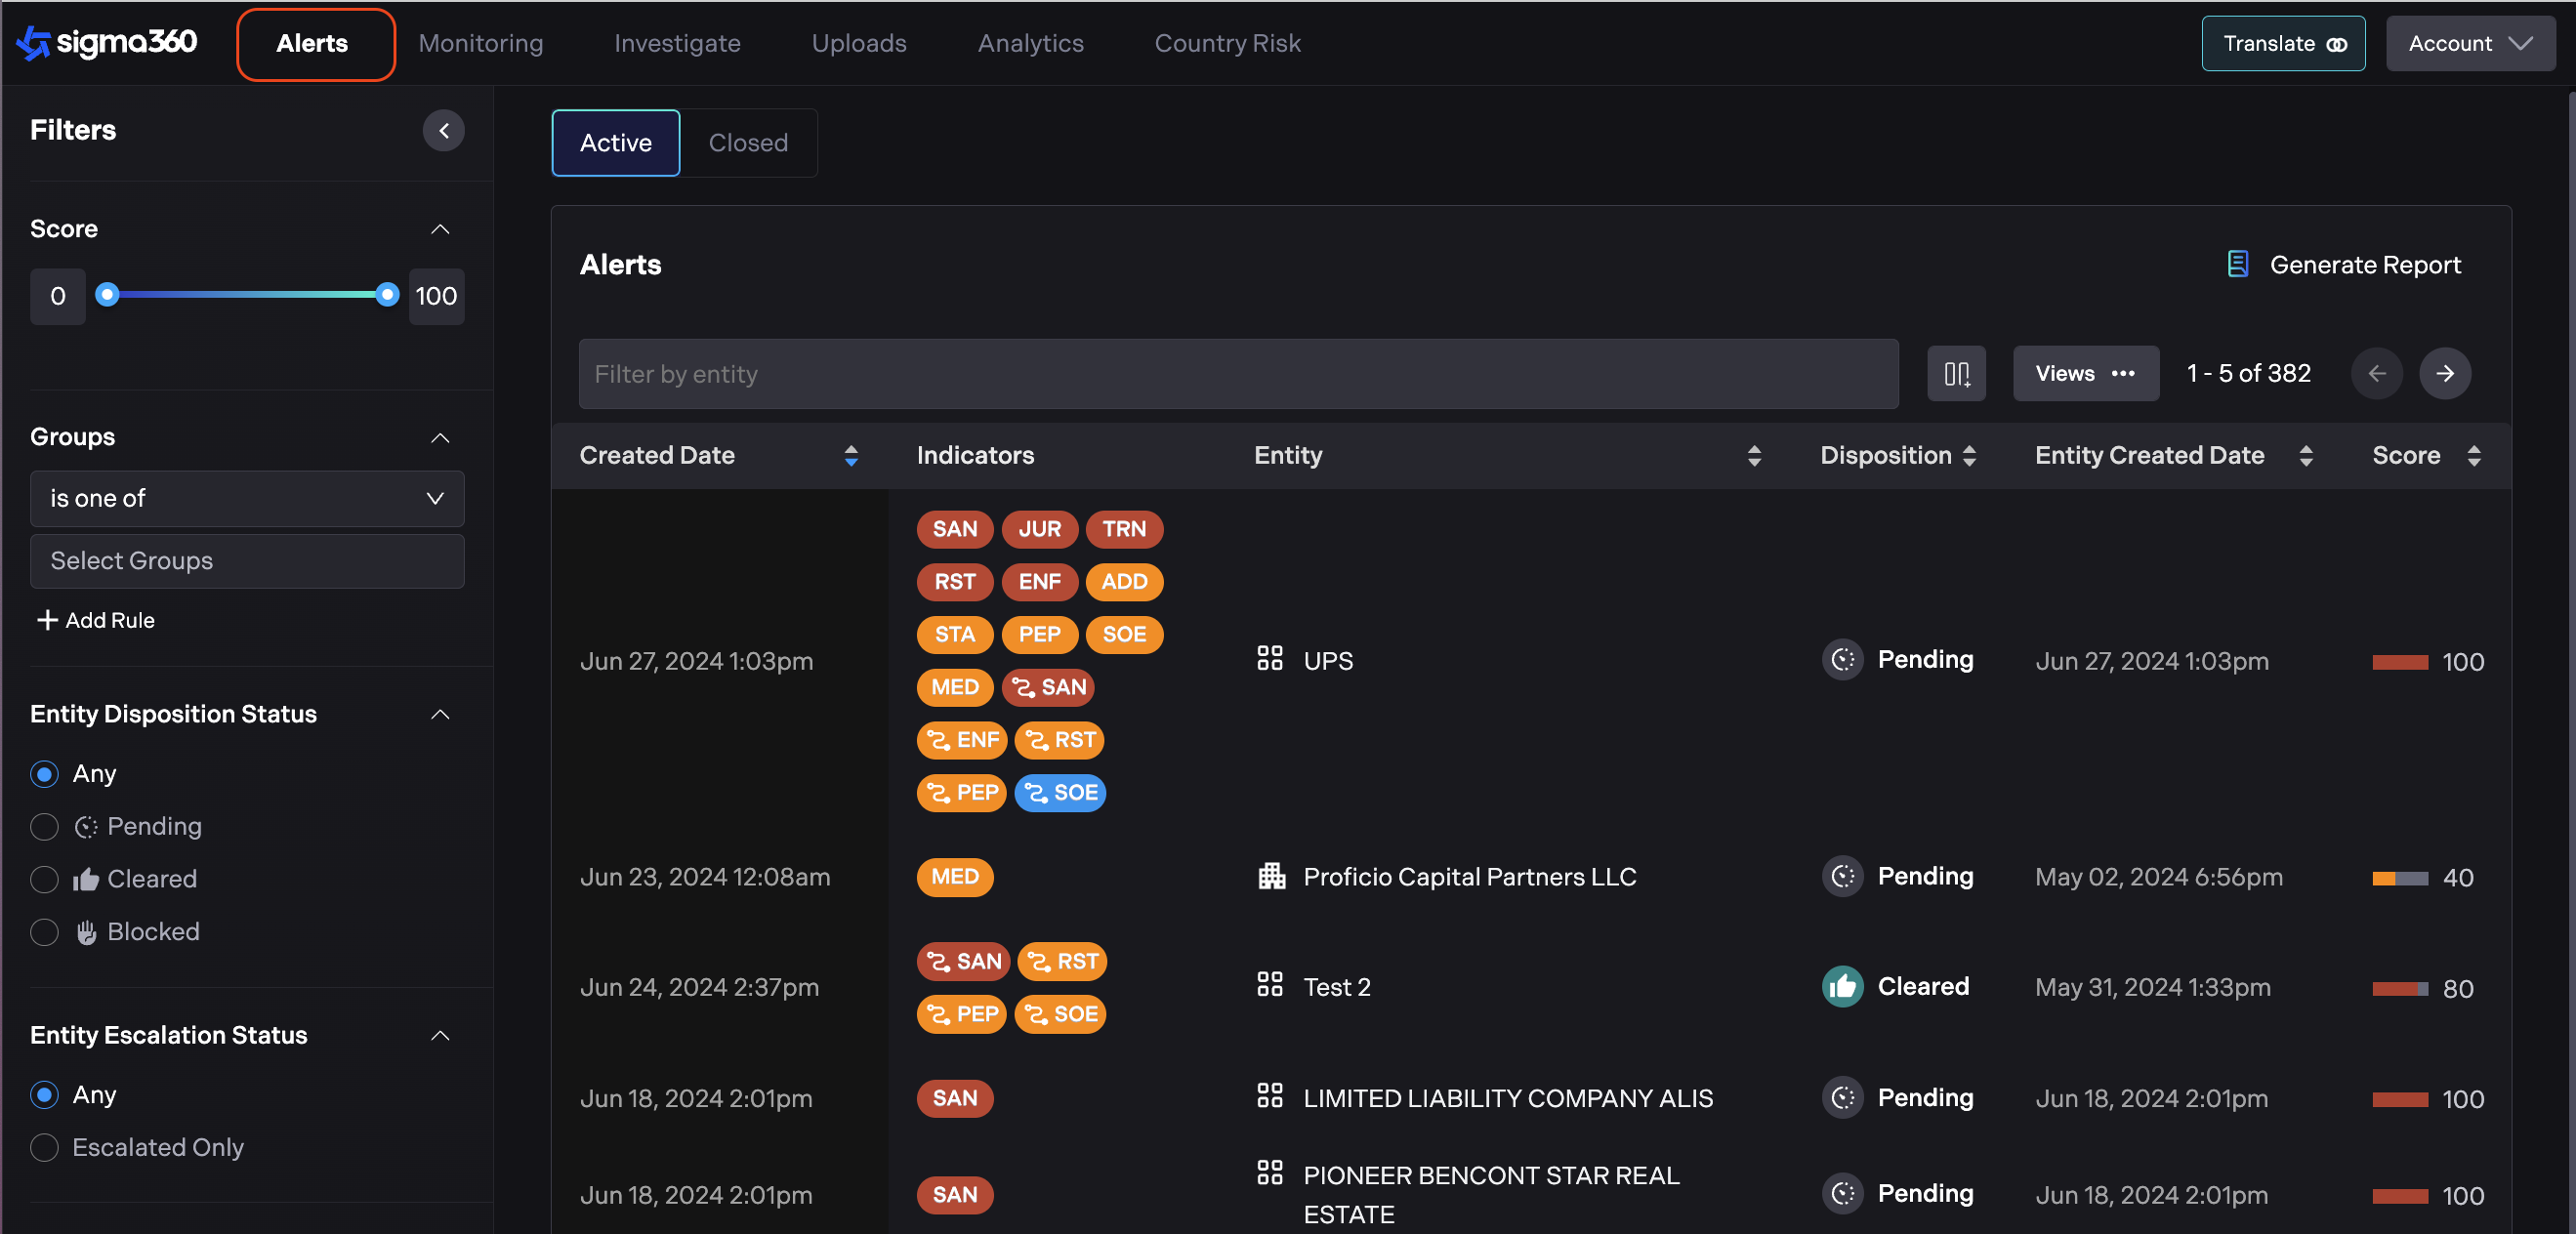
Alerts can be created from Monitored Entities or Screened Entities. They are generated based on the indicators included in the filter set for a given entity.
Each alert aggregates one or more indicators that have been added since the last closed alert or initial upload. Only one alert can be open on each Entity at a time.
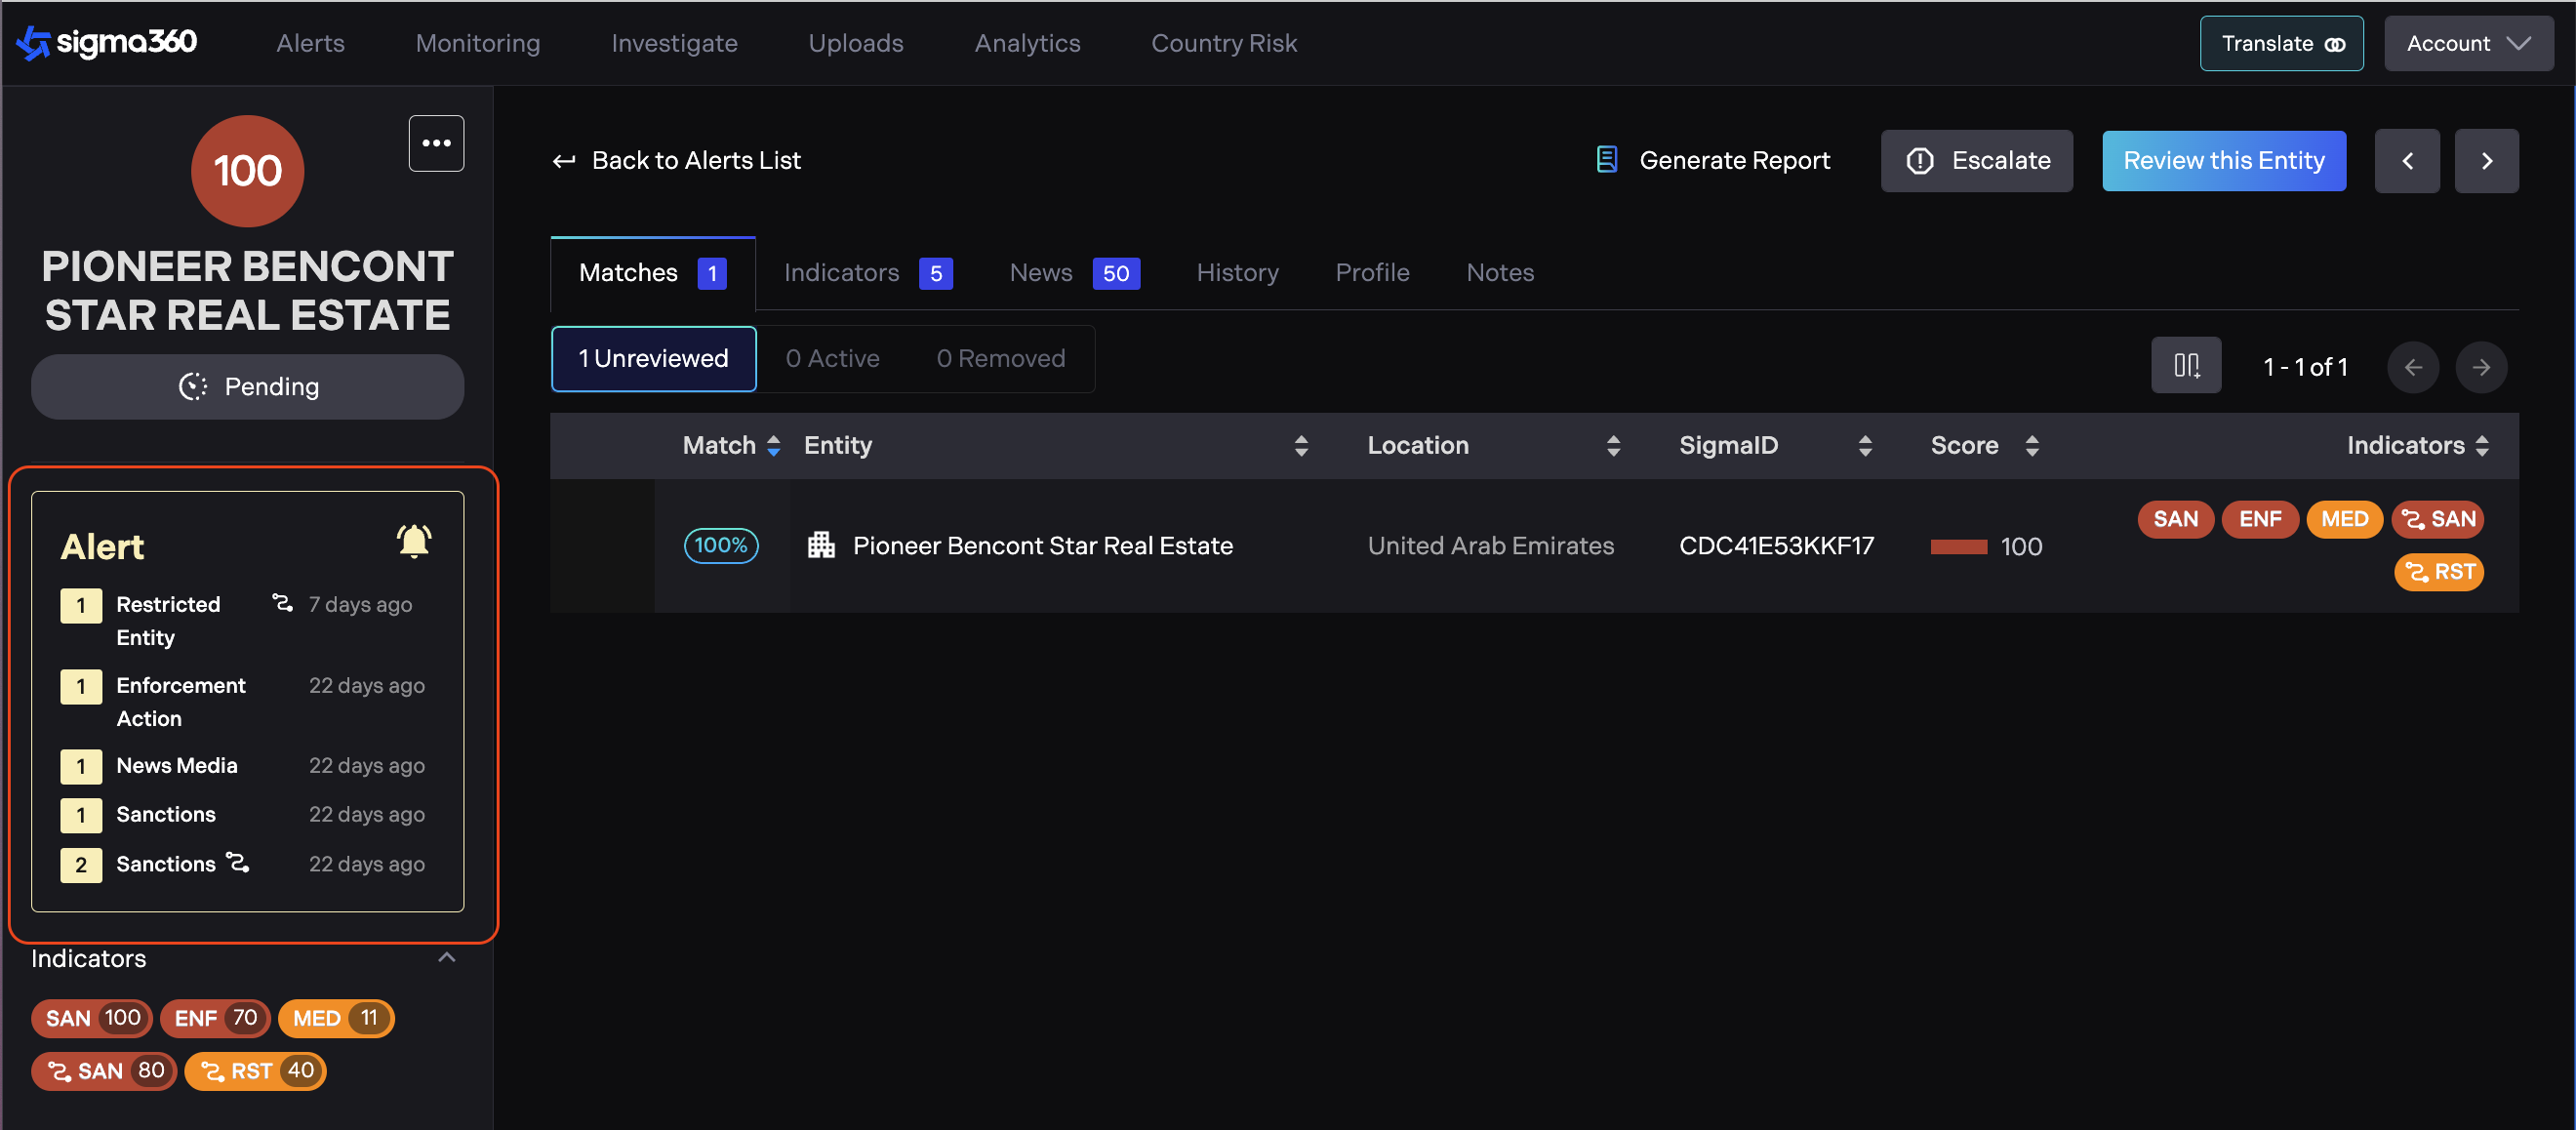
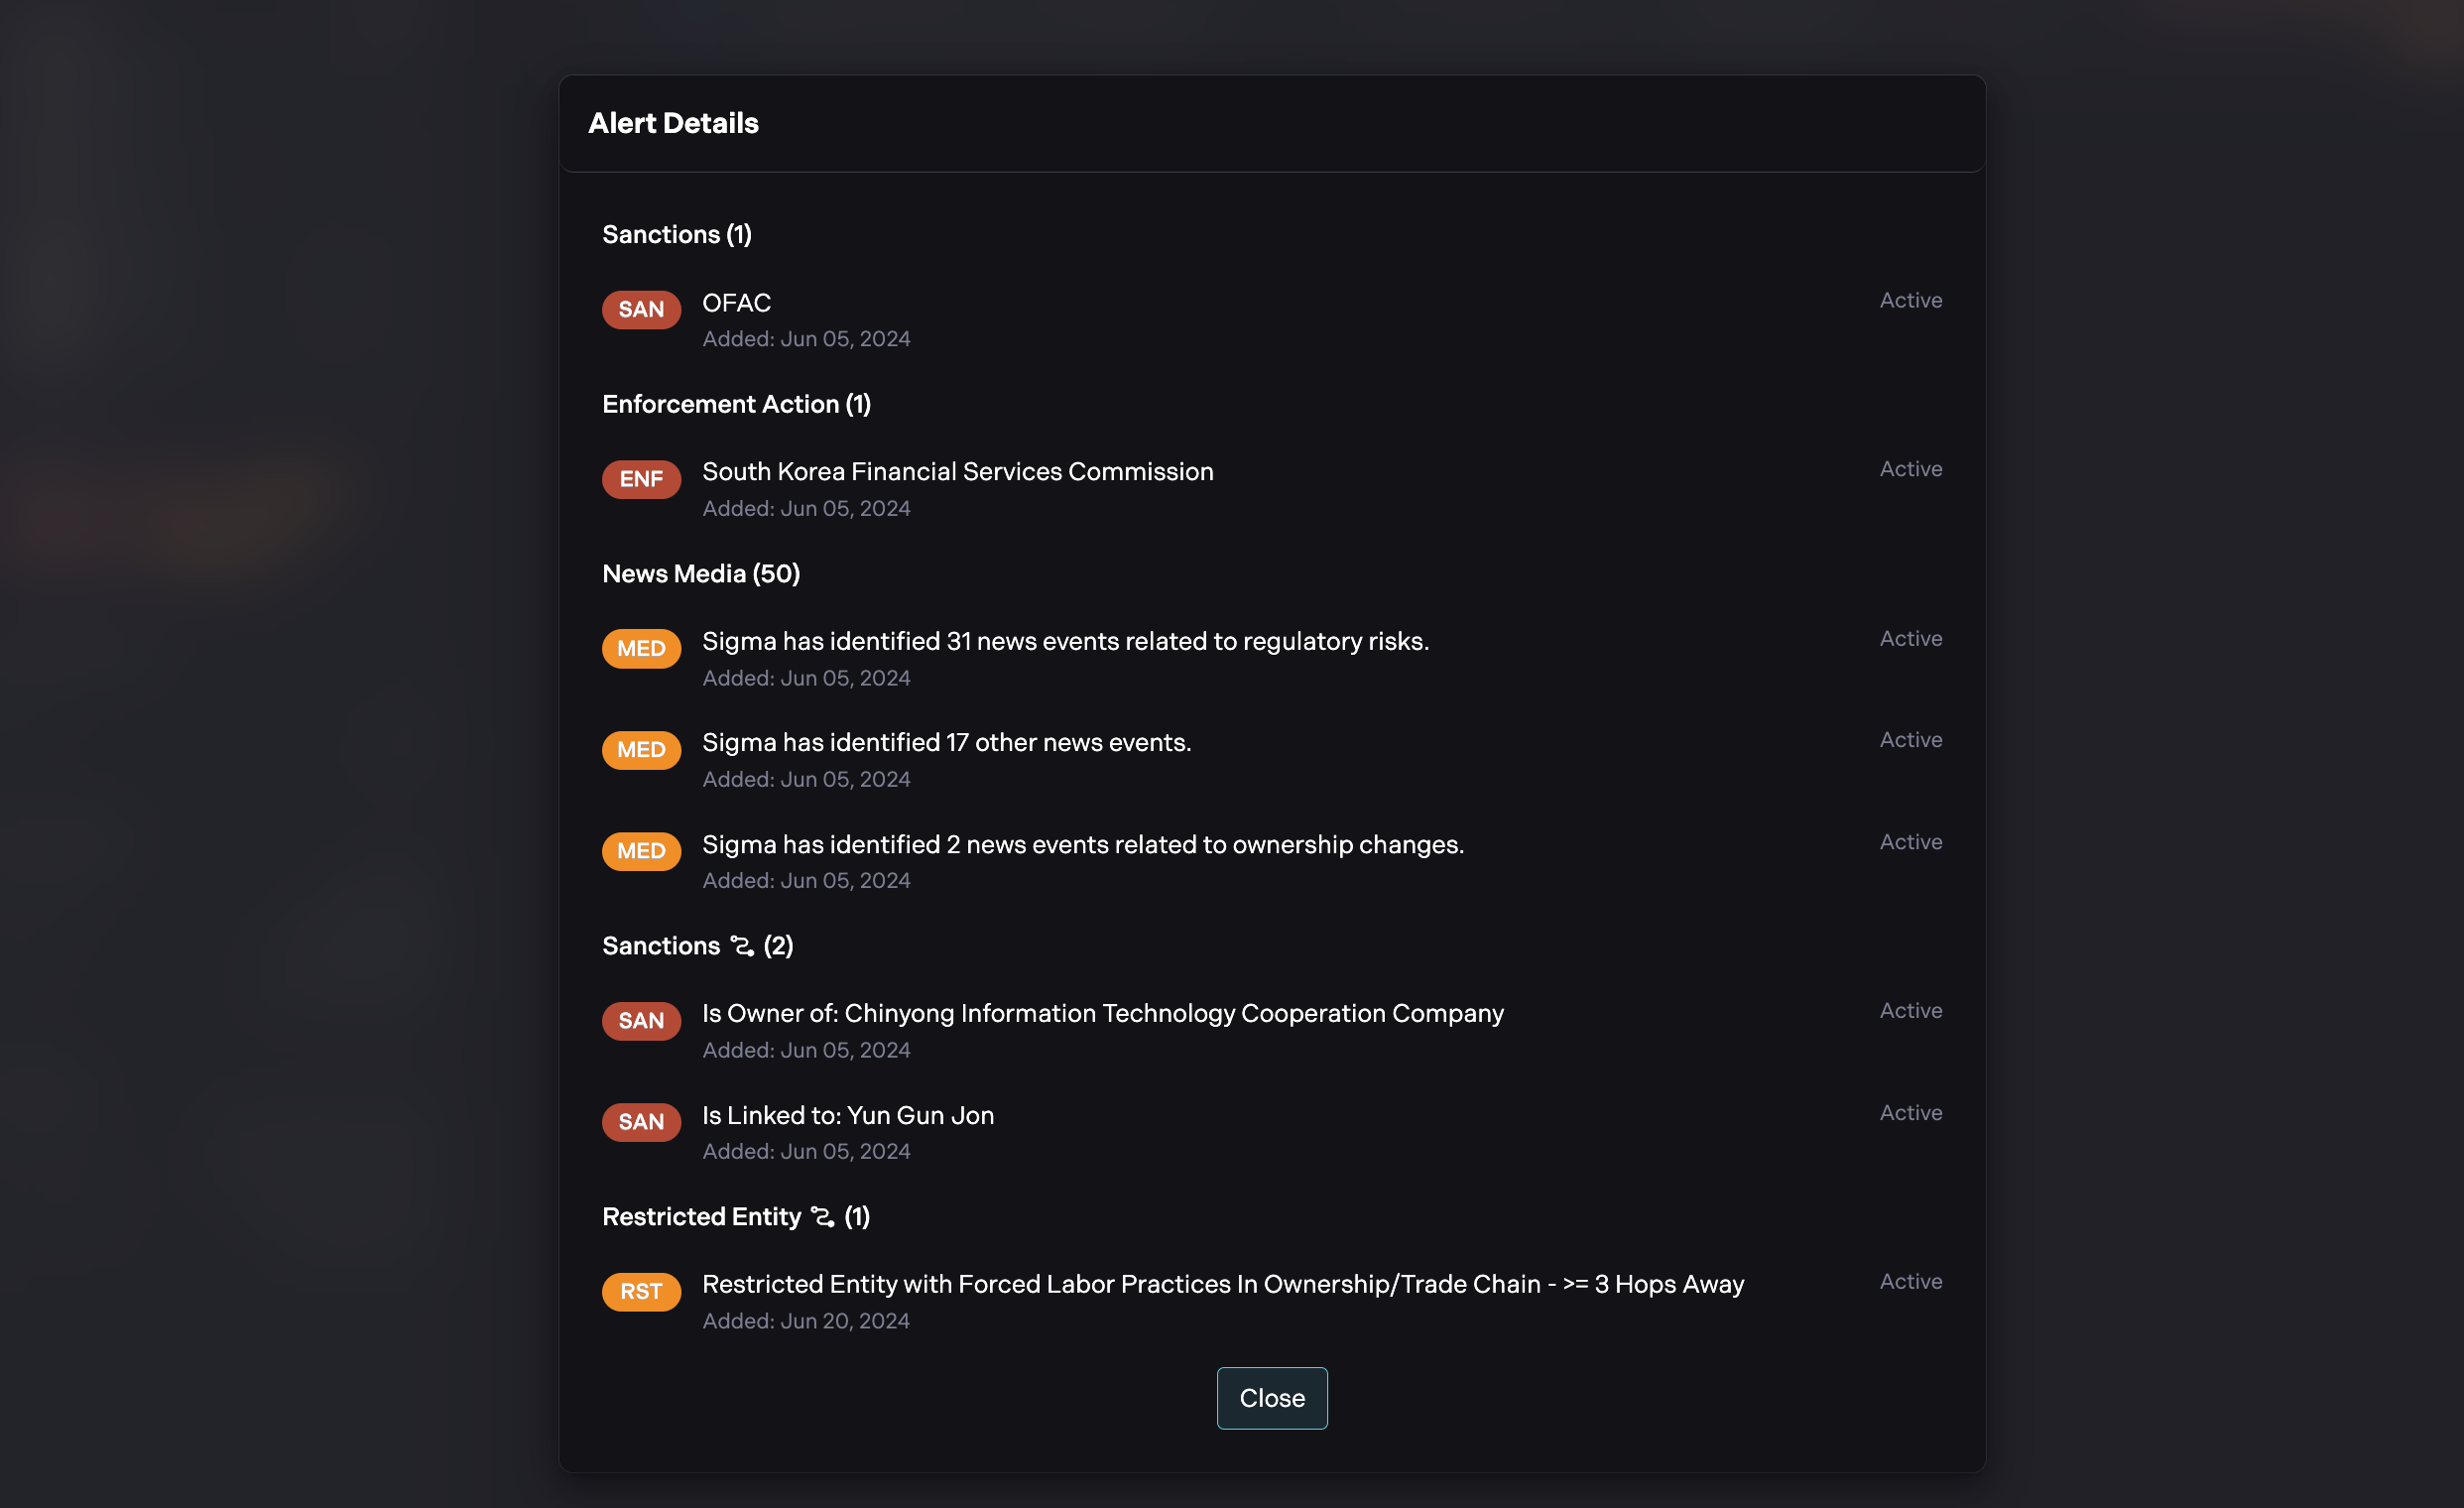
Users can view alert details by clicking on an alert in the left side panel.
Users must complete a review to close an alert. If a user starts a review and escalates an entity, the alert will remain open.
The alert will automatically close only when the disposition status is set to "Cleared" or "Blocked".
The History tab on each Entity provides a log, allowing users to review the timeline of when Alerts were opened and resolved.
Closed alerts will be displayed in a separate "Closed Alerts" tab and cannot be modified or reopened.
Open Alerts will be prominently displayed in the PDF report.
Decisioning Matches, Indicators and News
Entities undergo changes and these changes require careful review to ensure compliance with policies and regulations. Users can evaluate the validity, relevance, and significance of data within an Entity through a review process.
The Review Workflow allows user to manage Entities, view their statuses, apply filters, and perform various actions, such as:
-
Mark Match as Active or Not a Match
-
Mark Risk as Active or Remove Risk
-
Mark News Event as Active or Remove News Event
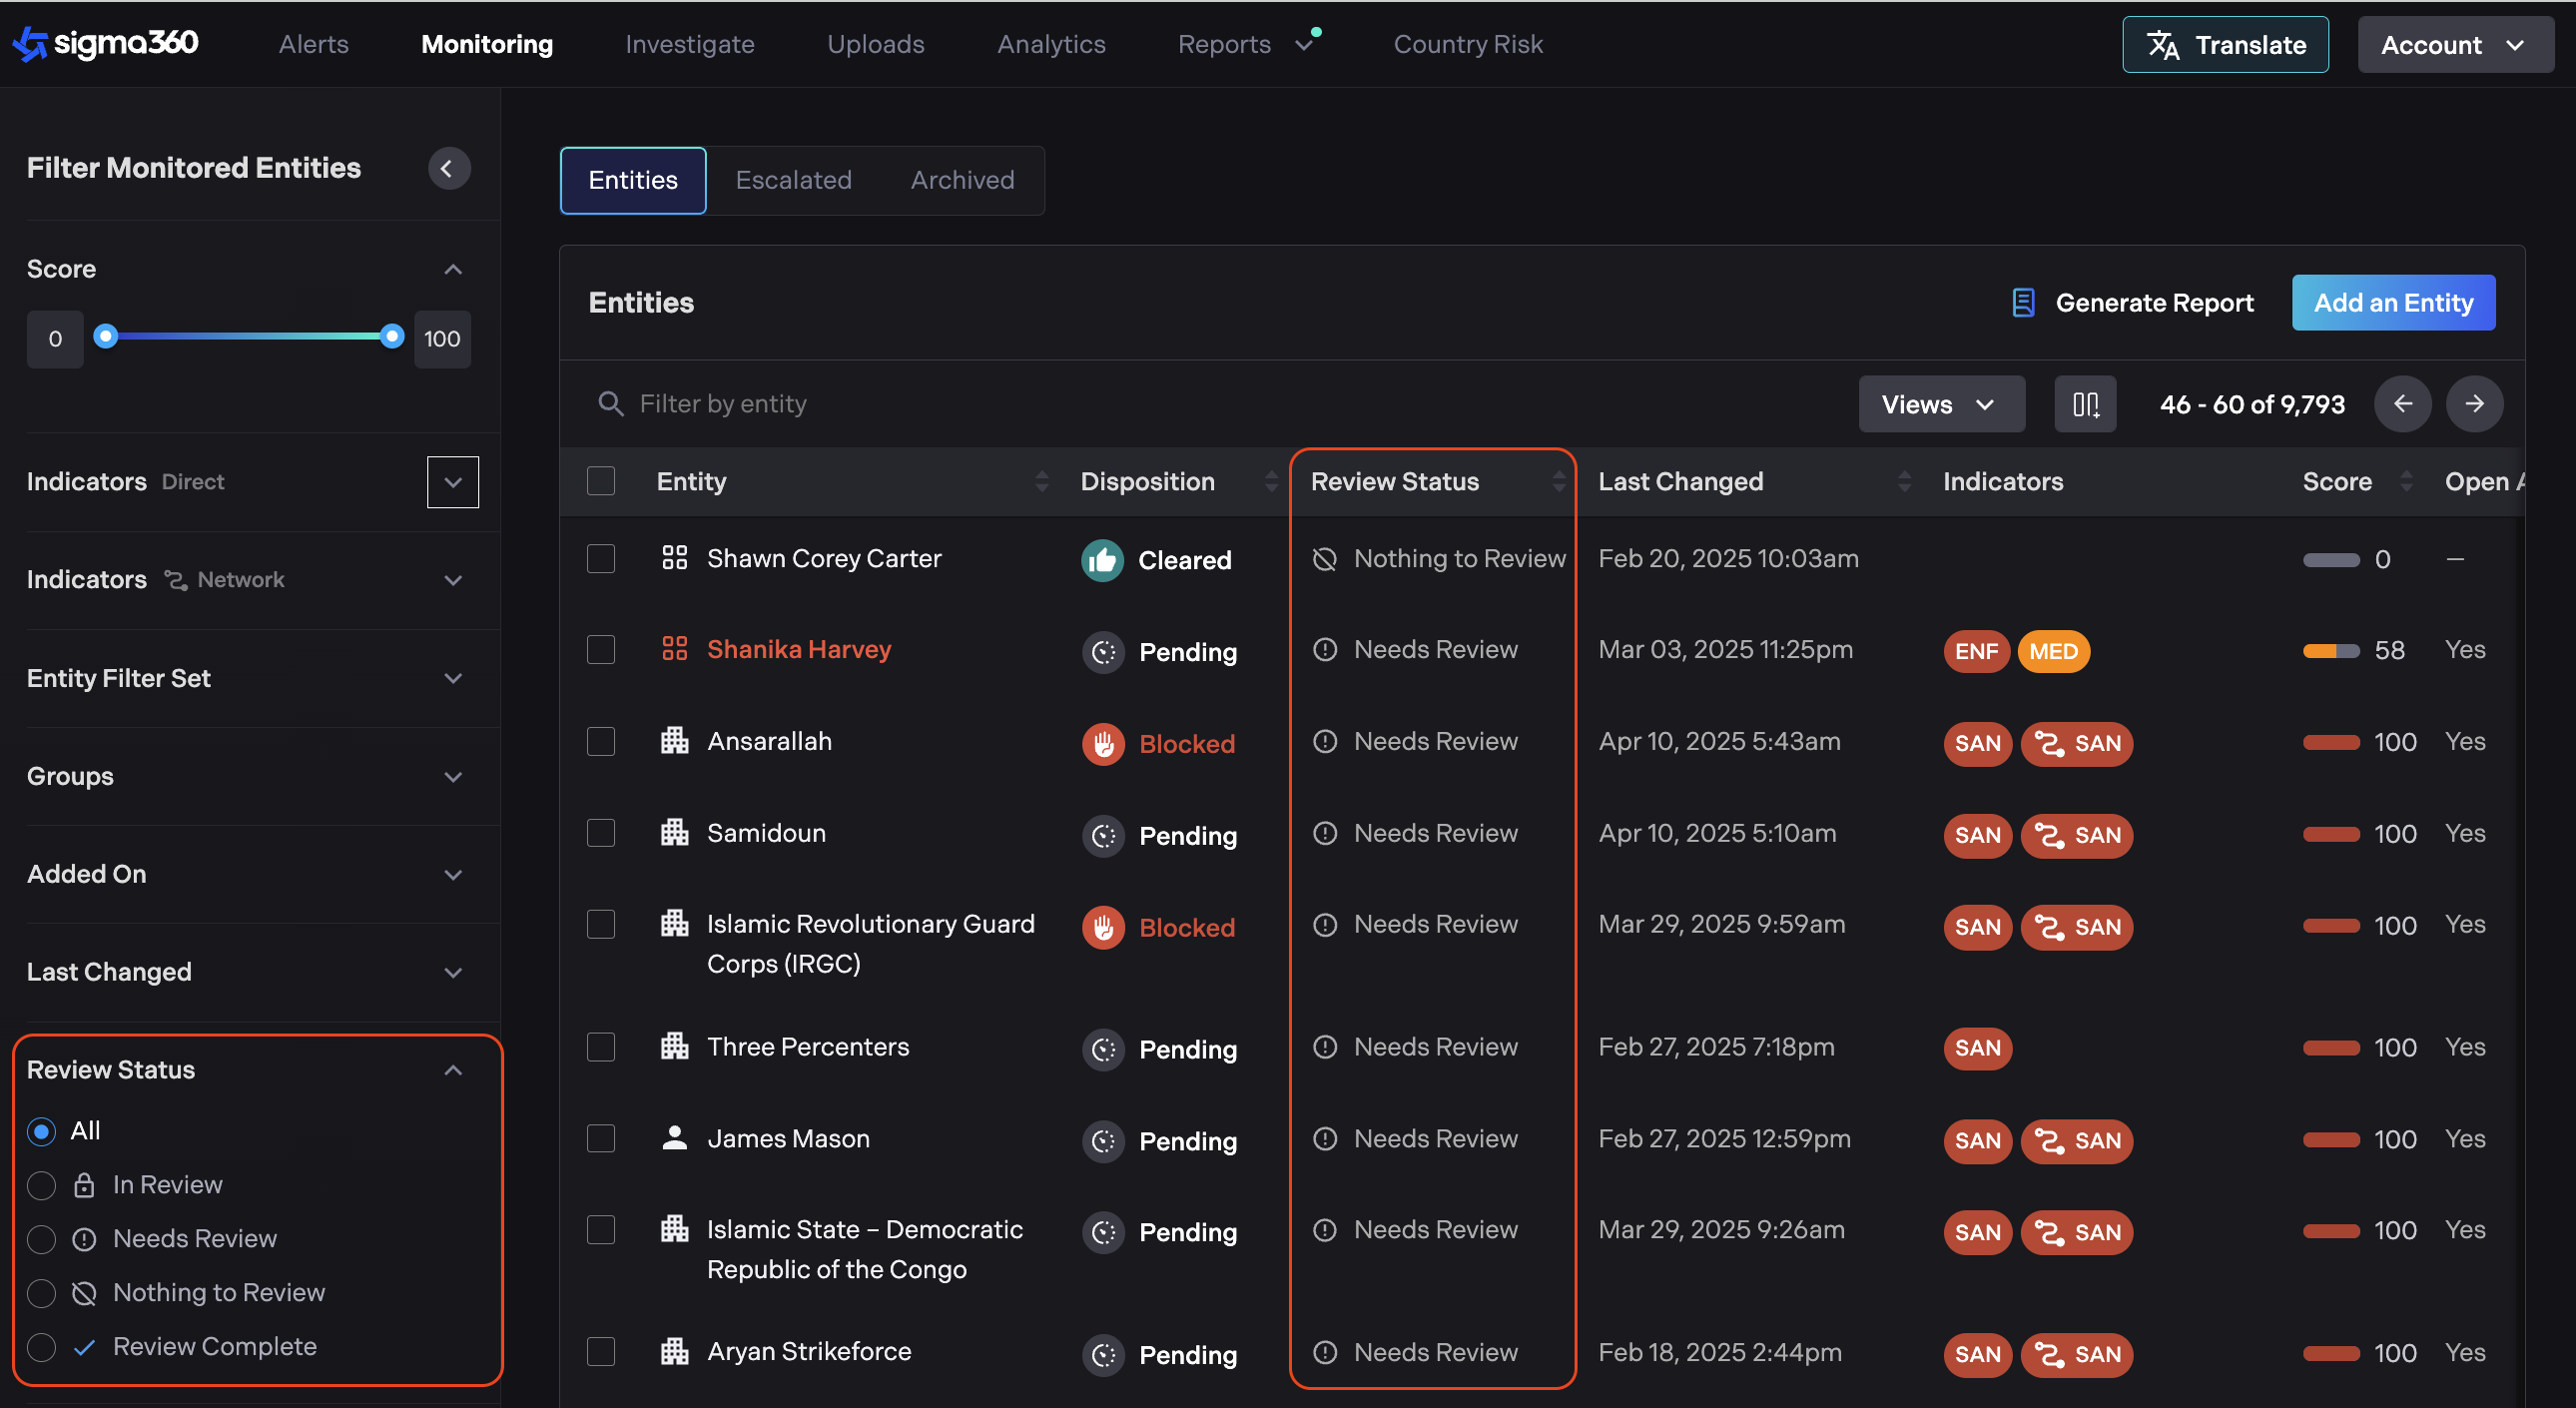
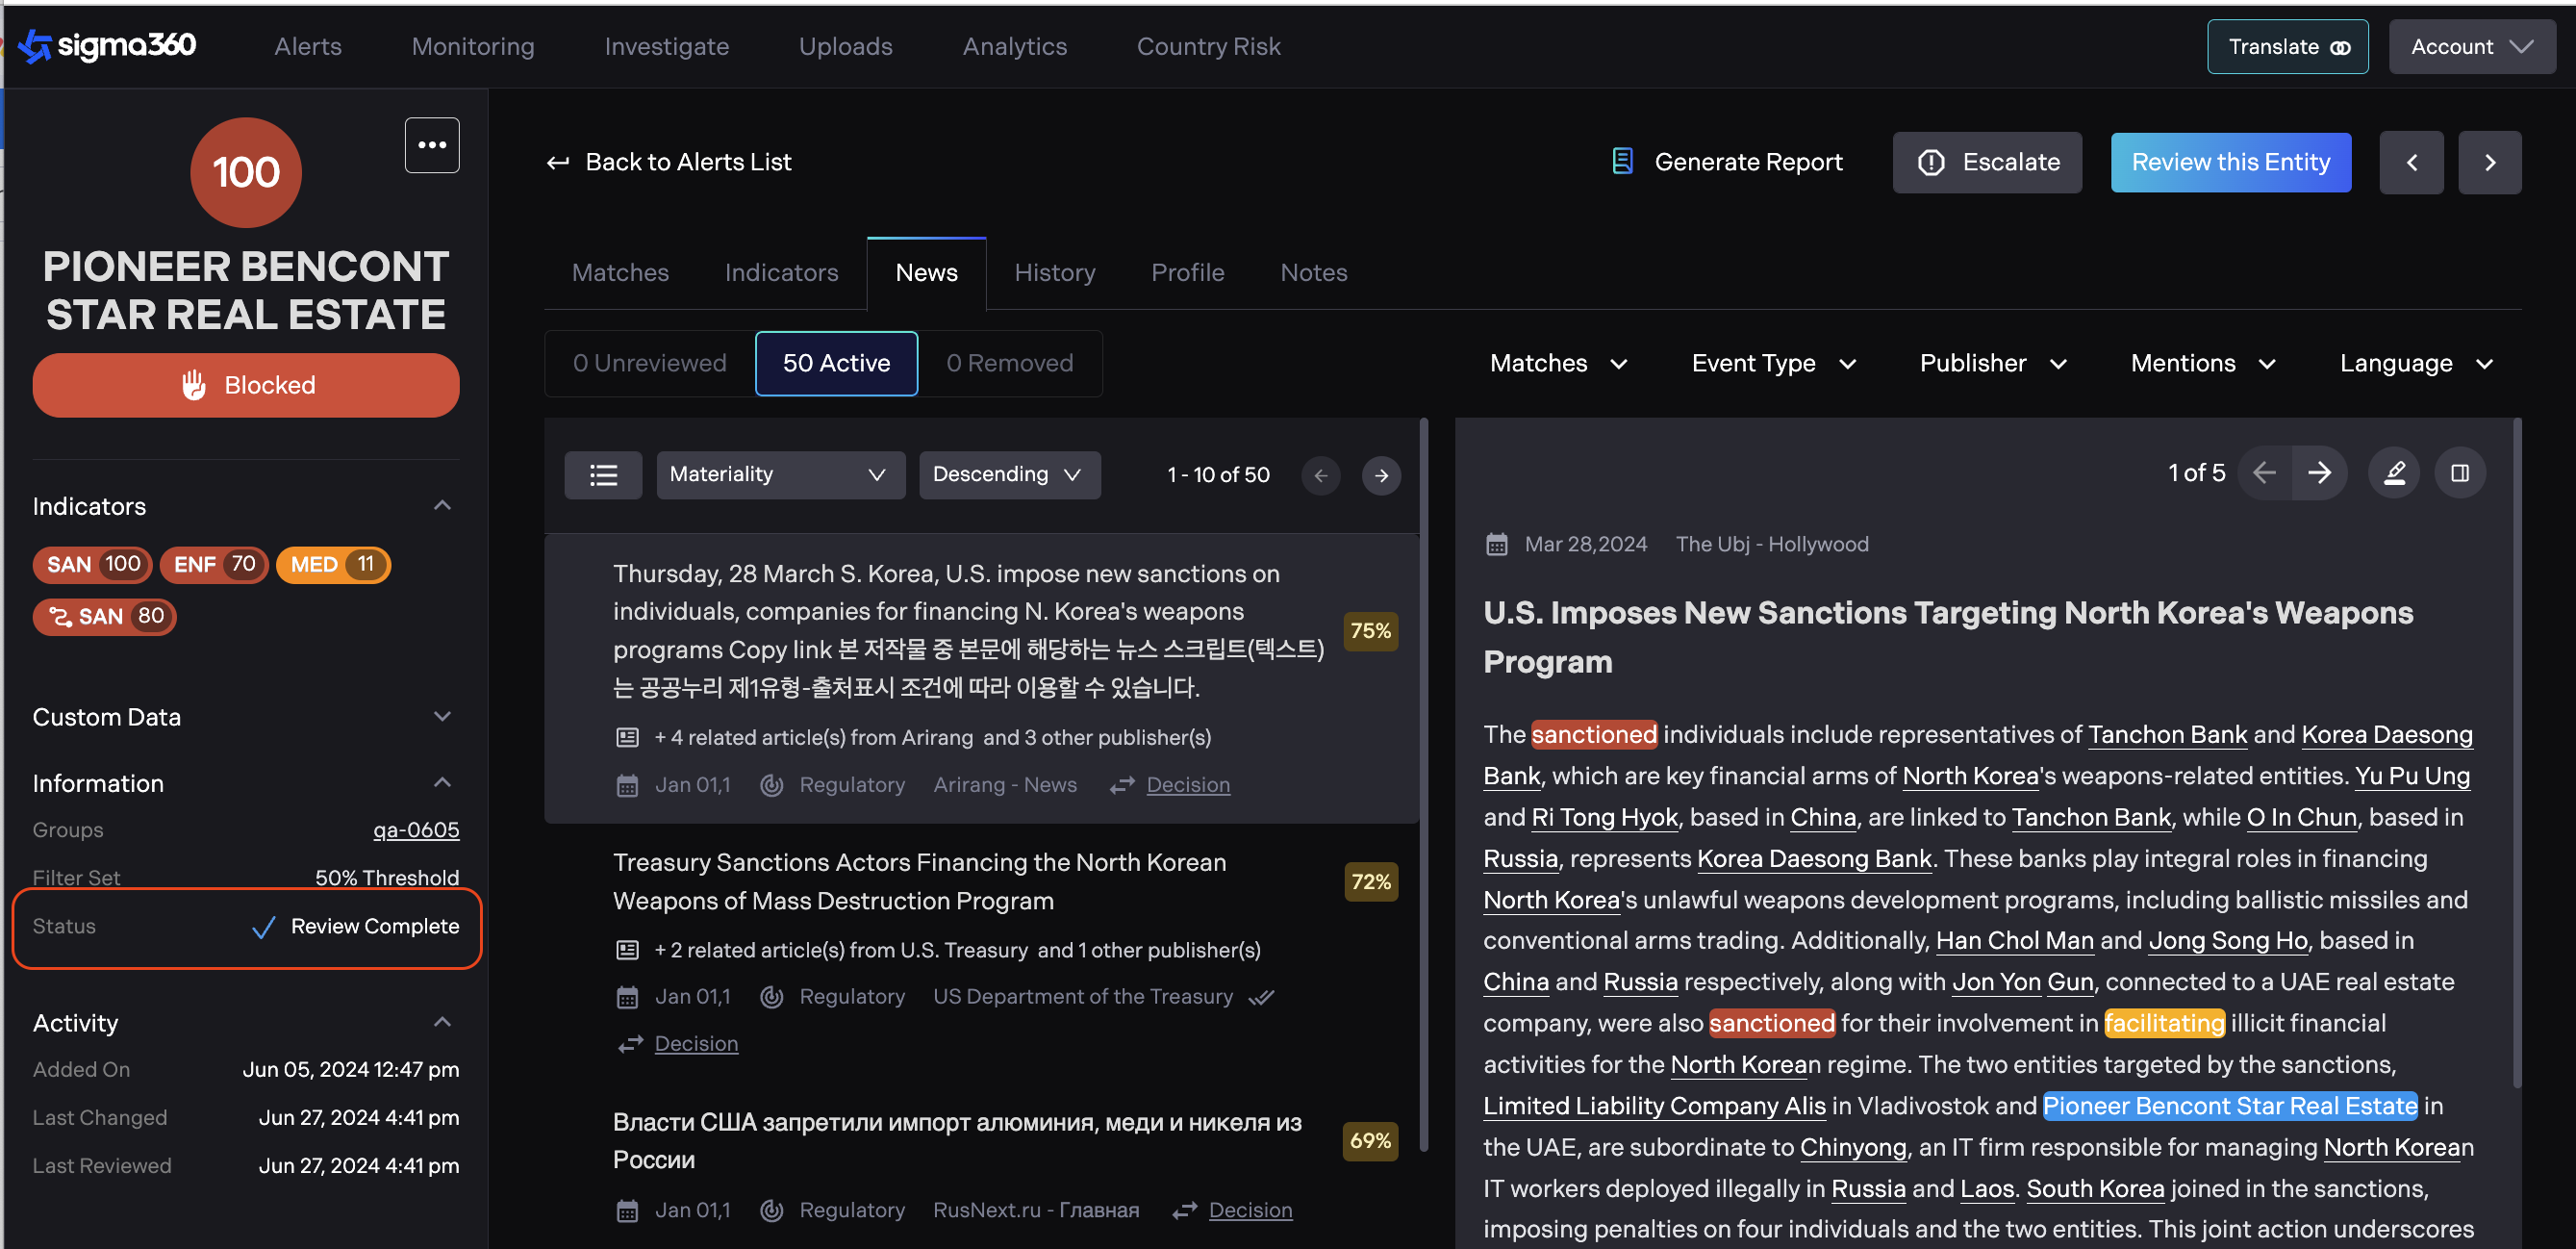
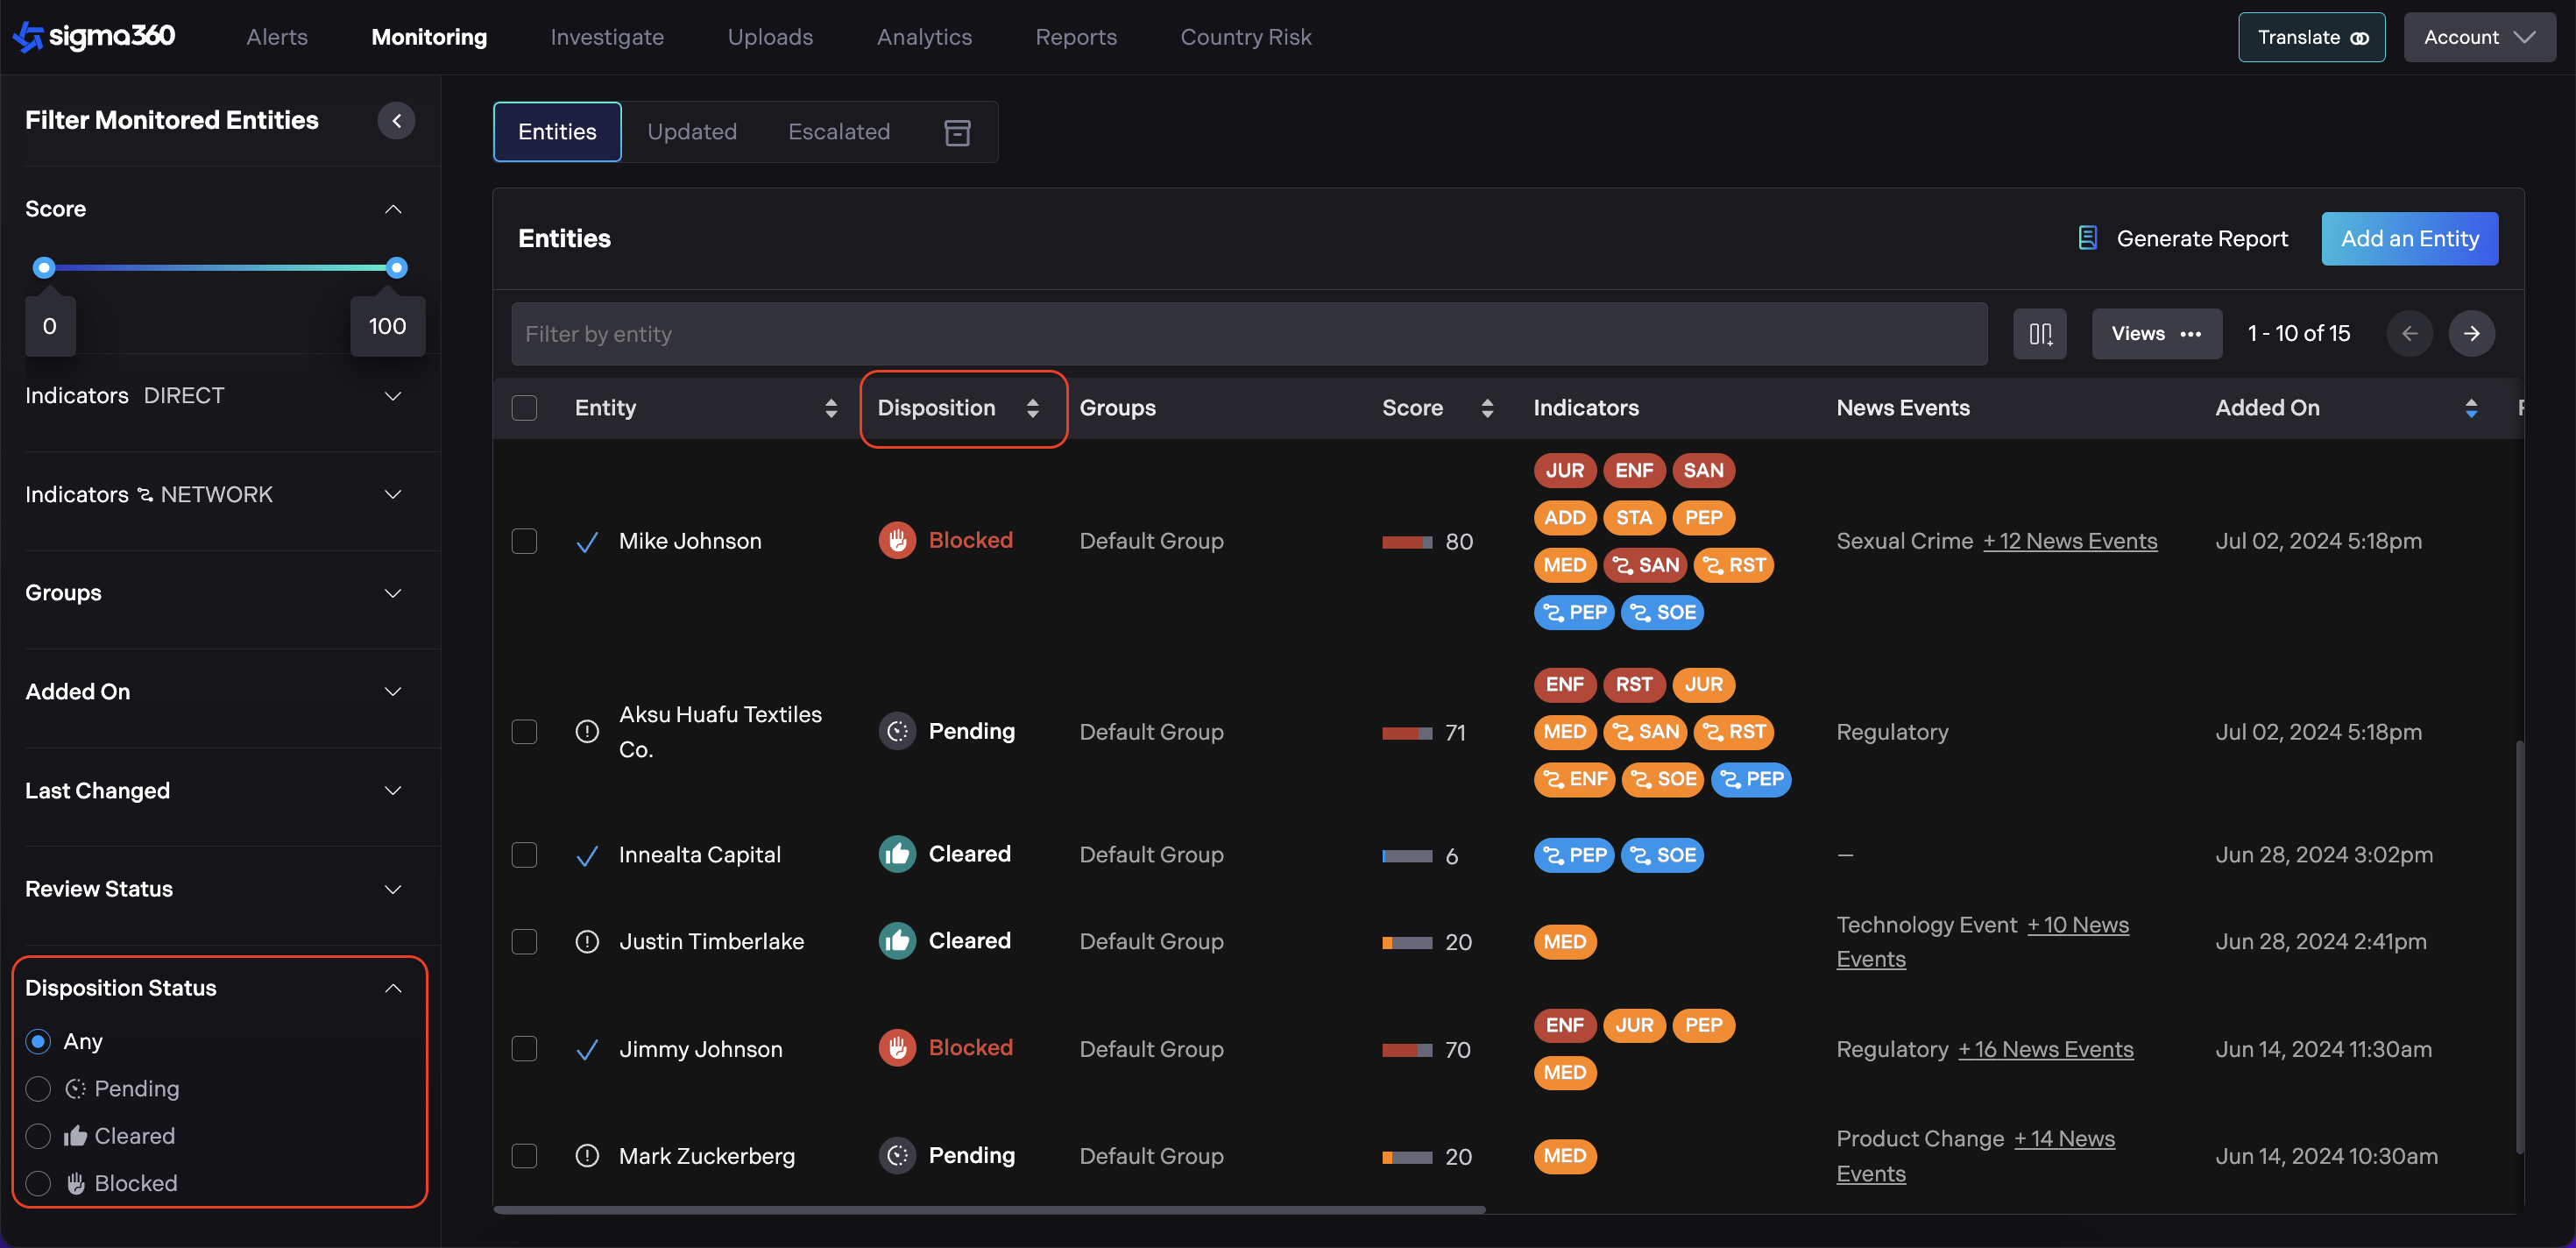
The Monitoring tab is designed to provide users with a centralized view of all their Entities. In the table, the Review Status column displays the current status for each entity, and users can filter Entities by their status using the Review Status filter on the left panel.
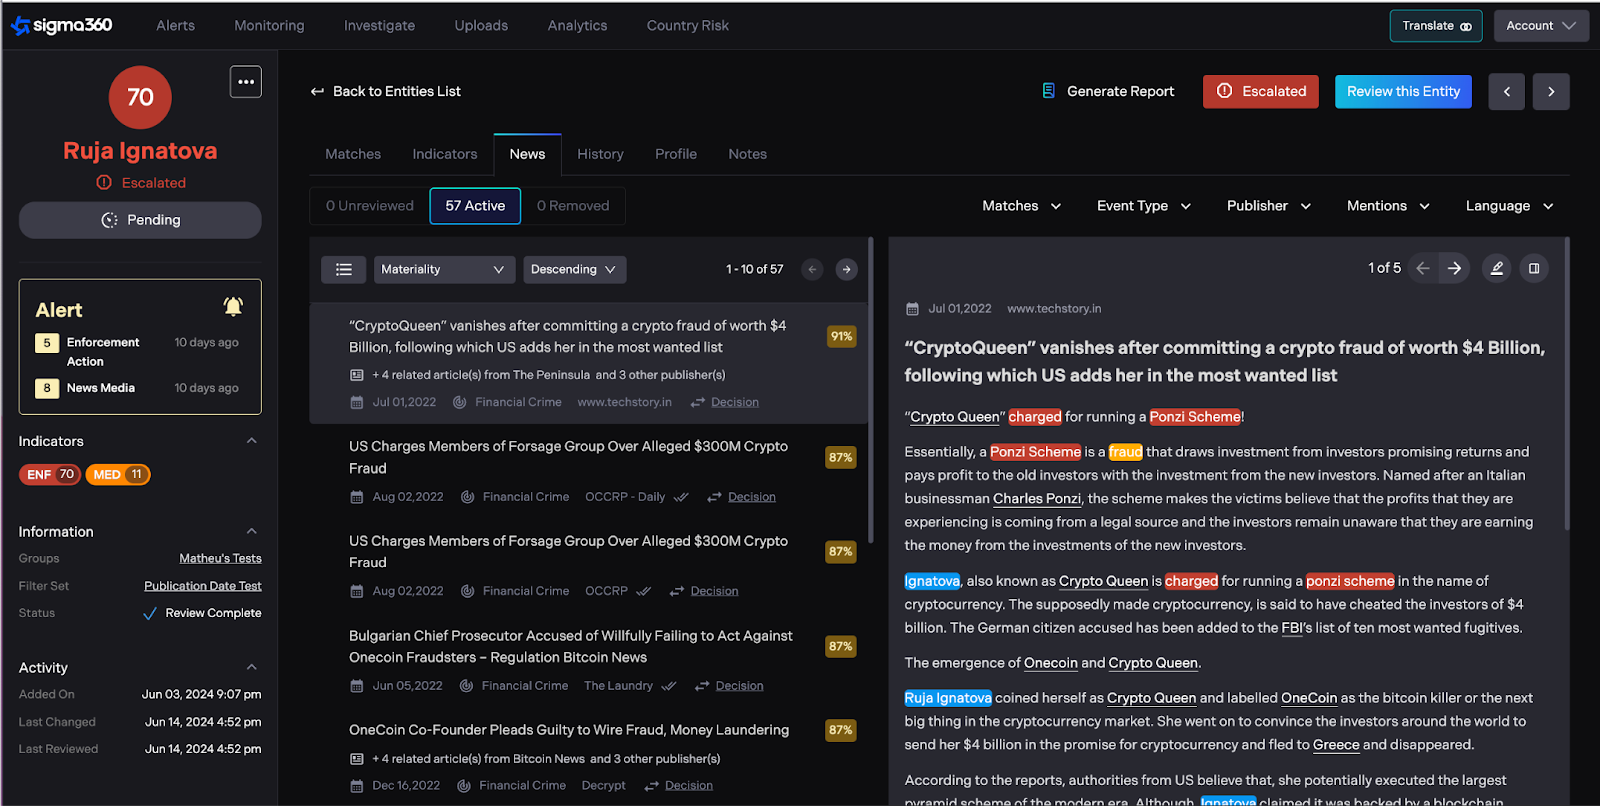
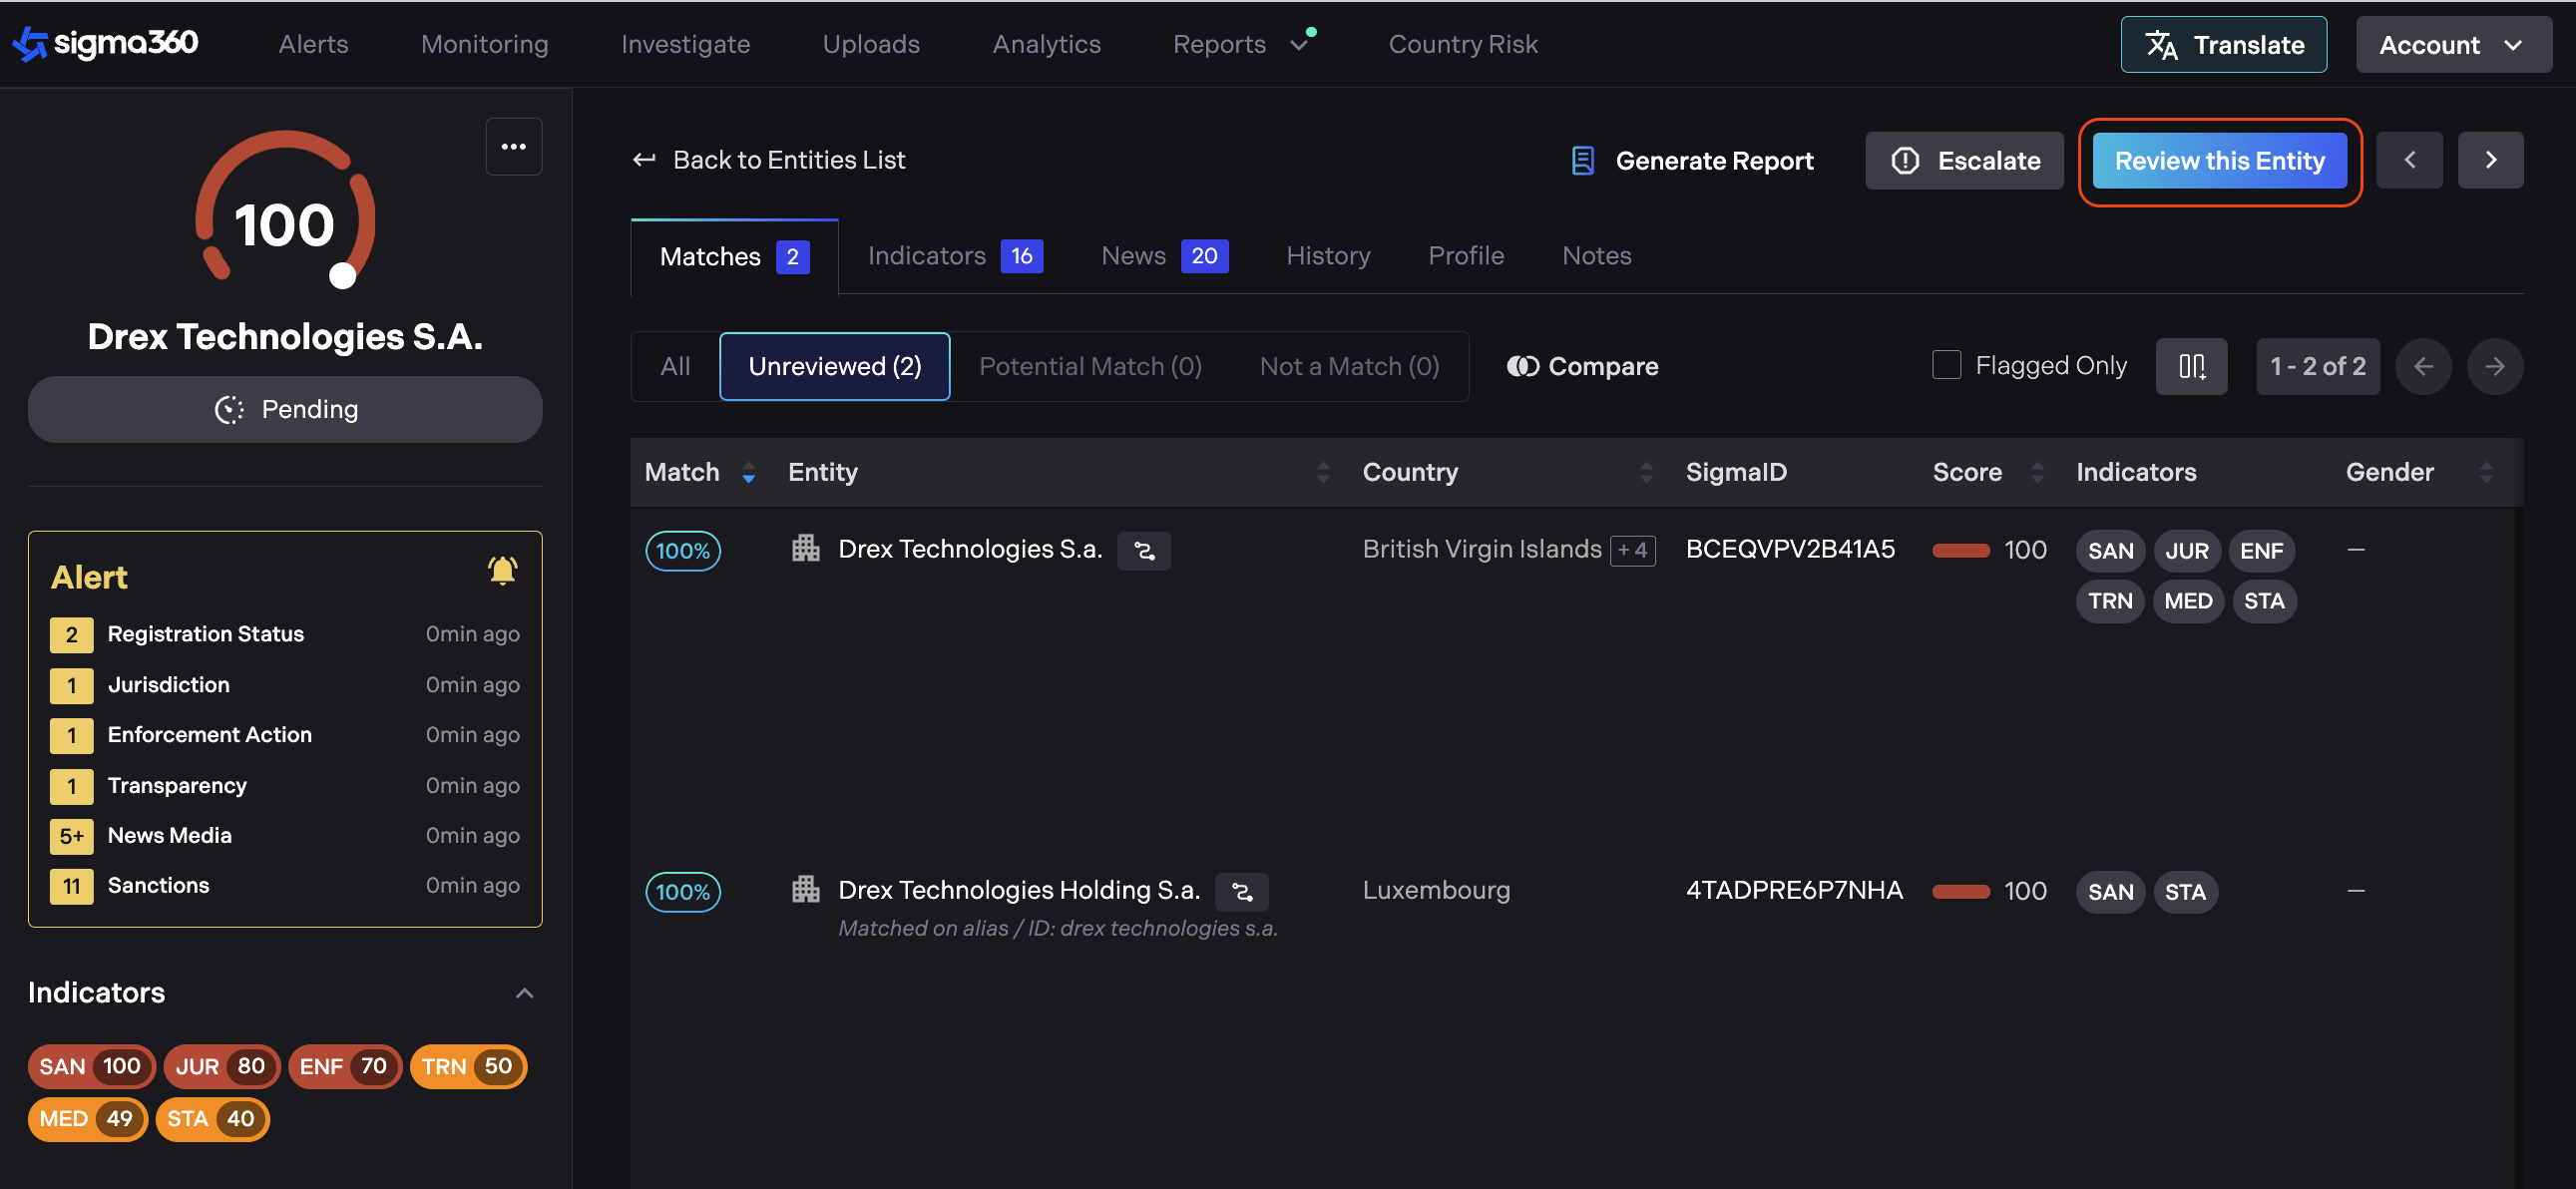
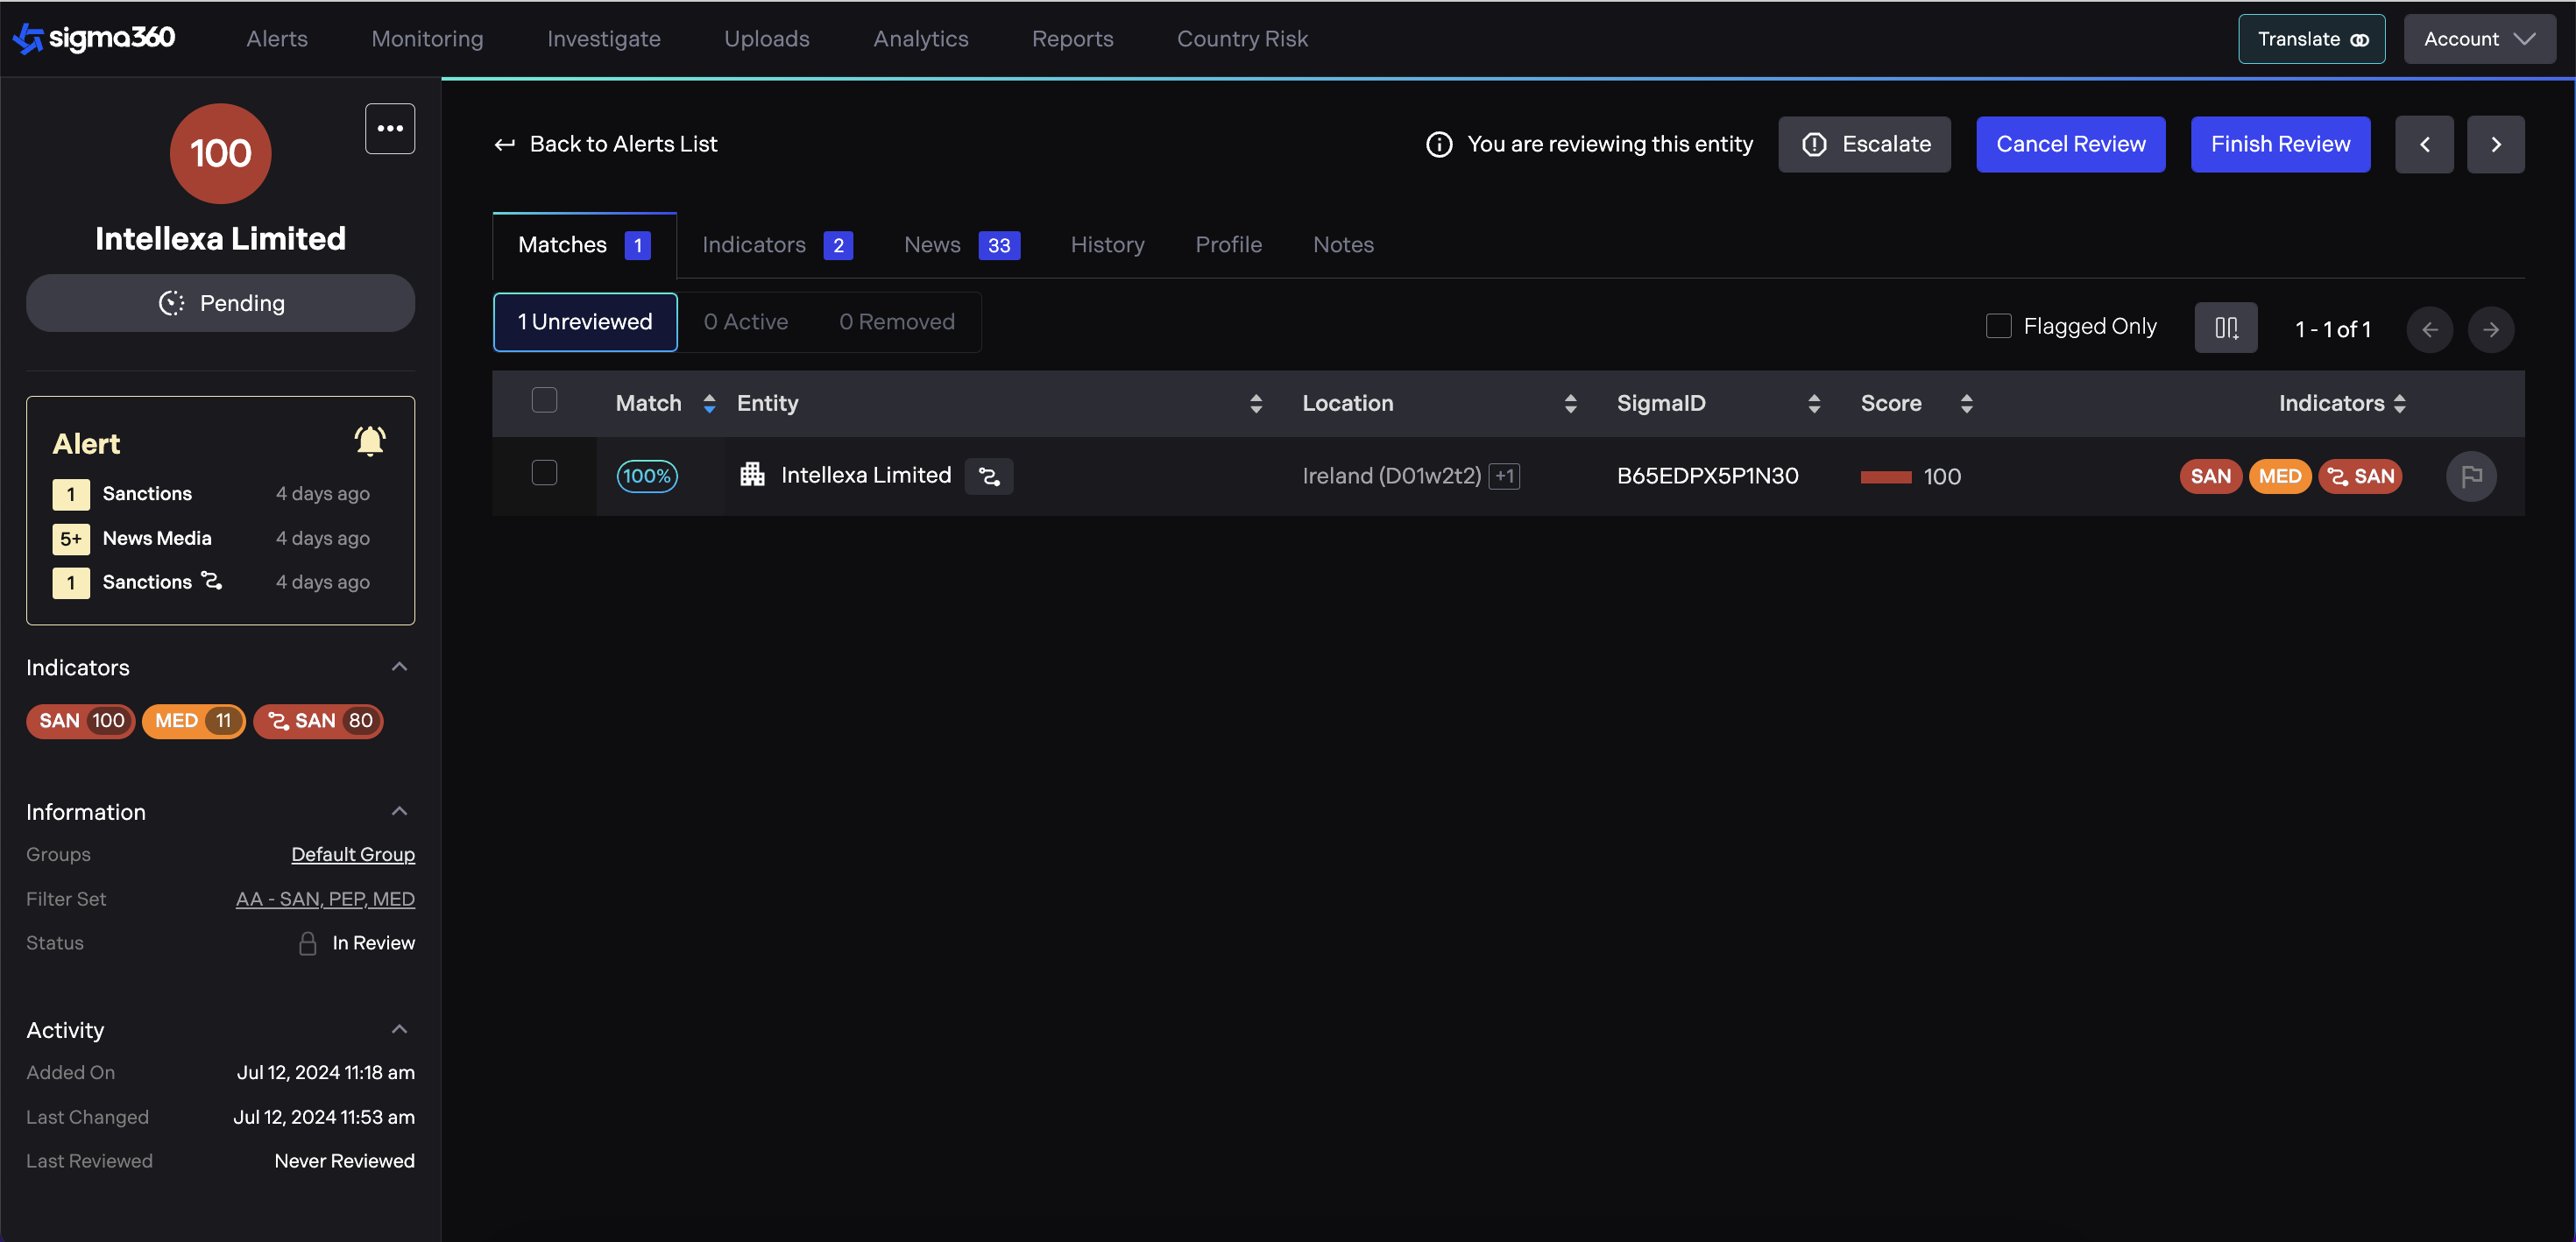
By clicking "Review this Entity", a review will be initiated, decision checkboxes will be revealed.

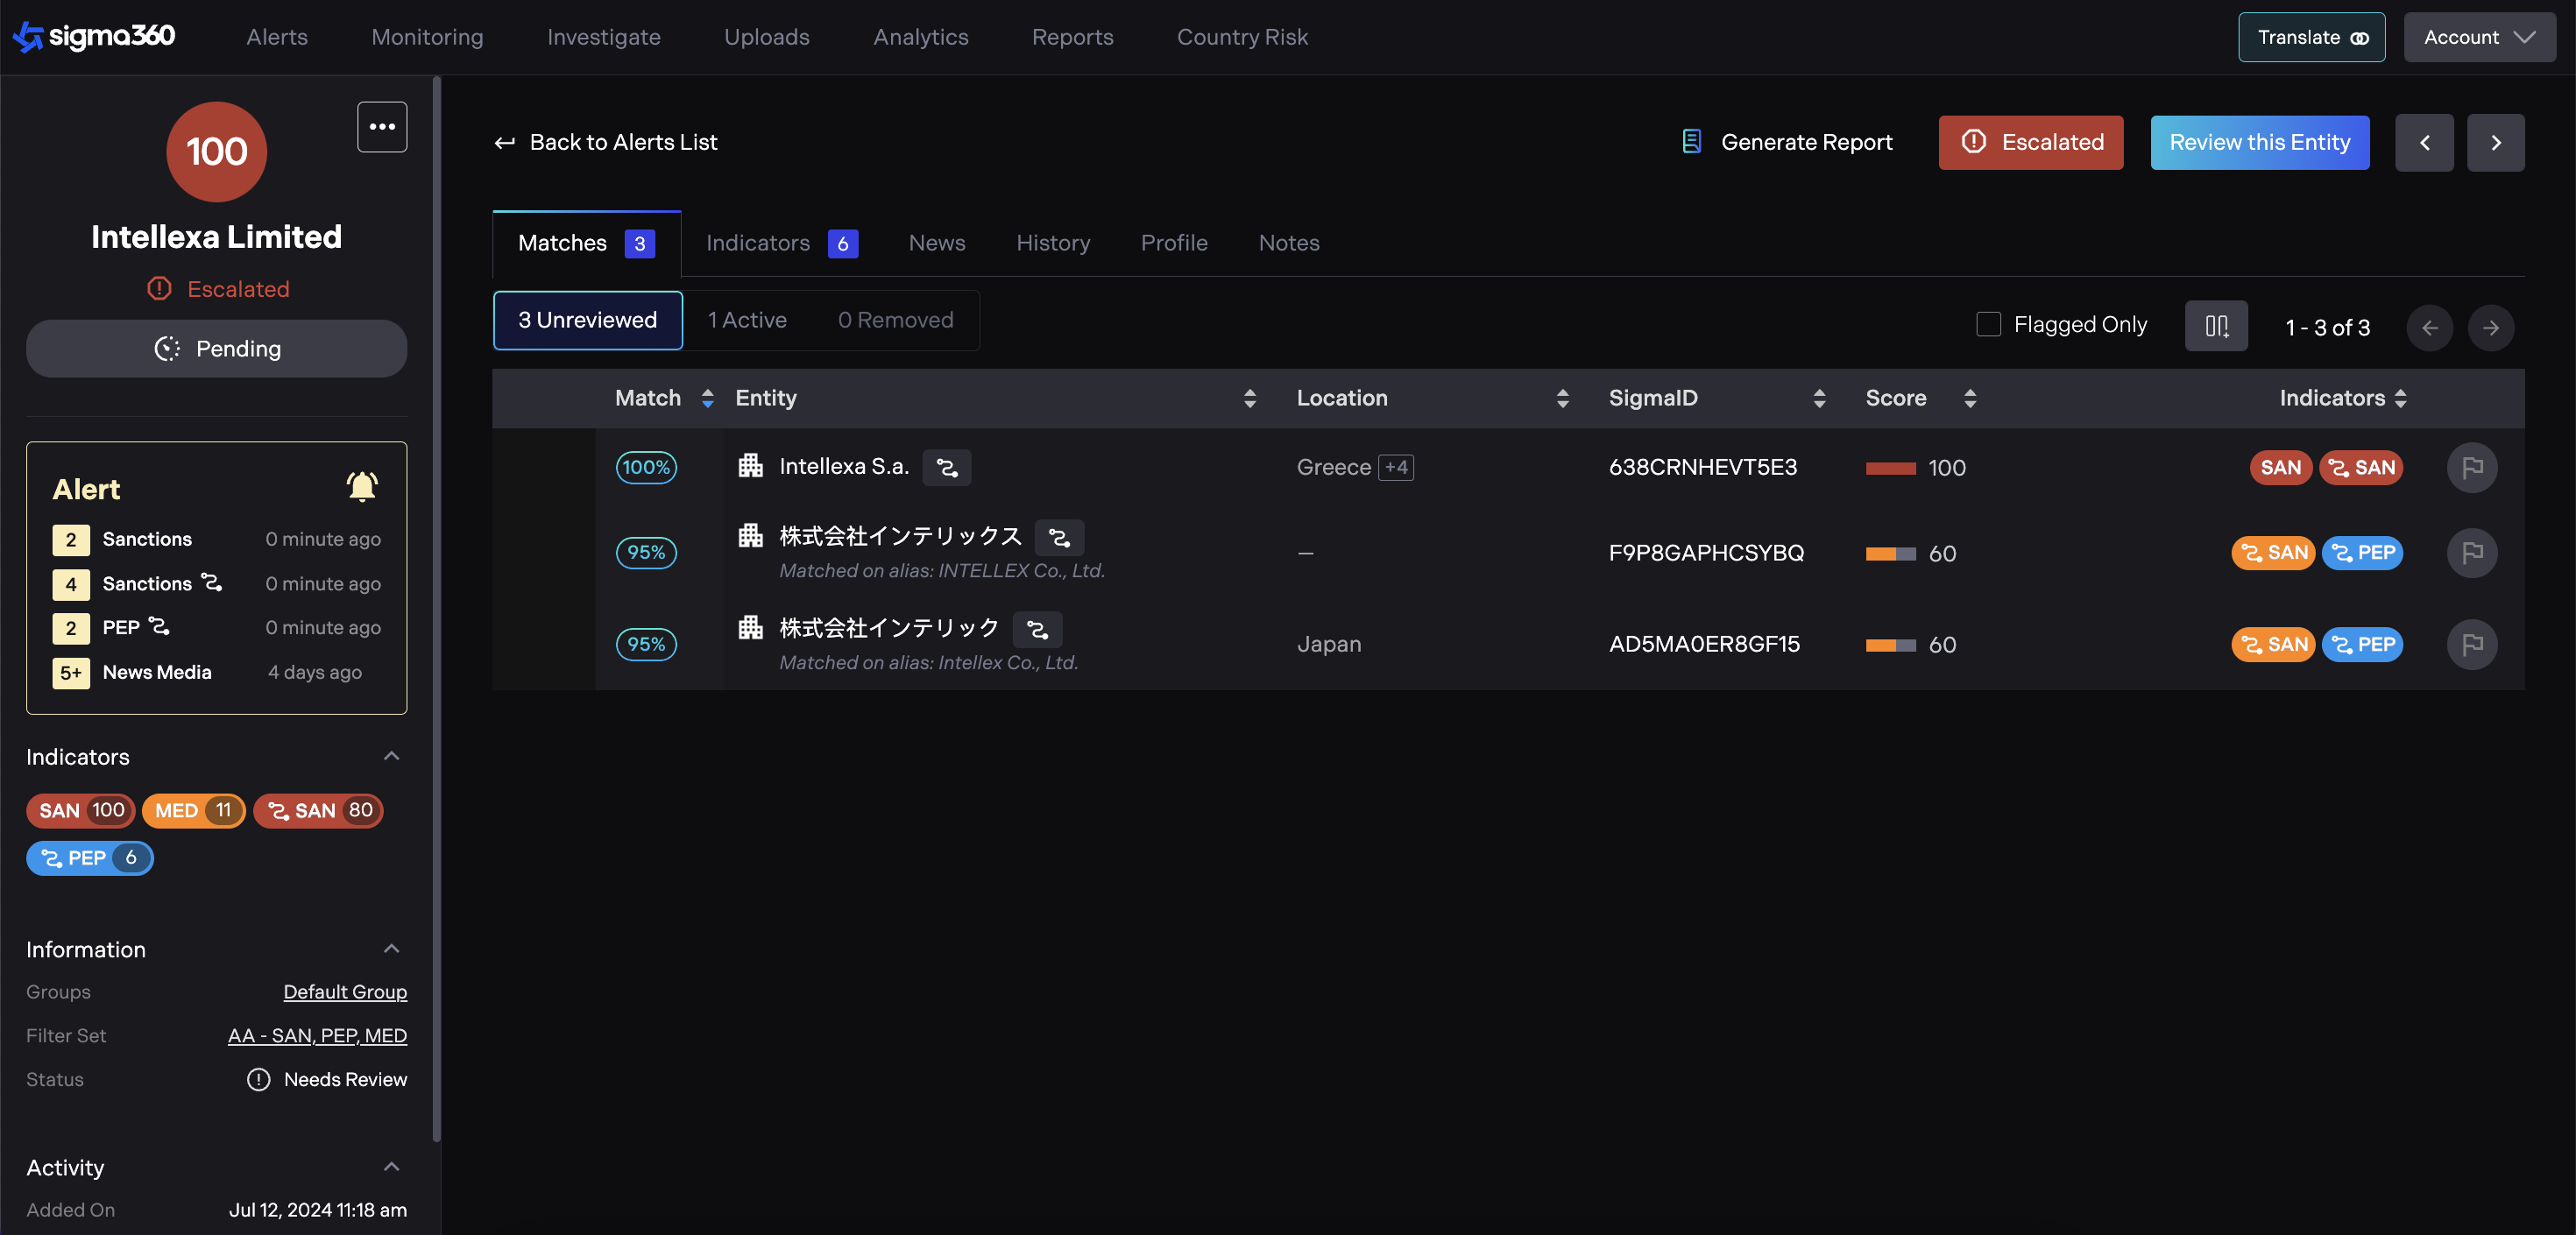
Users can easily track the number of new matches, indicators and news by looking at the blue badges in the Unreviewed sections.
“All”** **tab consolidates all match statuses into one view, including:
-
Unreviewed
-
Potential Match
-
Not a Match

The first step involves examining the profile data to verify that a given Sigma ID is a correct match.
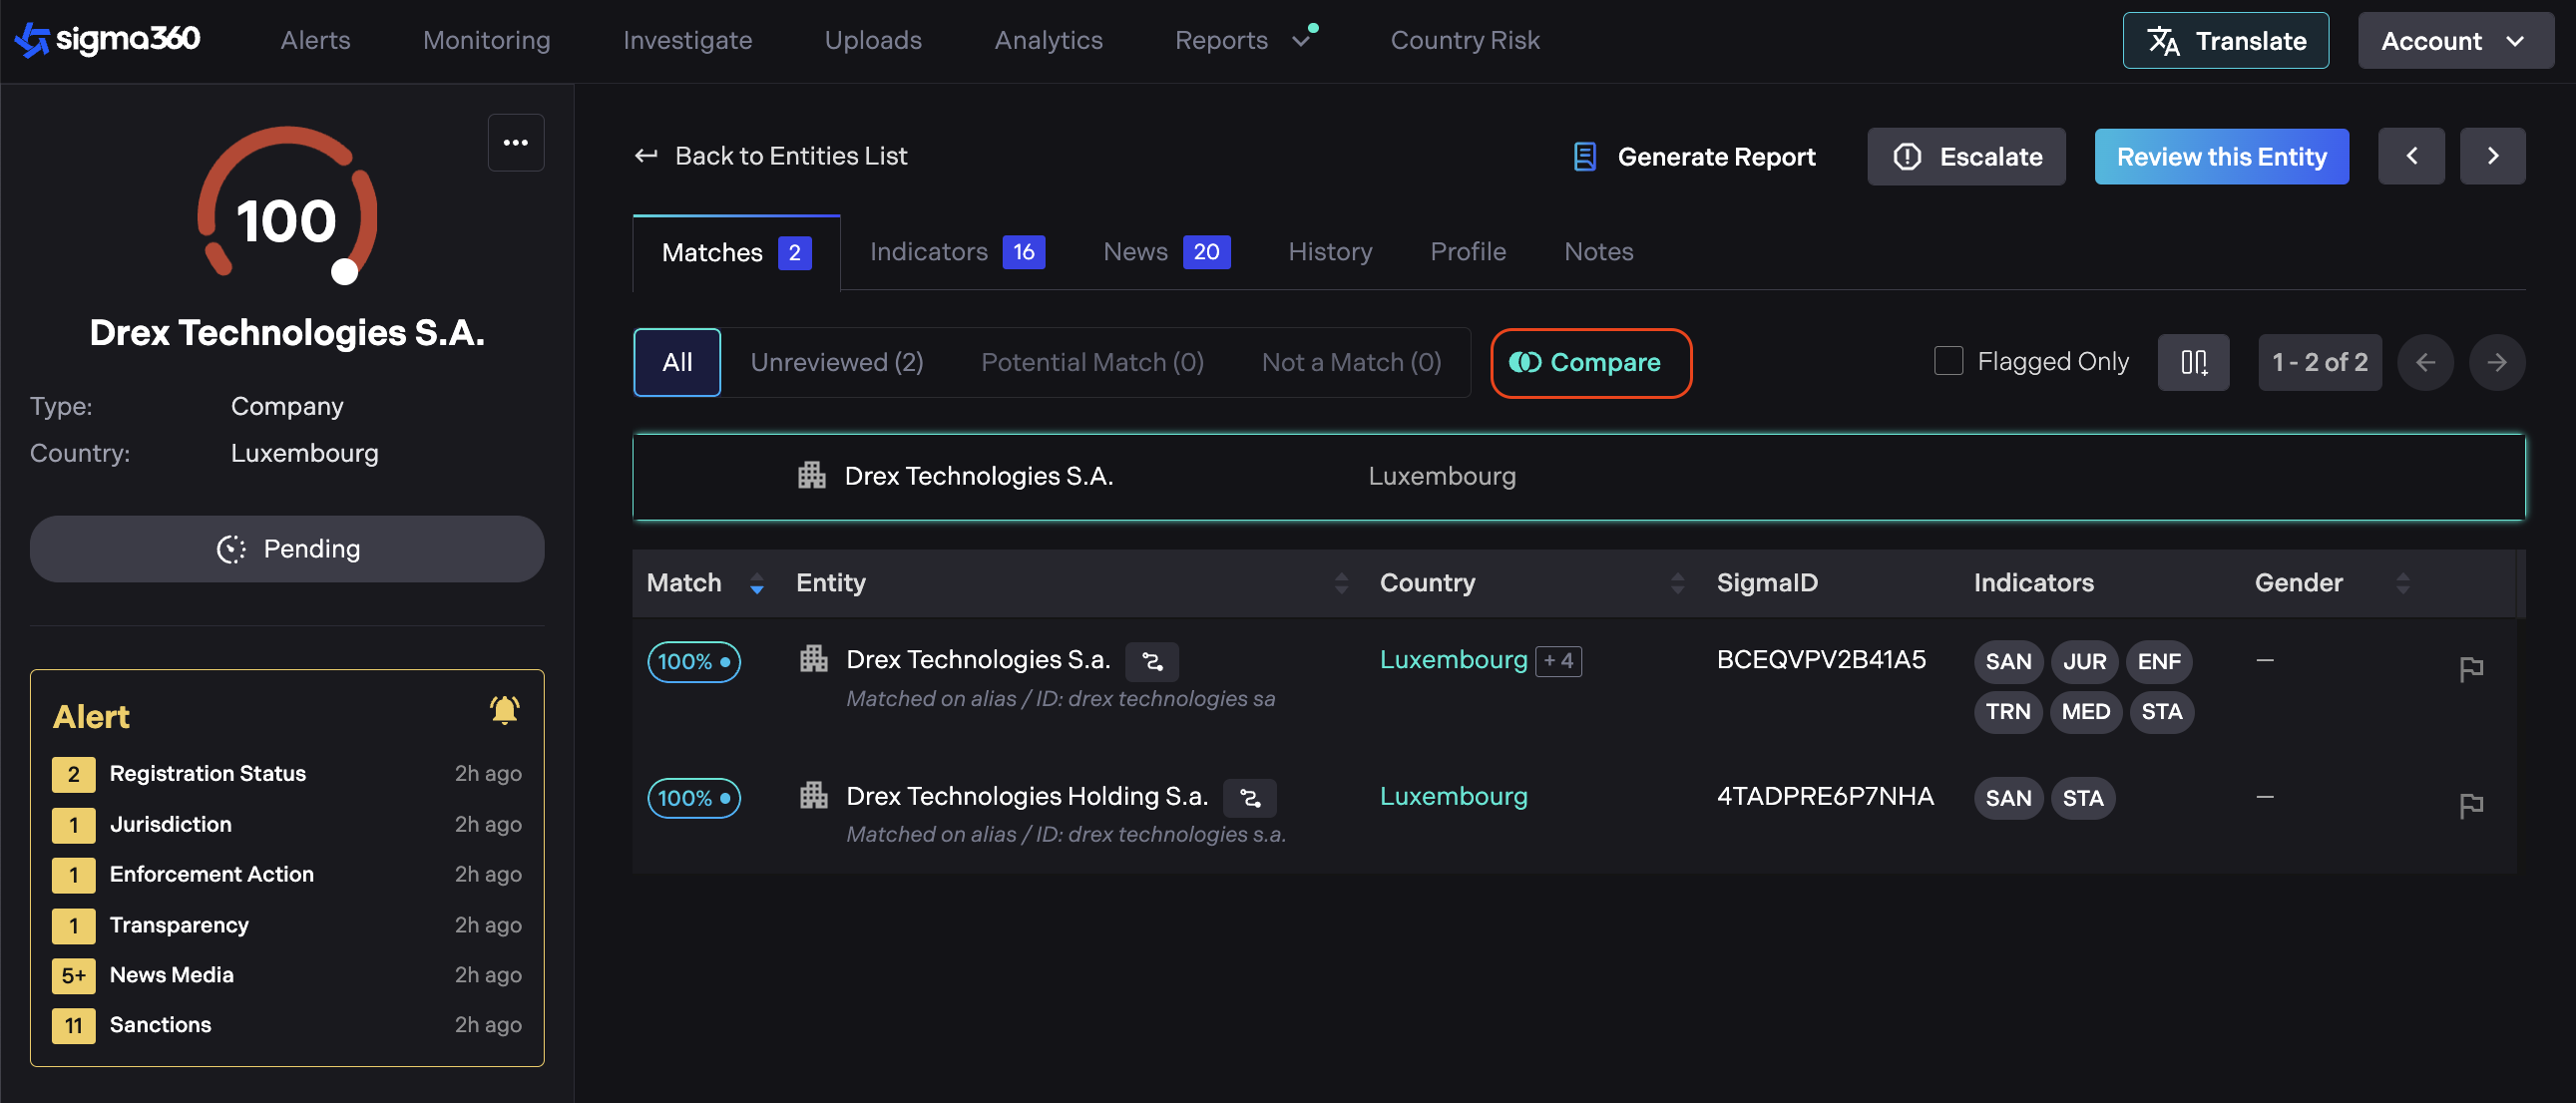
Users can view a list of matches in the "Matches" tab. Each match is displayed with details such as match percentage, entity name, date of birth, location, SigmaID, score, and indicators.
"Match Decision" column enables faster decision-making by allowing quick actions on Matches directly from the table. This column is also available in the column selector for customization.
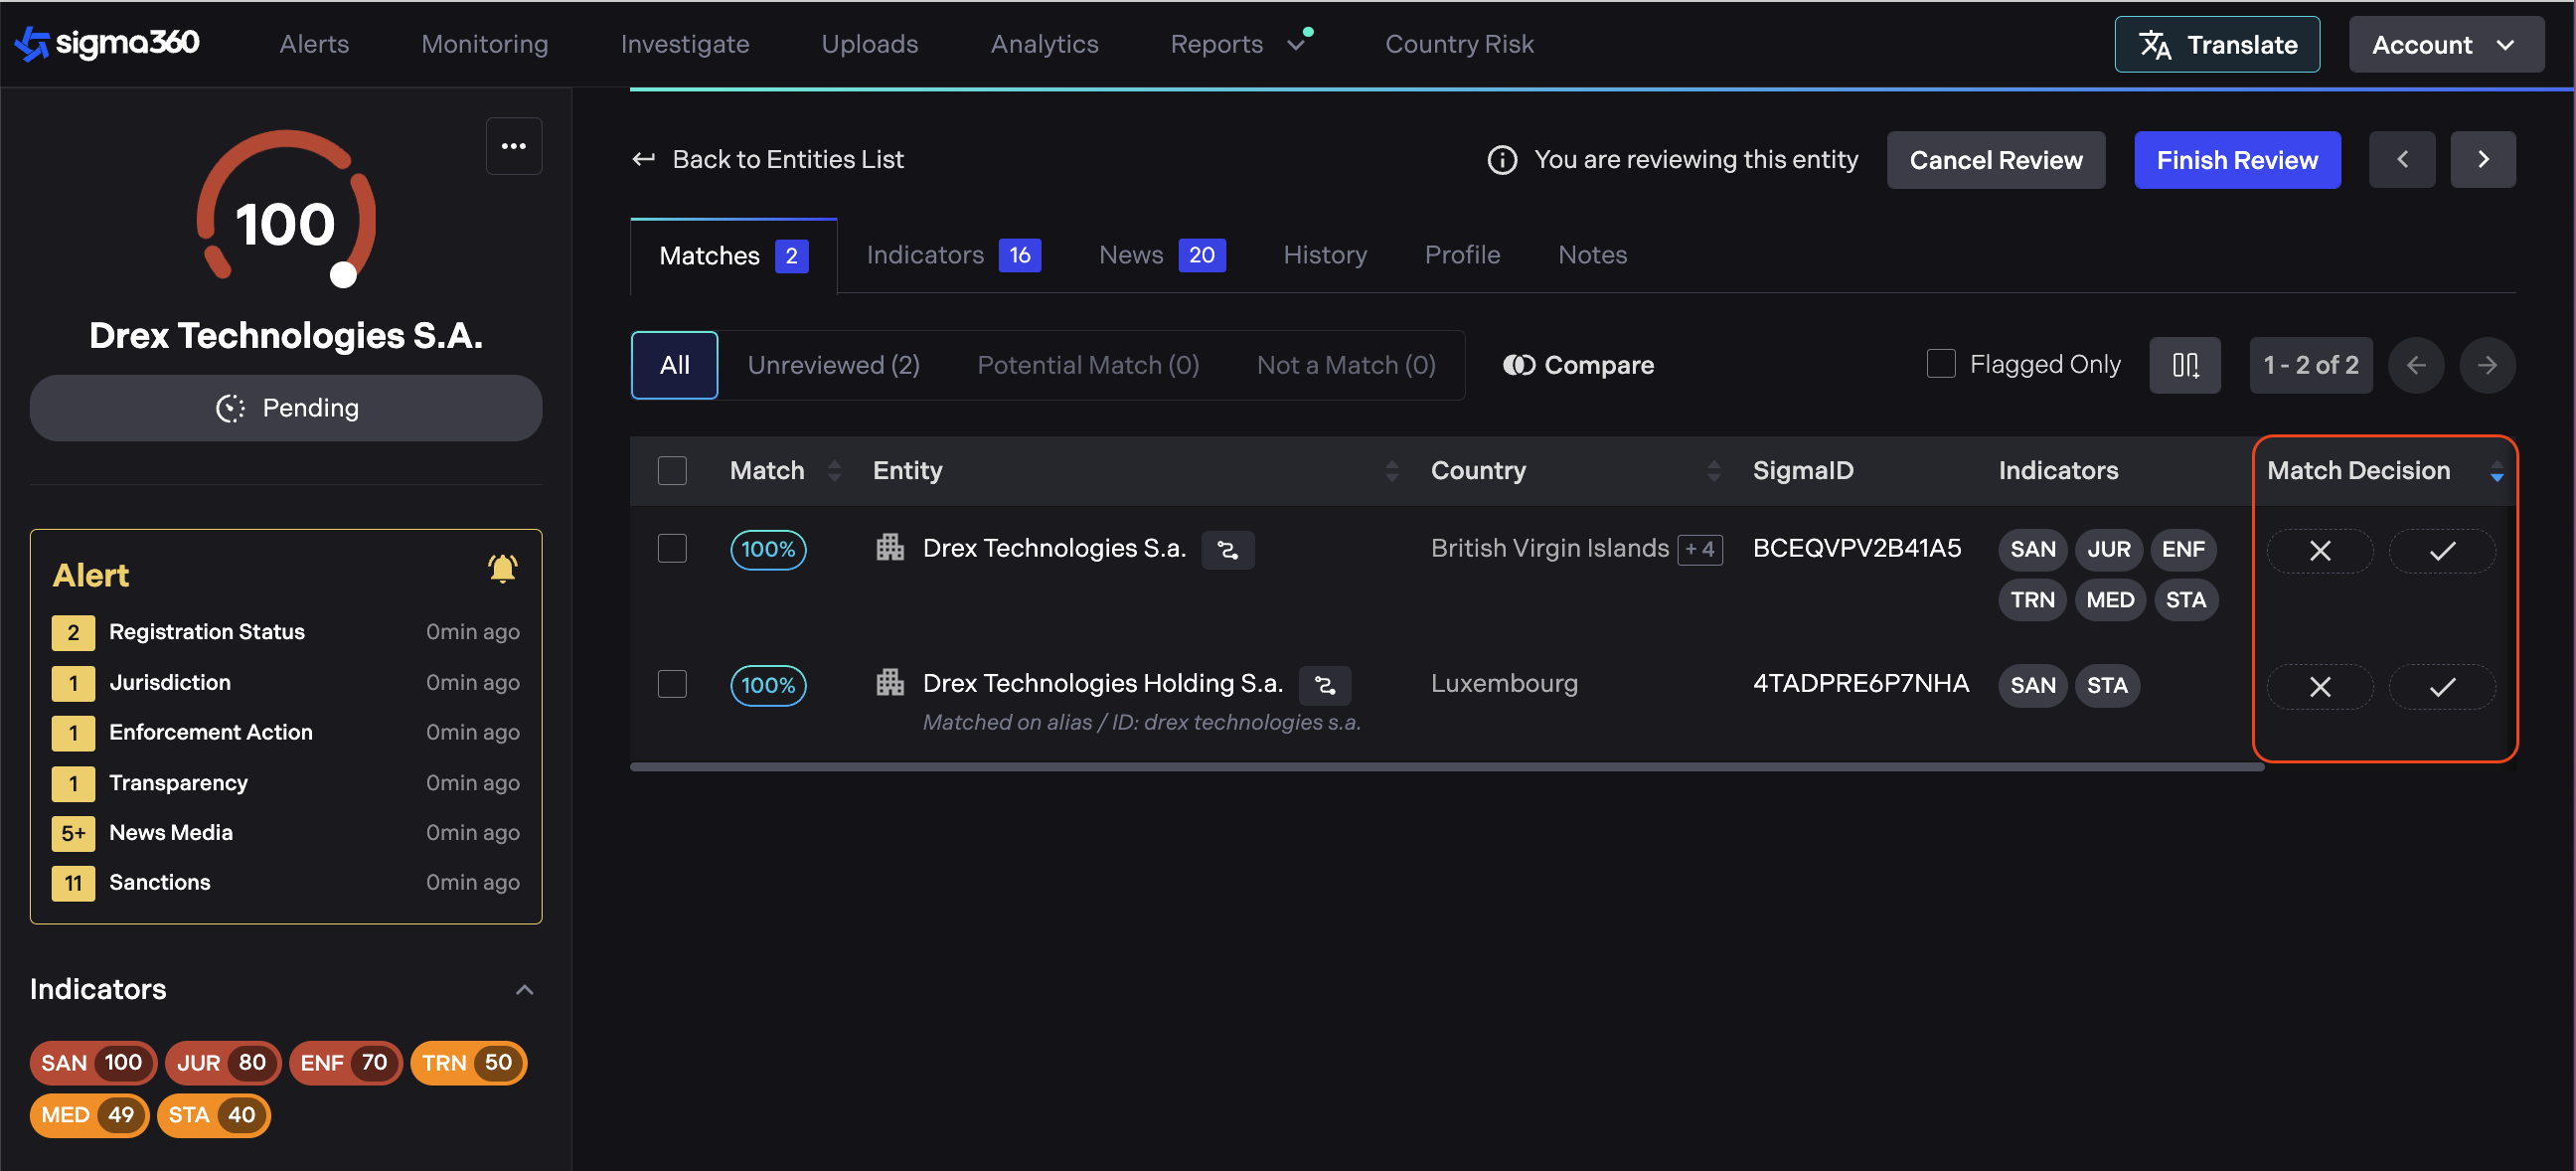
Following actions can be performed:
-
Mark Matches as a "Potential Match" or "Not a Match".
- Indicators and Sigma News related to Matches will be removed if a Match is decisioned as "Not a Match”. Scores will only be adjusted after the review process is completed.
Note:
-
Decision checkboxes are not visible until the user presses "Review this Entity."
-
"Match Decision" column is not visible until the user presses "Review this Entity."
-
Unreviewed items do contribute to the overall score.
Users can still apply bulk actions using the checkboxes.
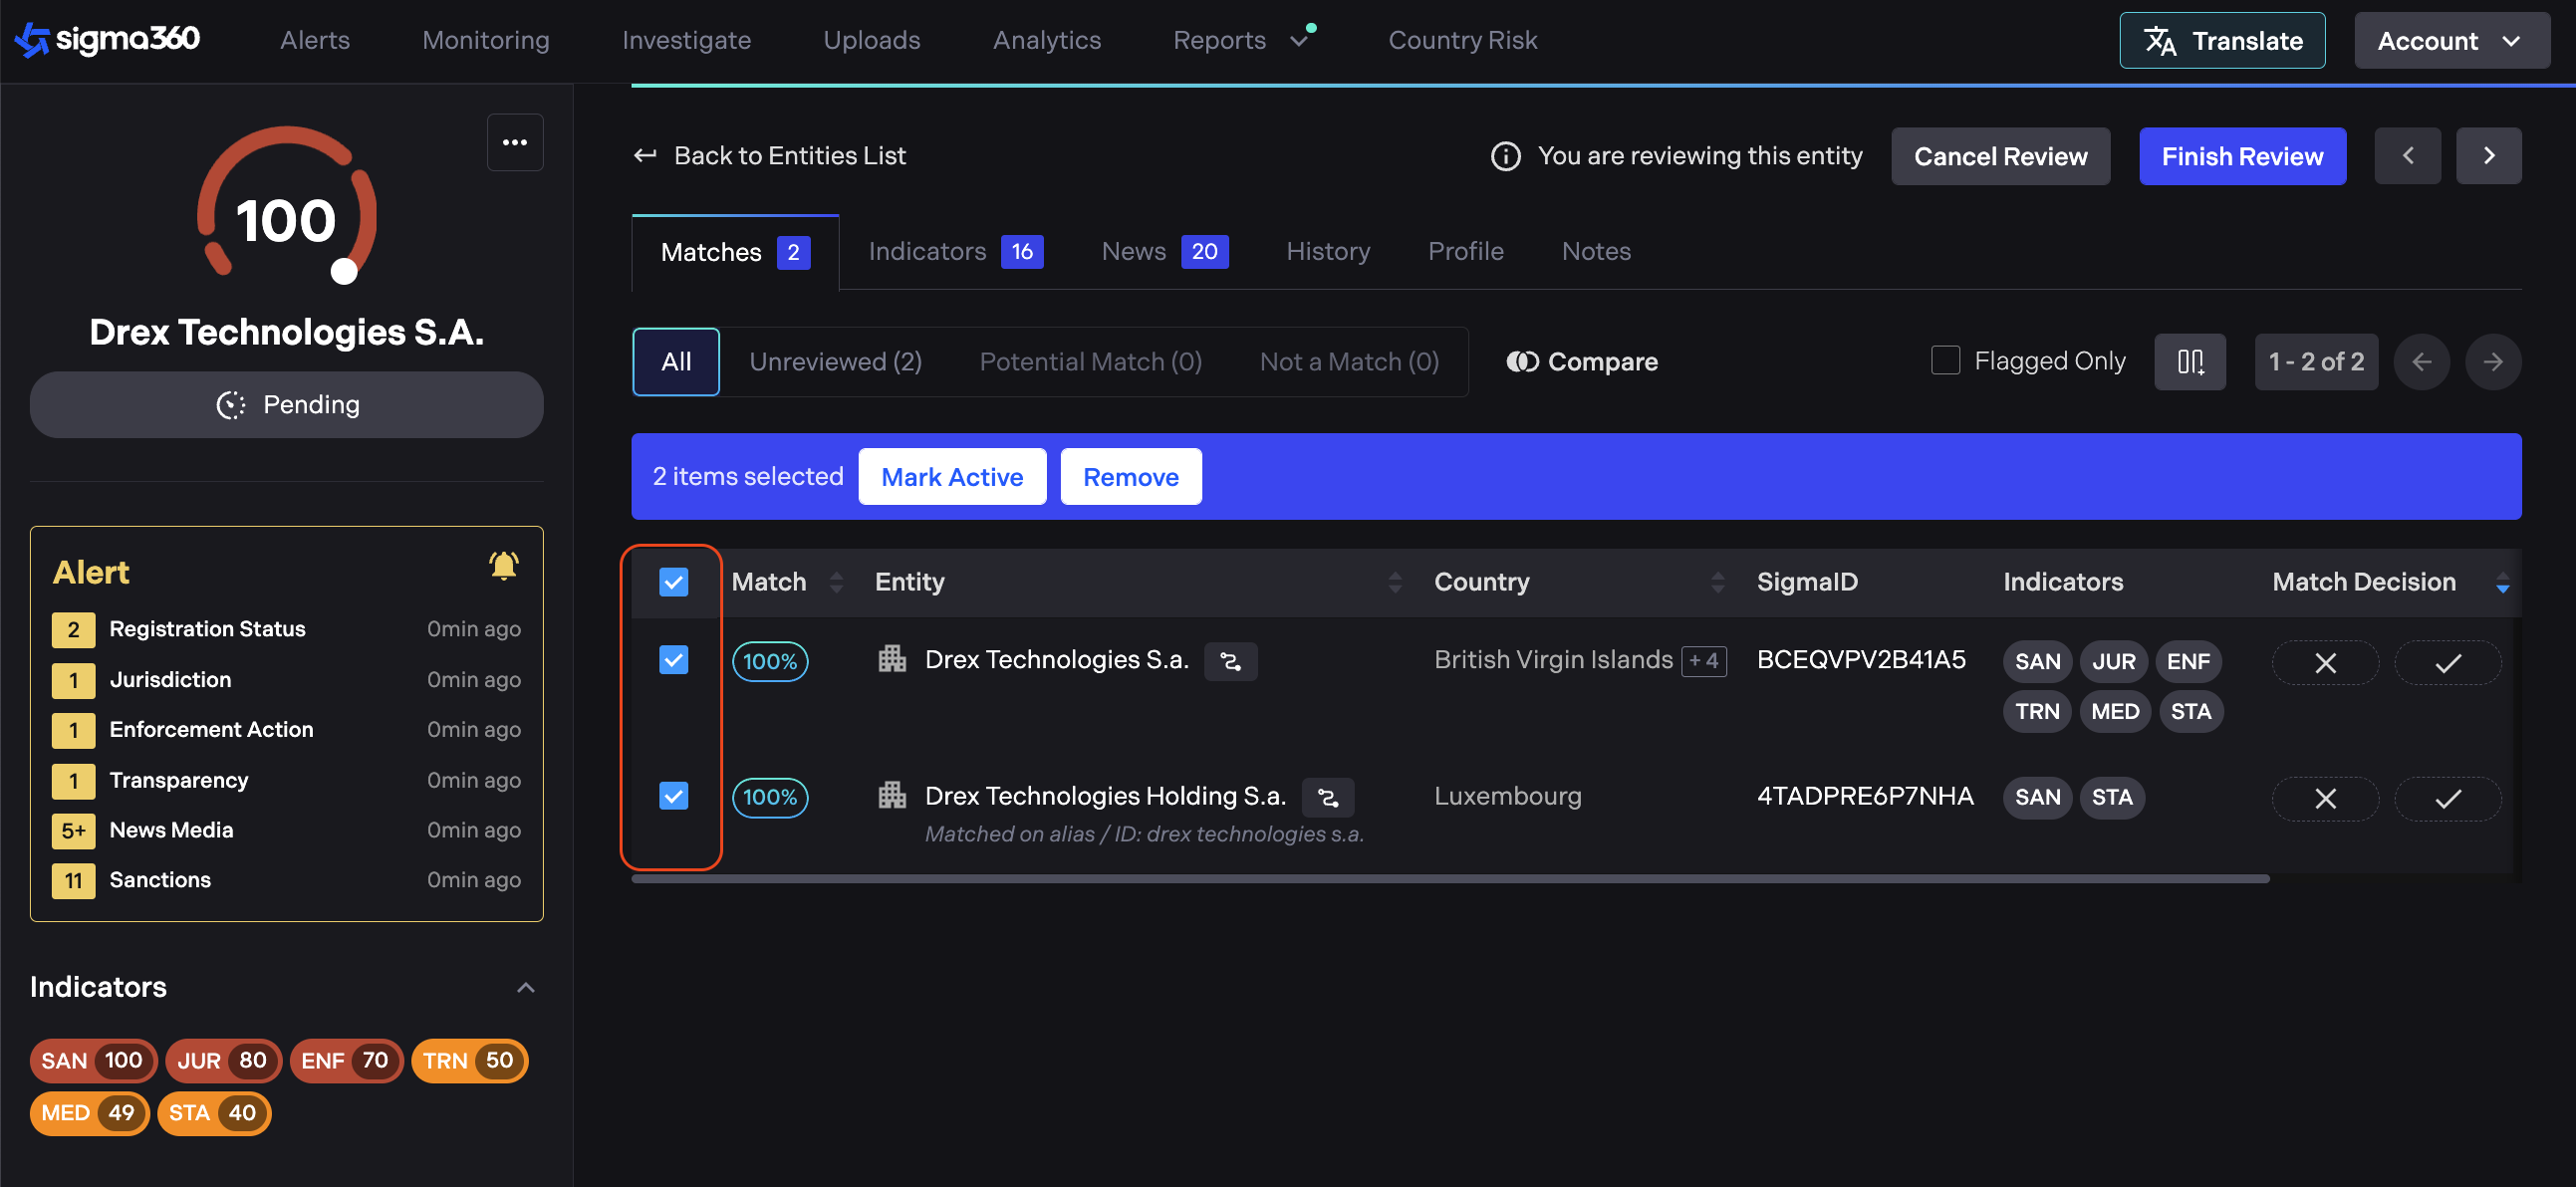
Once the matches to be decisioned are selected, users can click the "Mark Active" or 'Removed' button located above the match list.
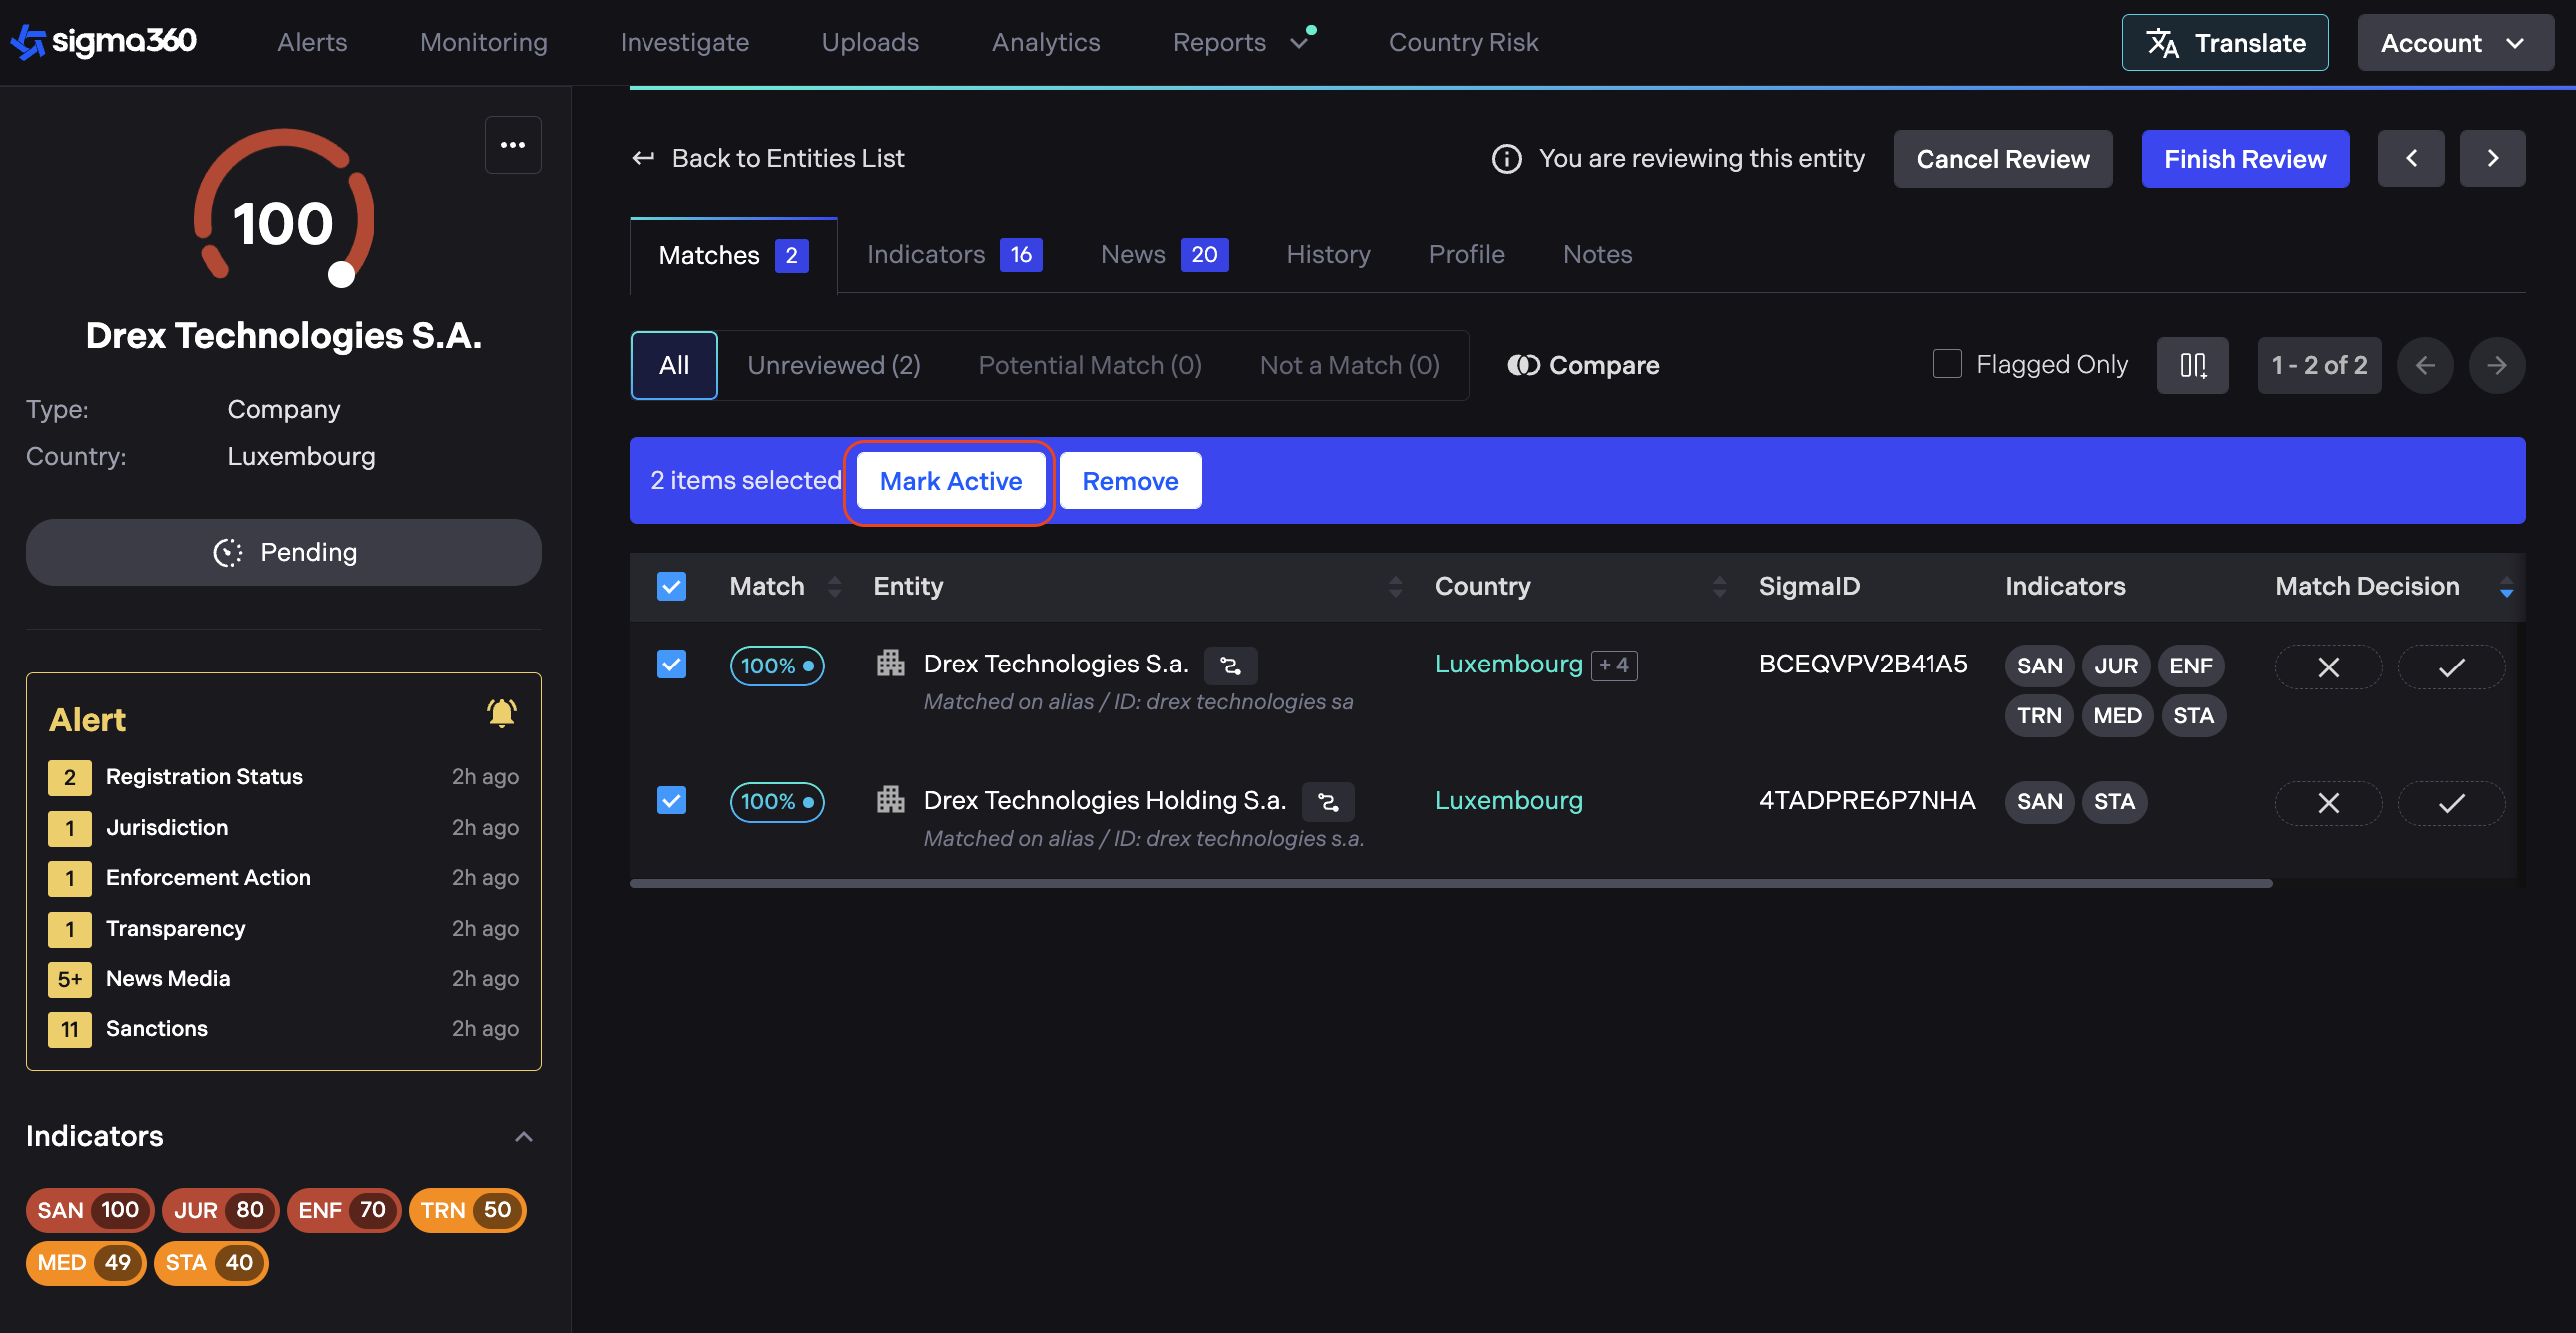
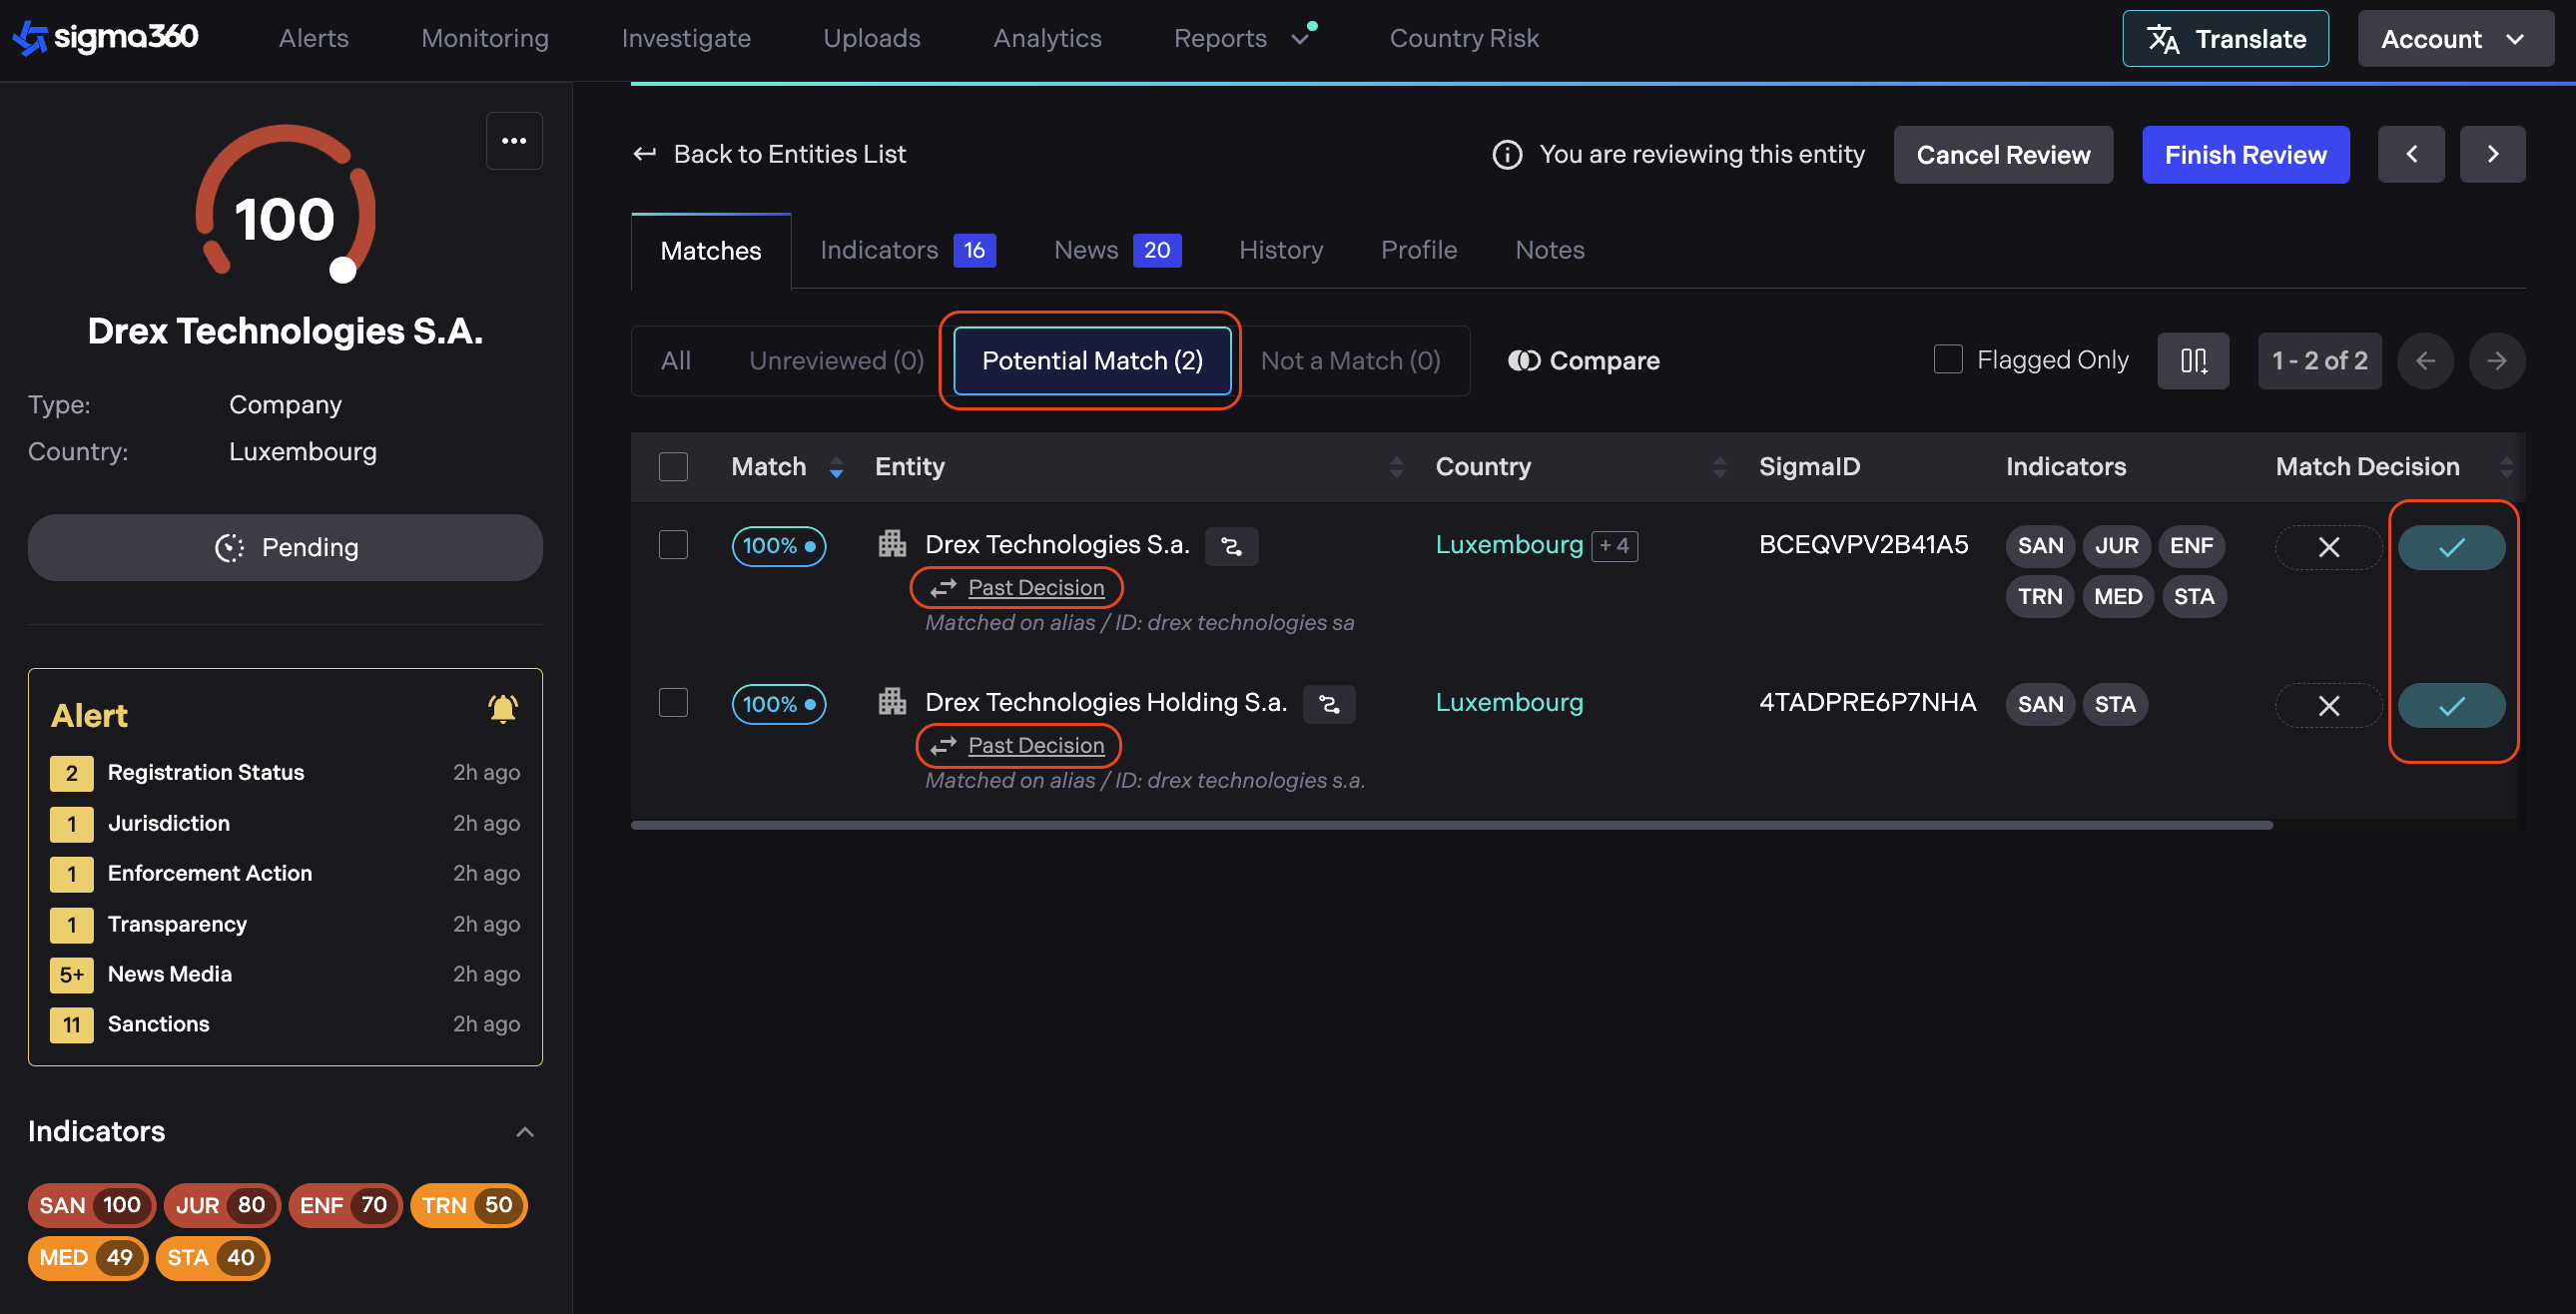
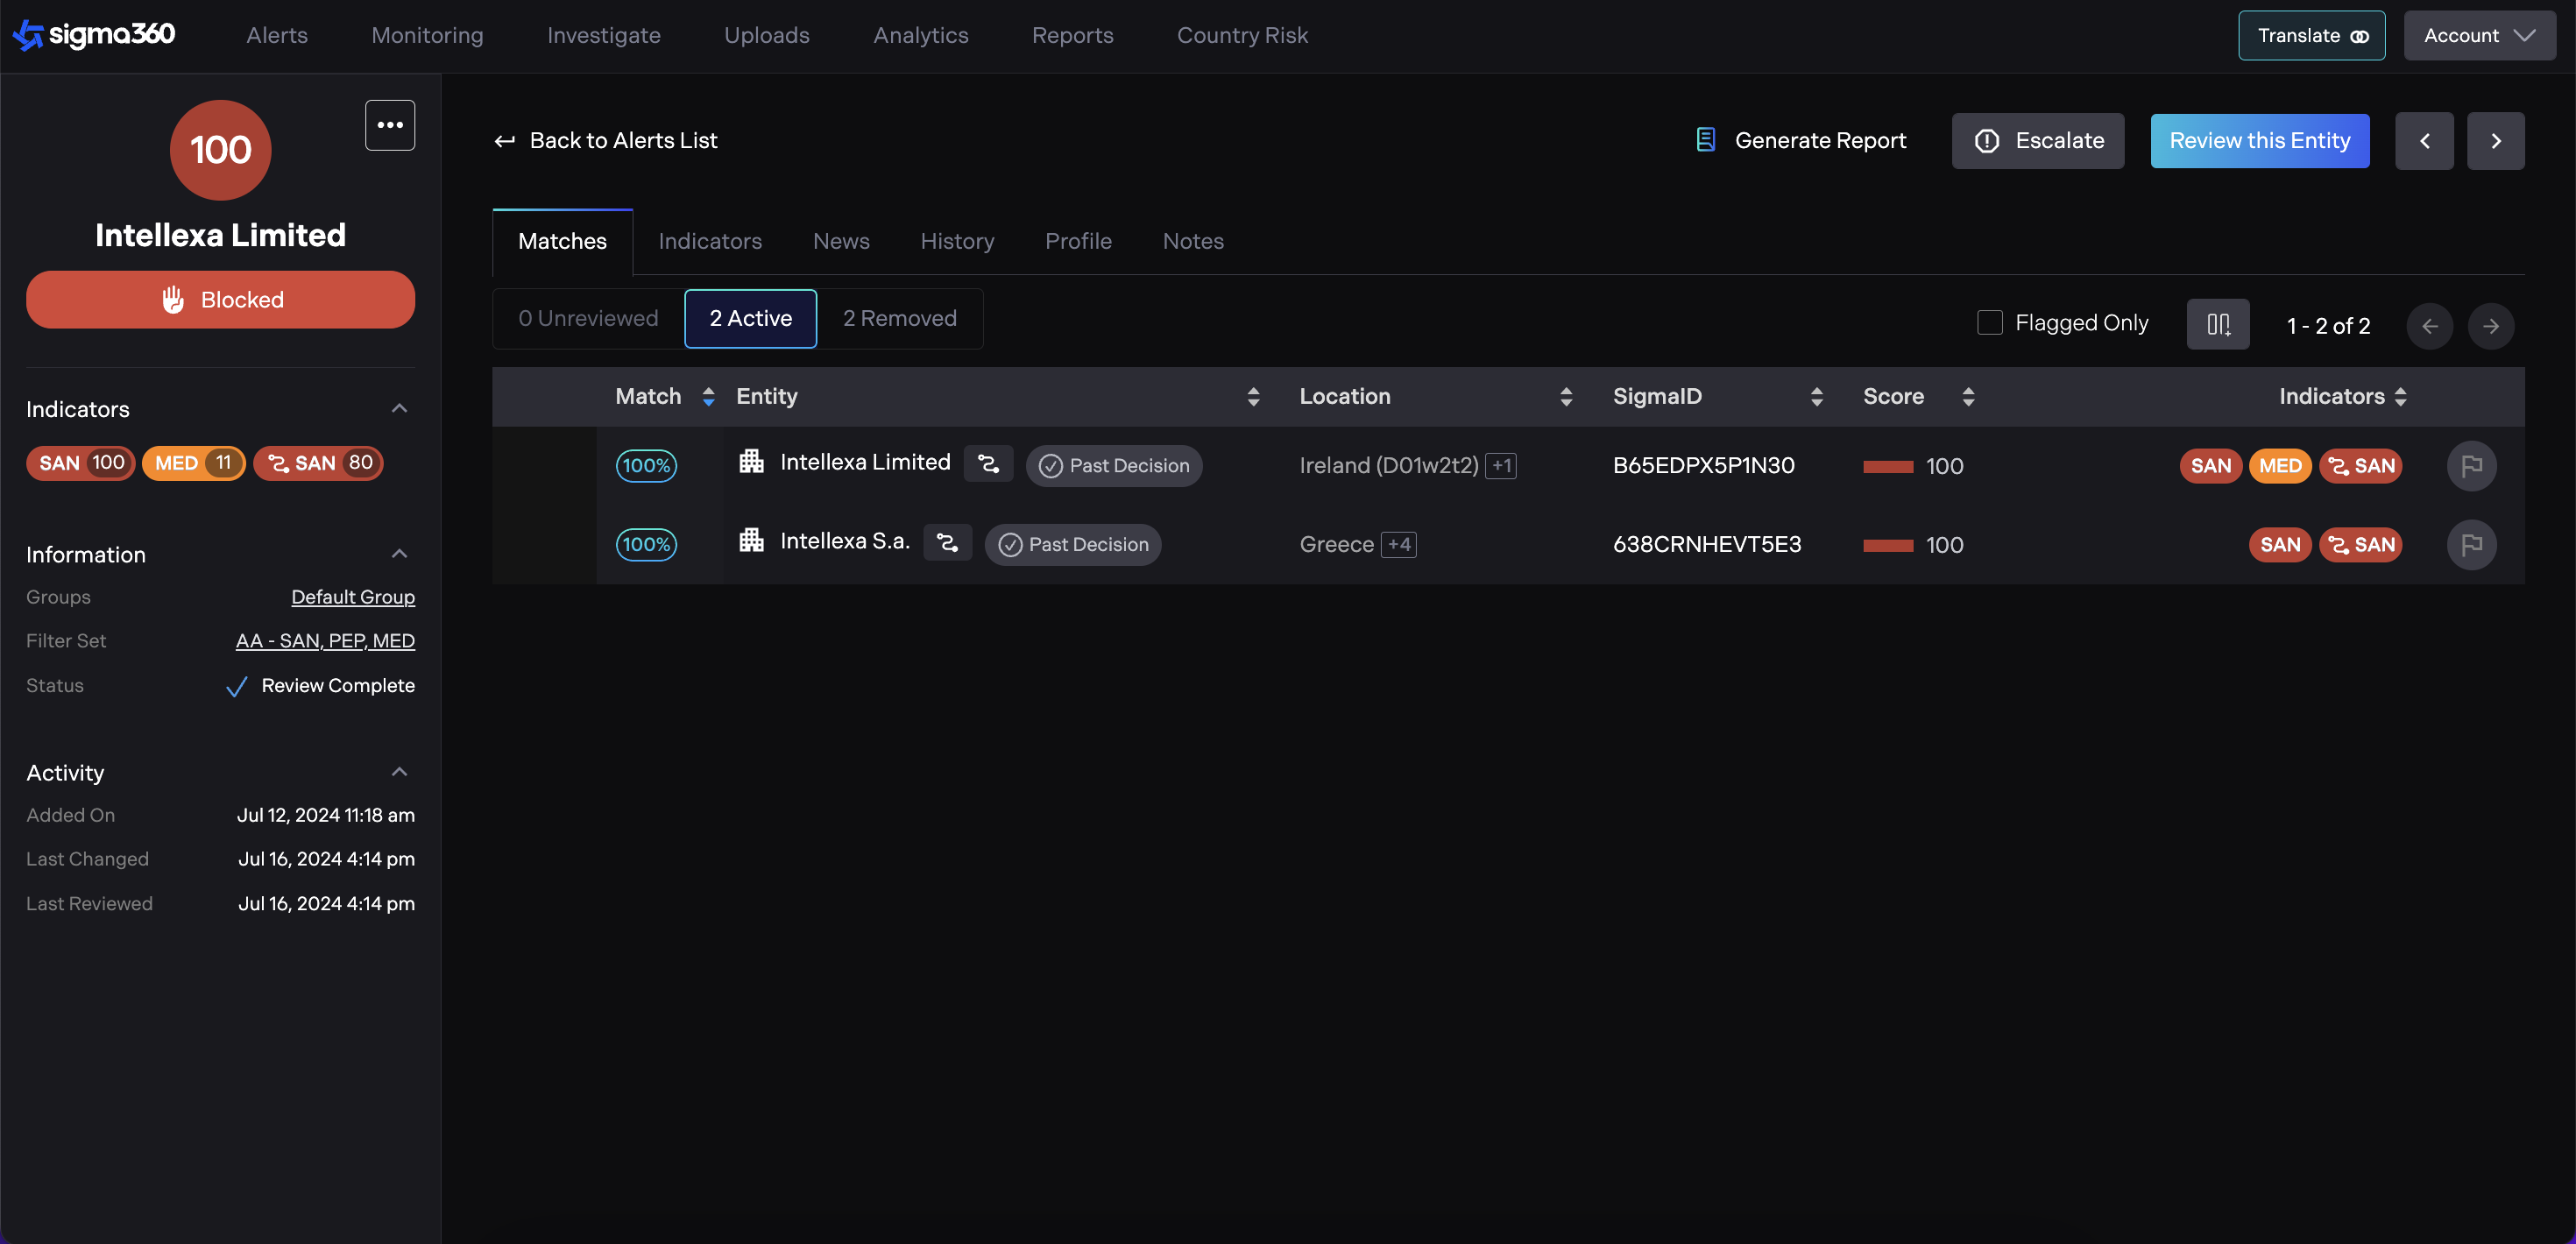
If matches are marked as active, they appear in the "Potential Match" tab. Potential matches are marked with a "Past Decision" badge, indicating that a decision has already been made regarding these matches.
Users should provide the reason(s) for removing the match.
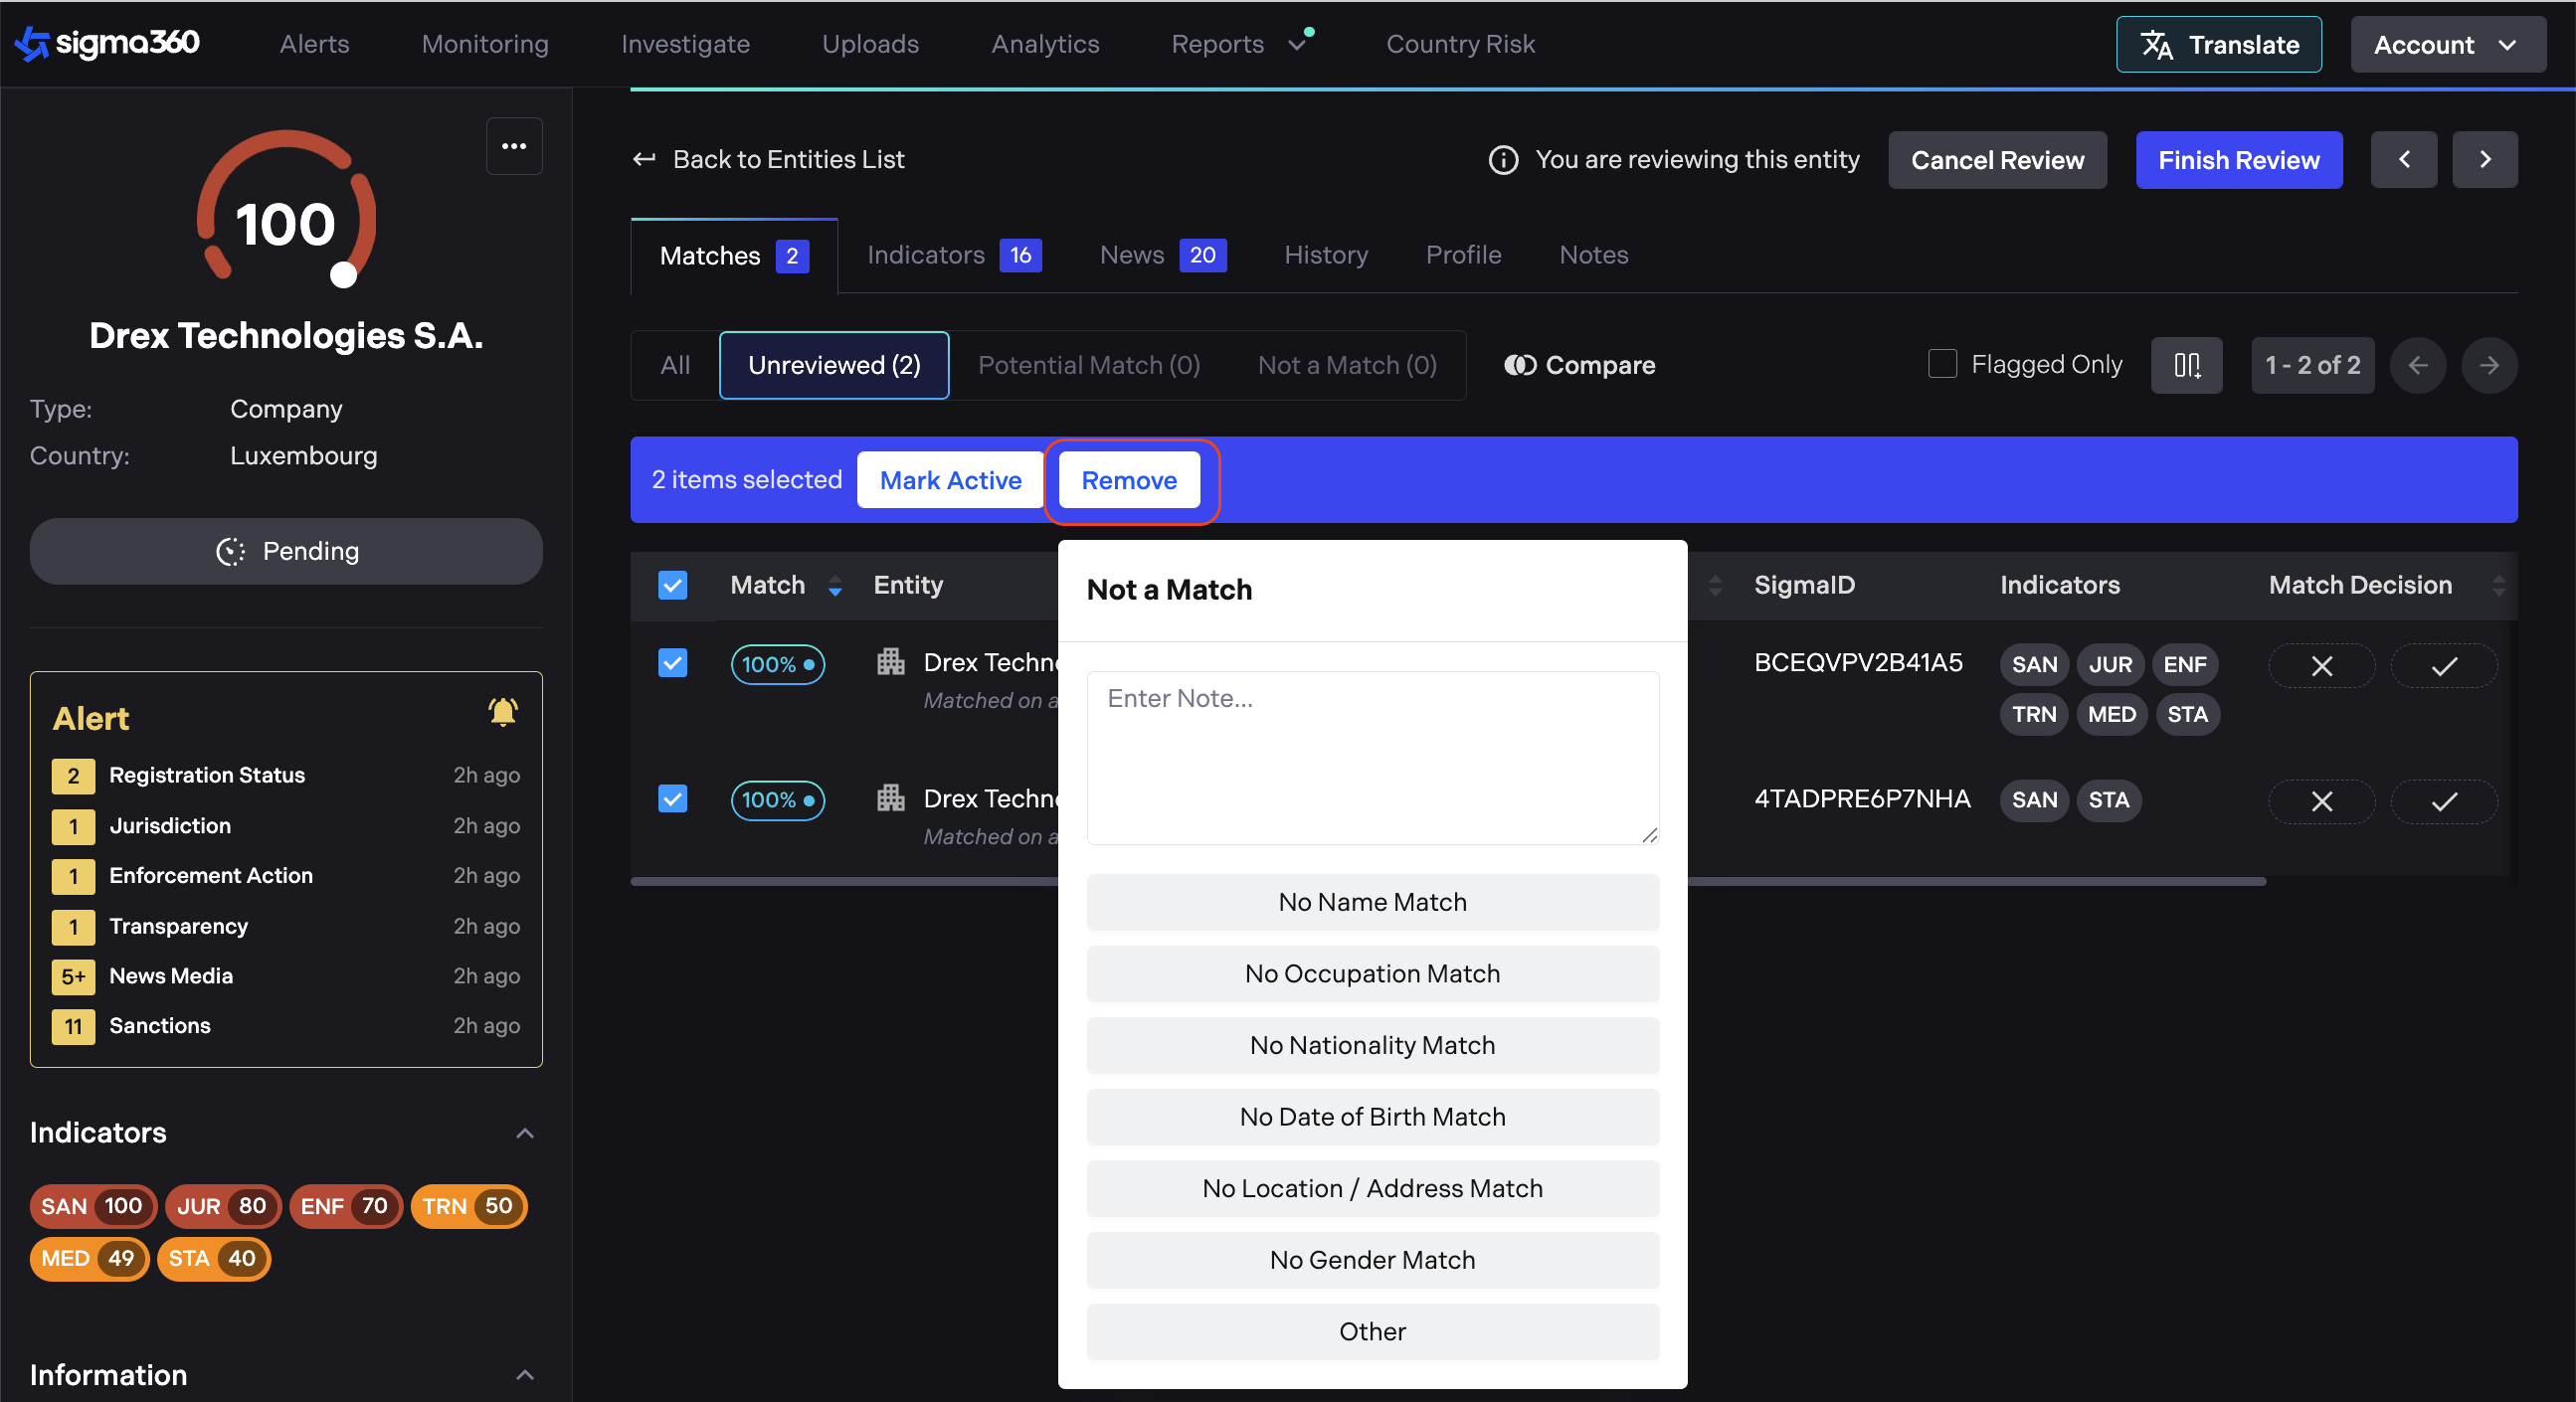
The reasons include:
-
No Partial/Full Name Match
-
No Occupation, Profession, or Role Match
-
No Citizenship or Nationality Match
-
No Date of Birth/Founded Match
-
No Location or Address Match
-
No Gender Match
-
Other (with an option to enter notes)
Once matches are removed, they appear in the "Not a Match" tab. Removed matches are marked with a "Past Decision" badge, indicating that a decision has already been made regarding these matches.
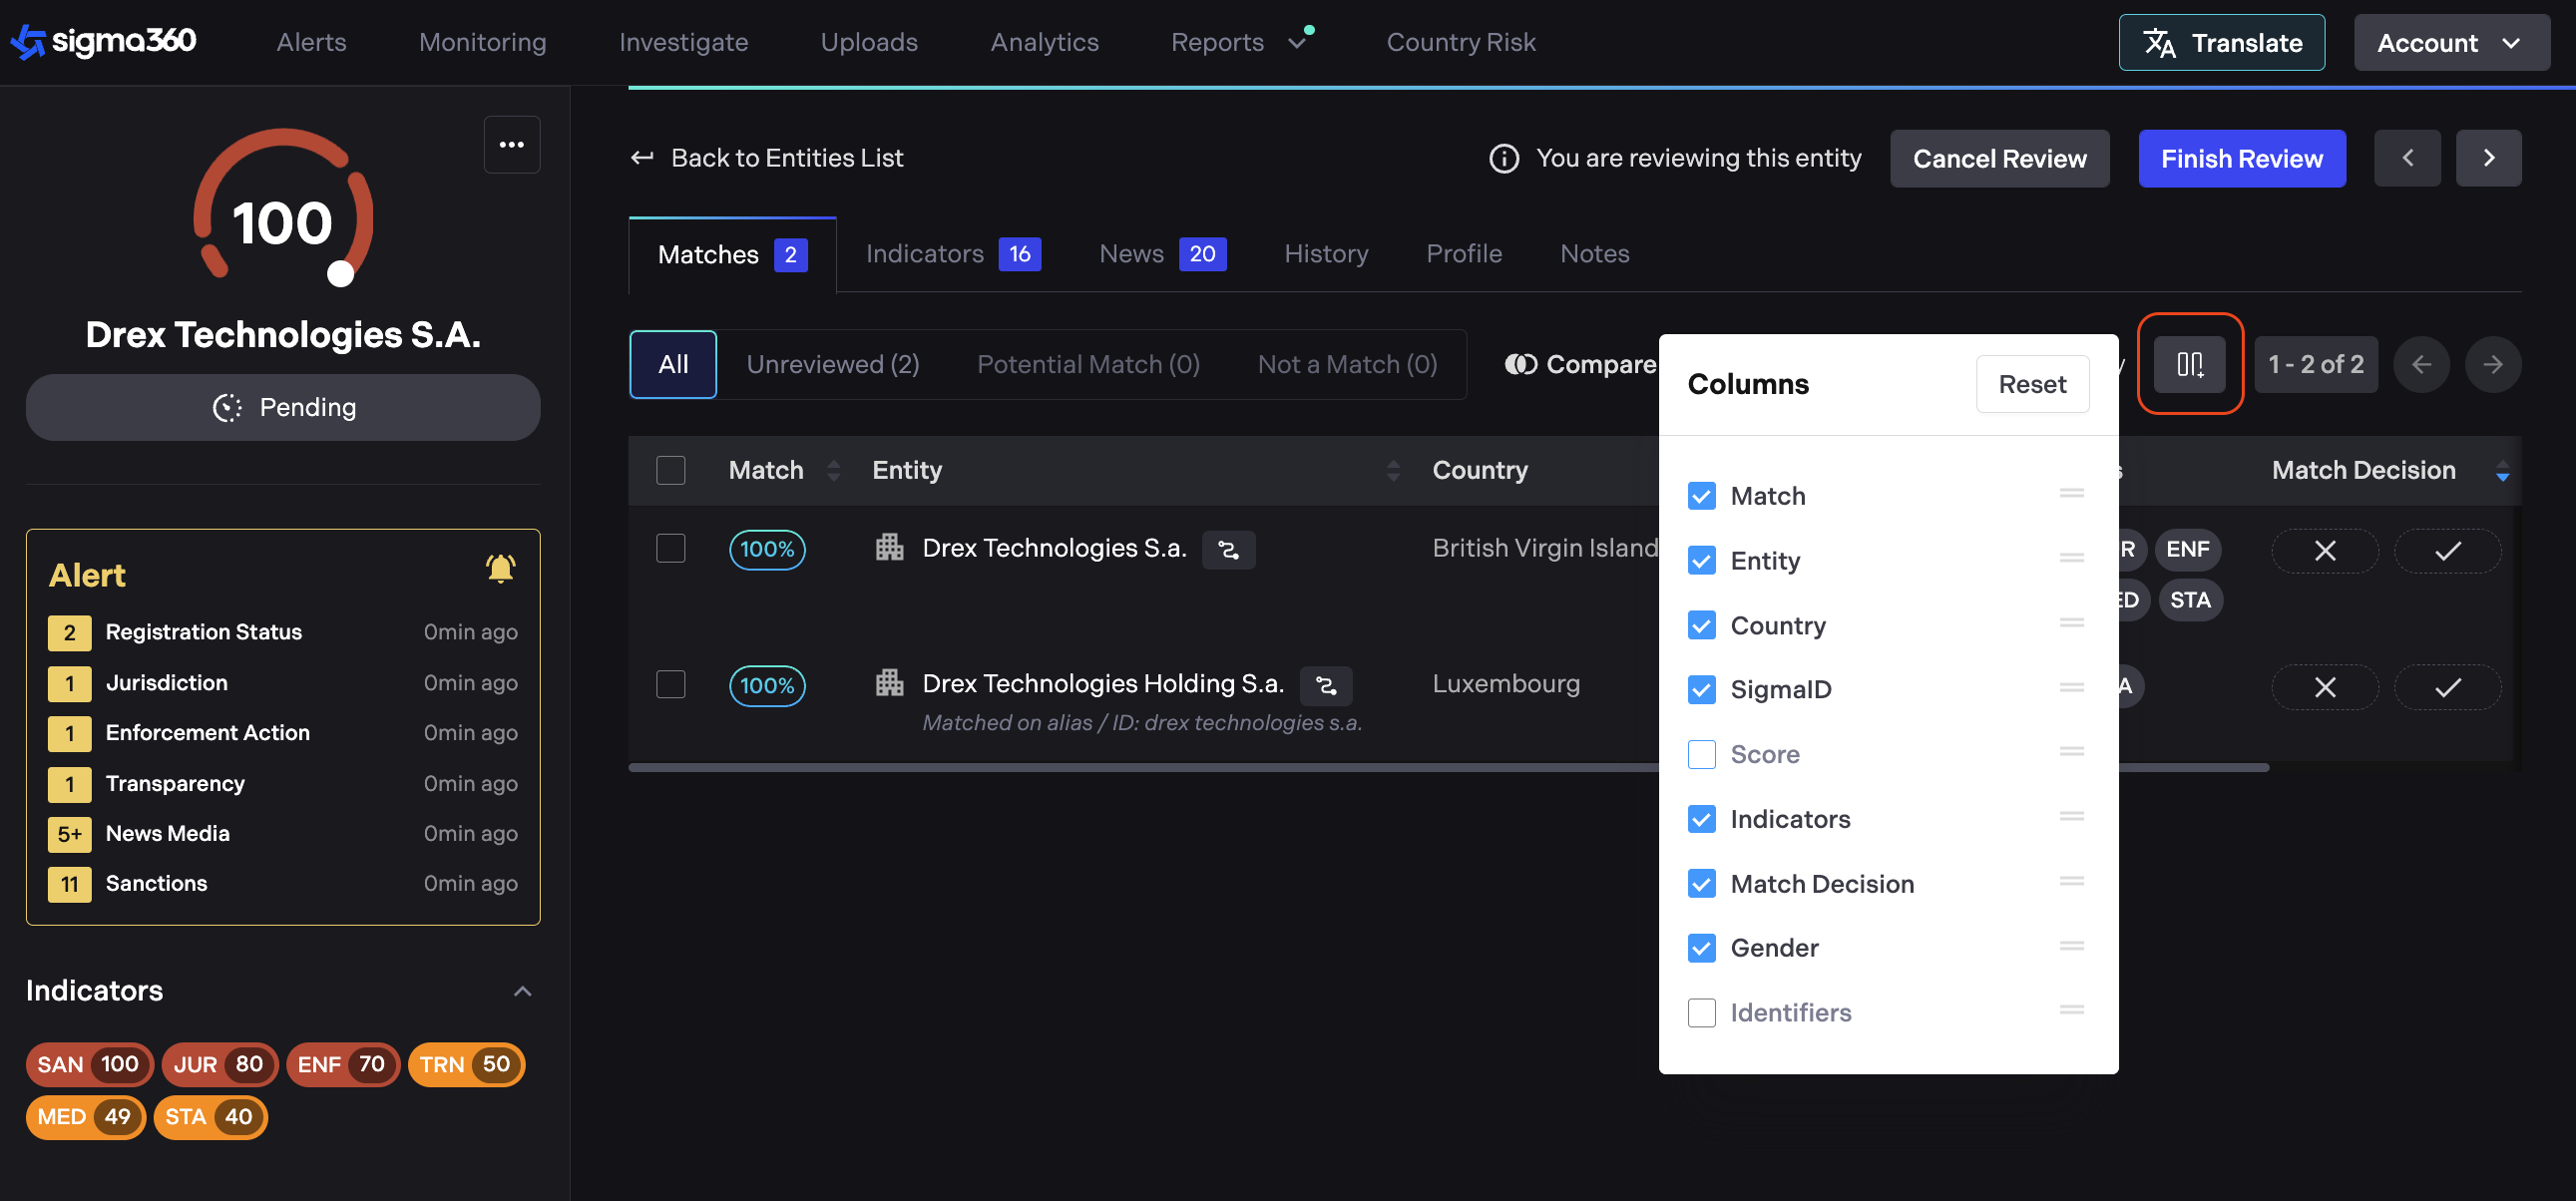
Users can customize their view on the Matches tab by selecting which columns to display and arranging them in their preferred order. The reset button will restore all unchecked columns and display them in default order.
The Compare toggle allows users to easily compare their search criteria with potential matches. When enabled, a row displaying the user’s search input appears at the top of the table, aligning column by column with the matched results.
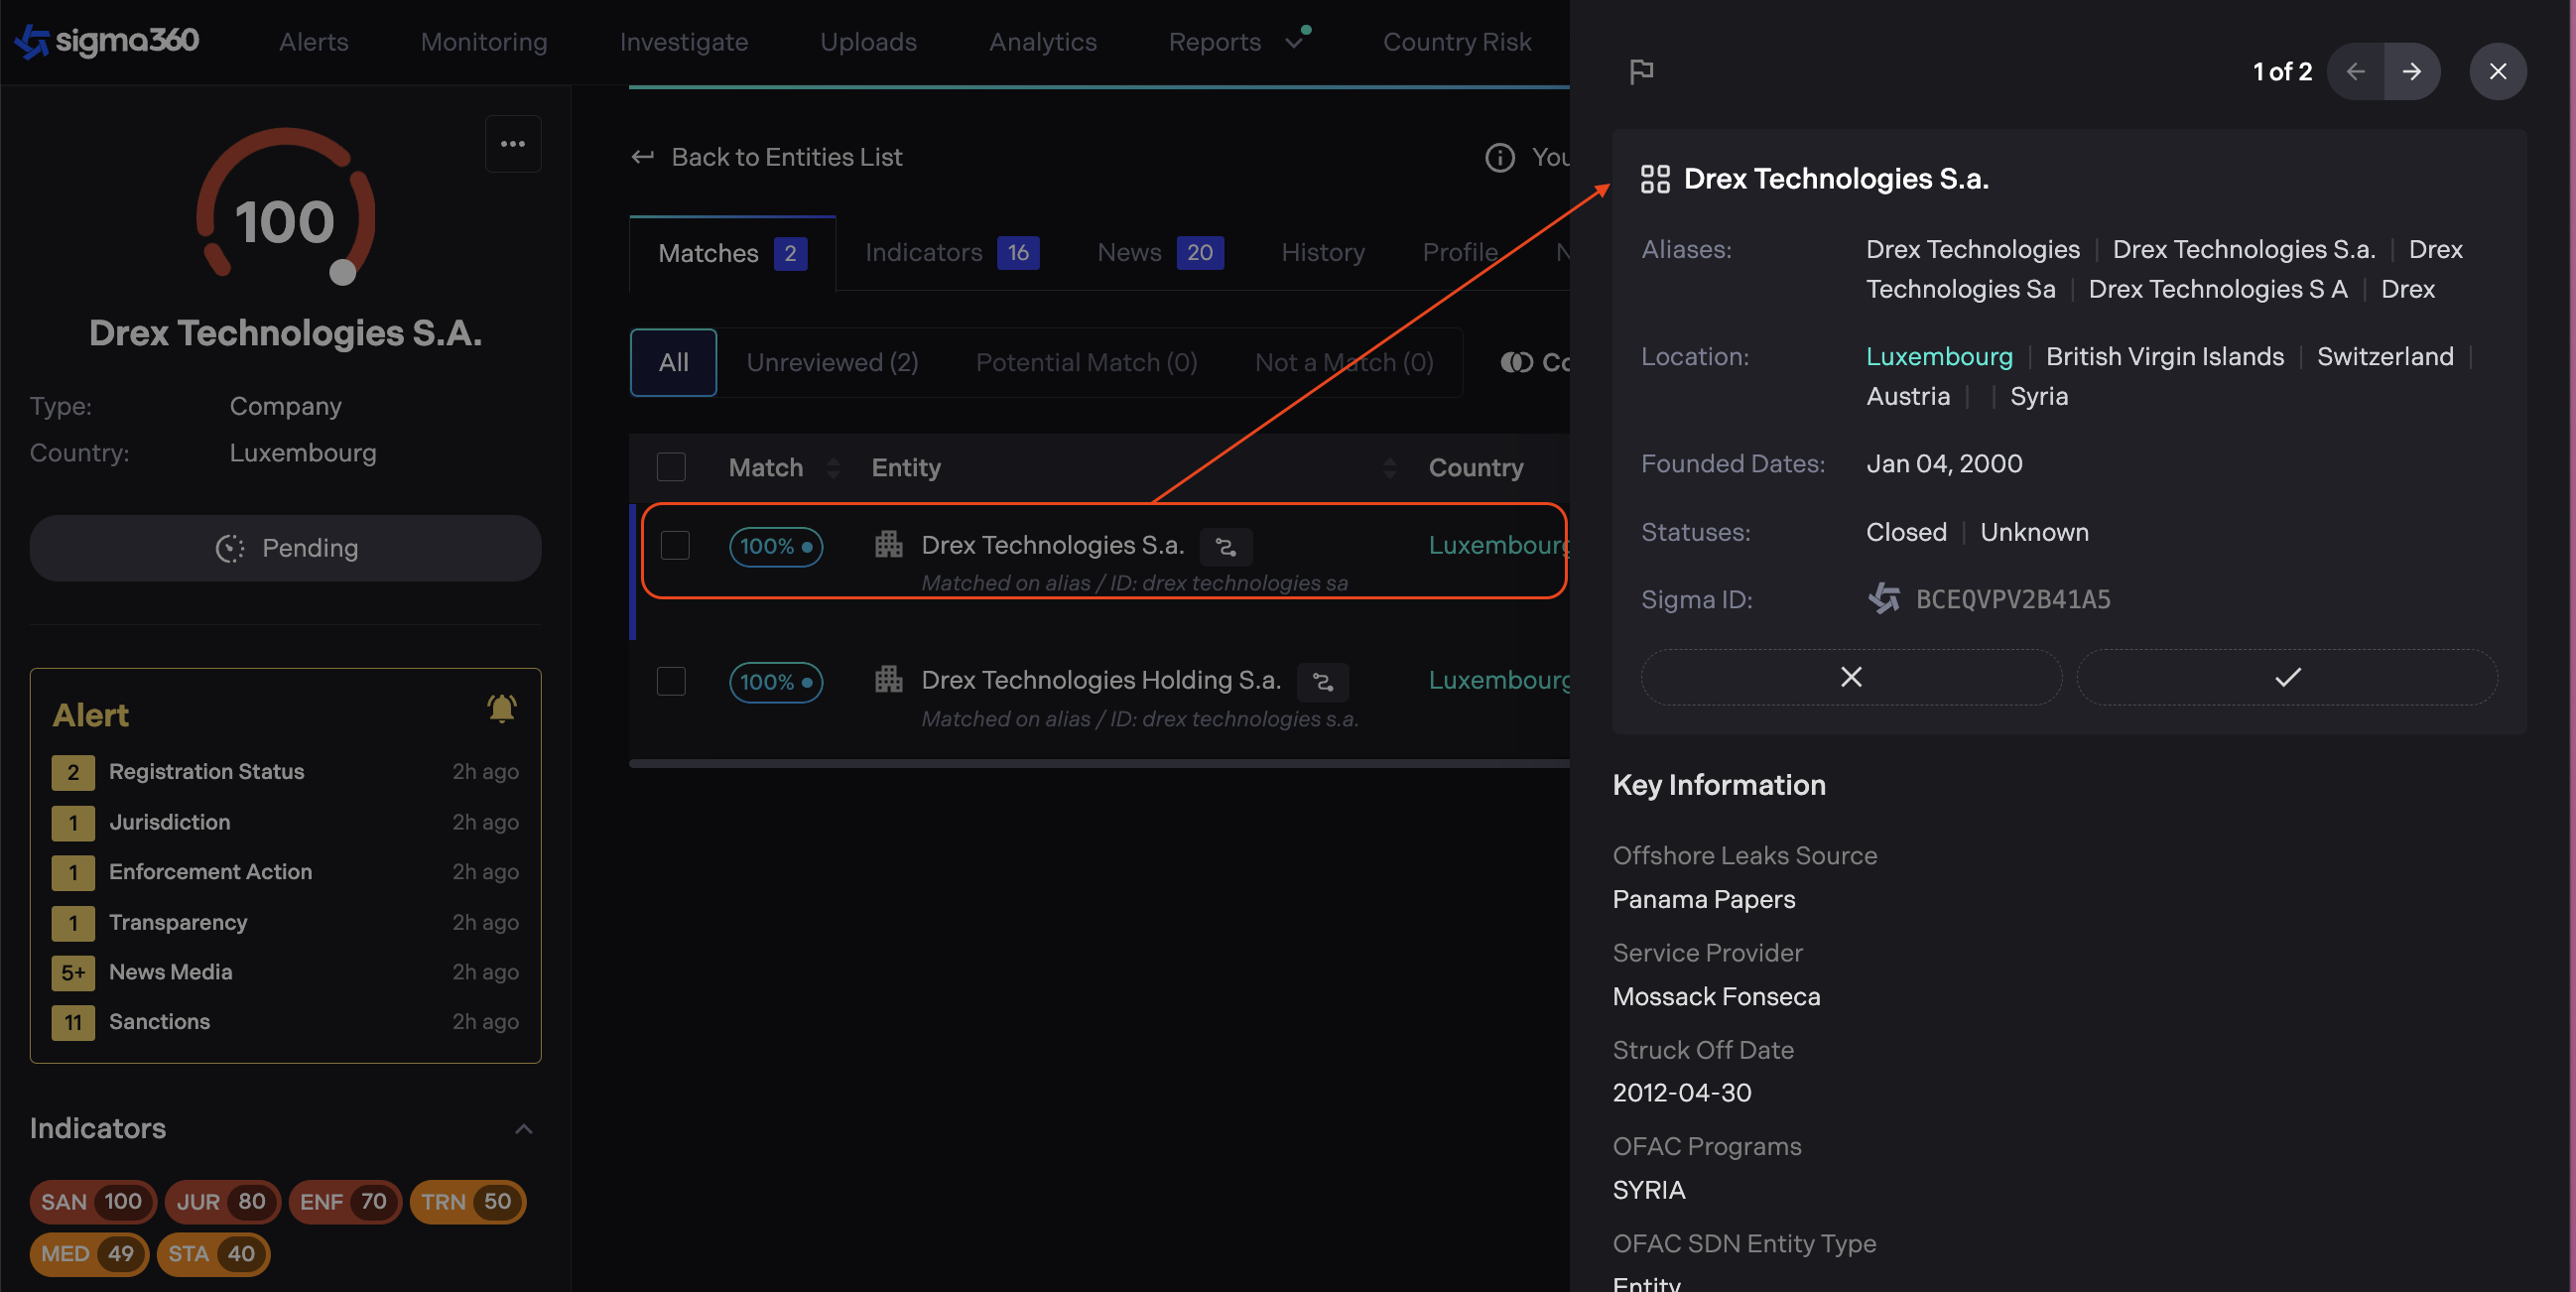
Clicking on a table row now opens a sliding panel from the right.
-
This panel provides detailed match information while keeping the user on the same page.
-
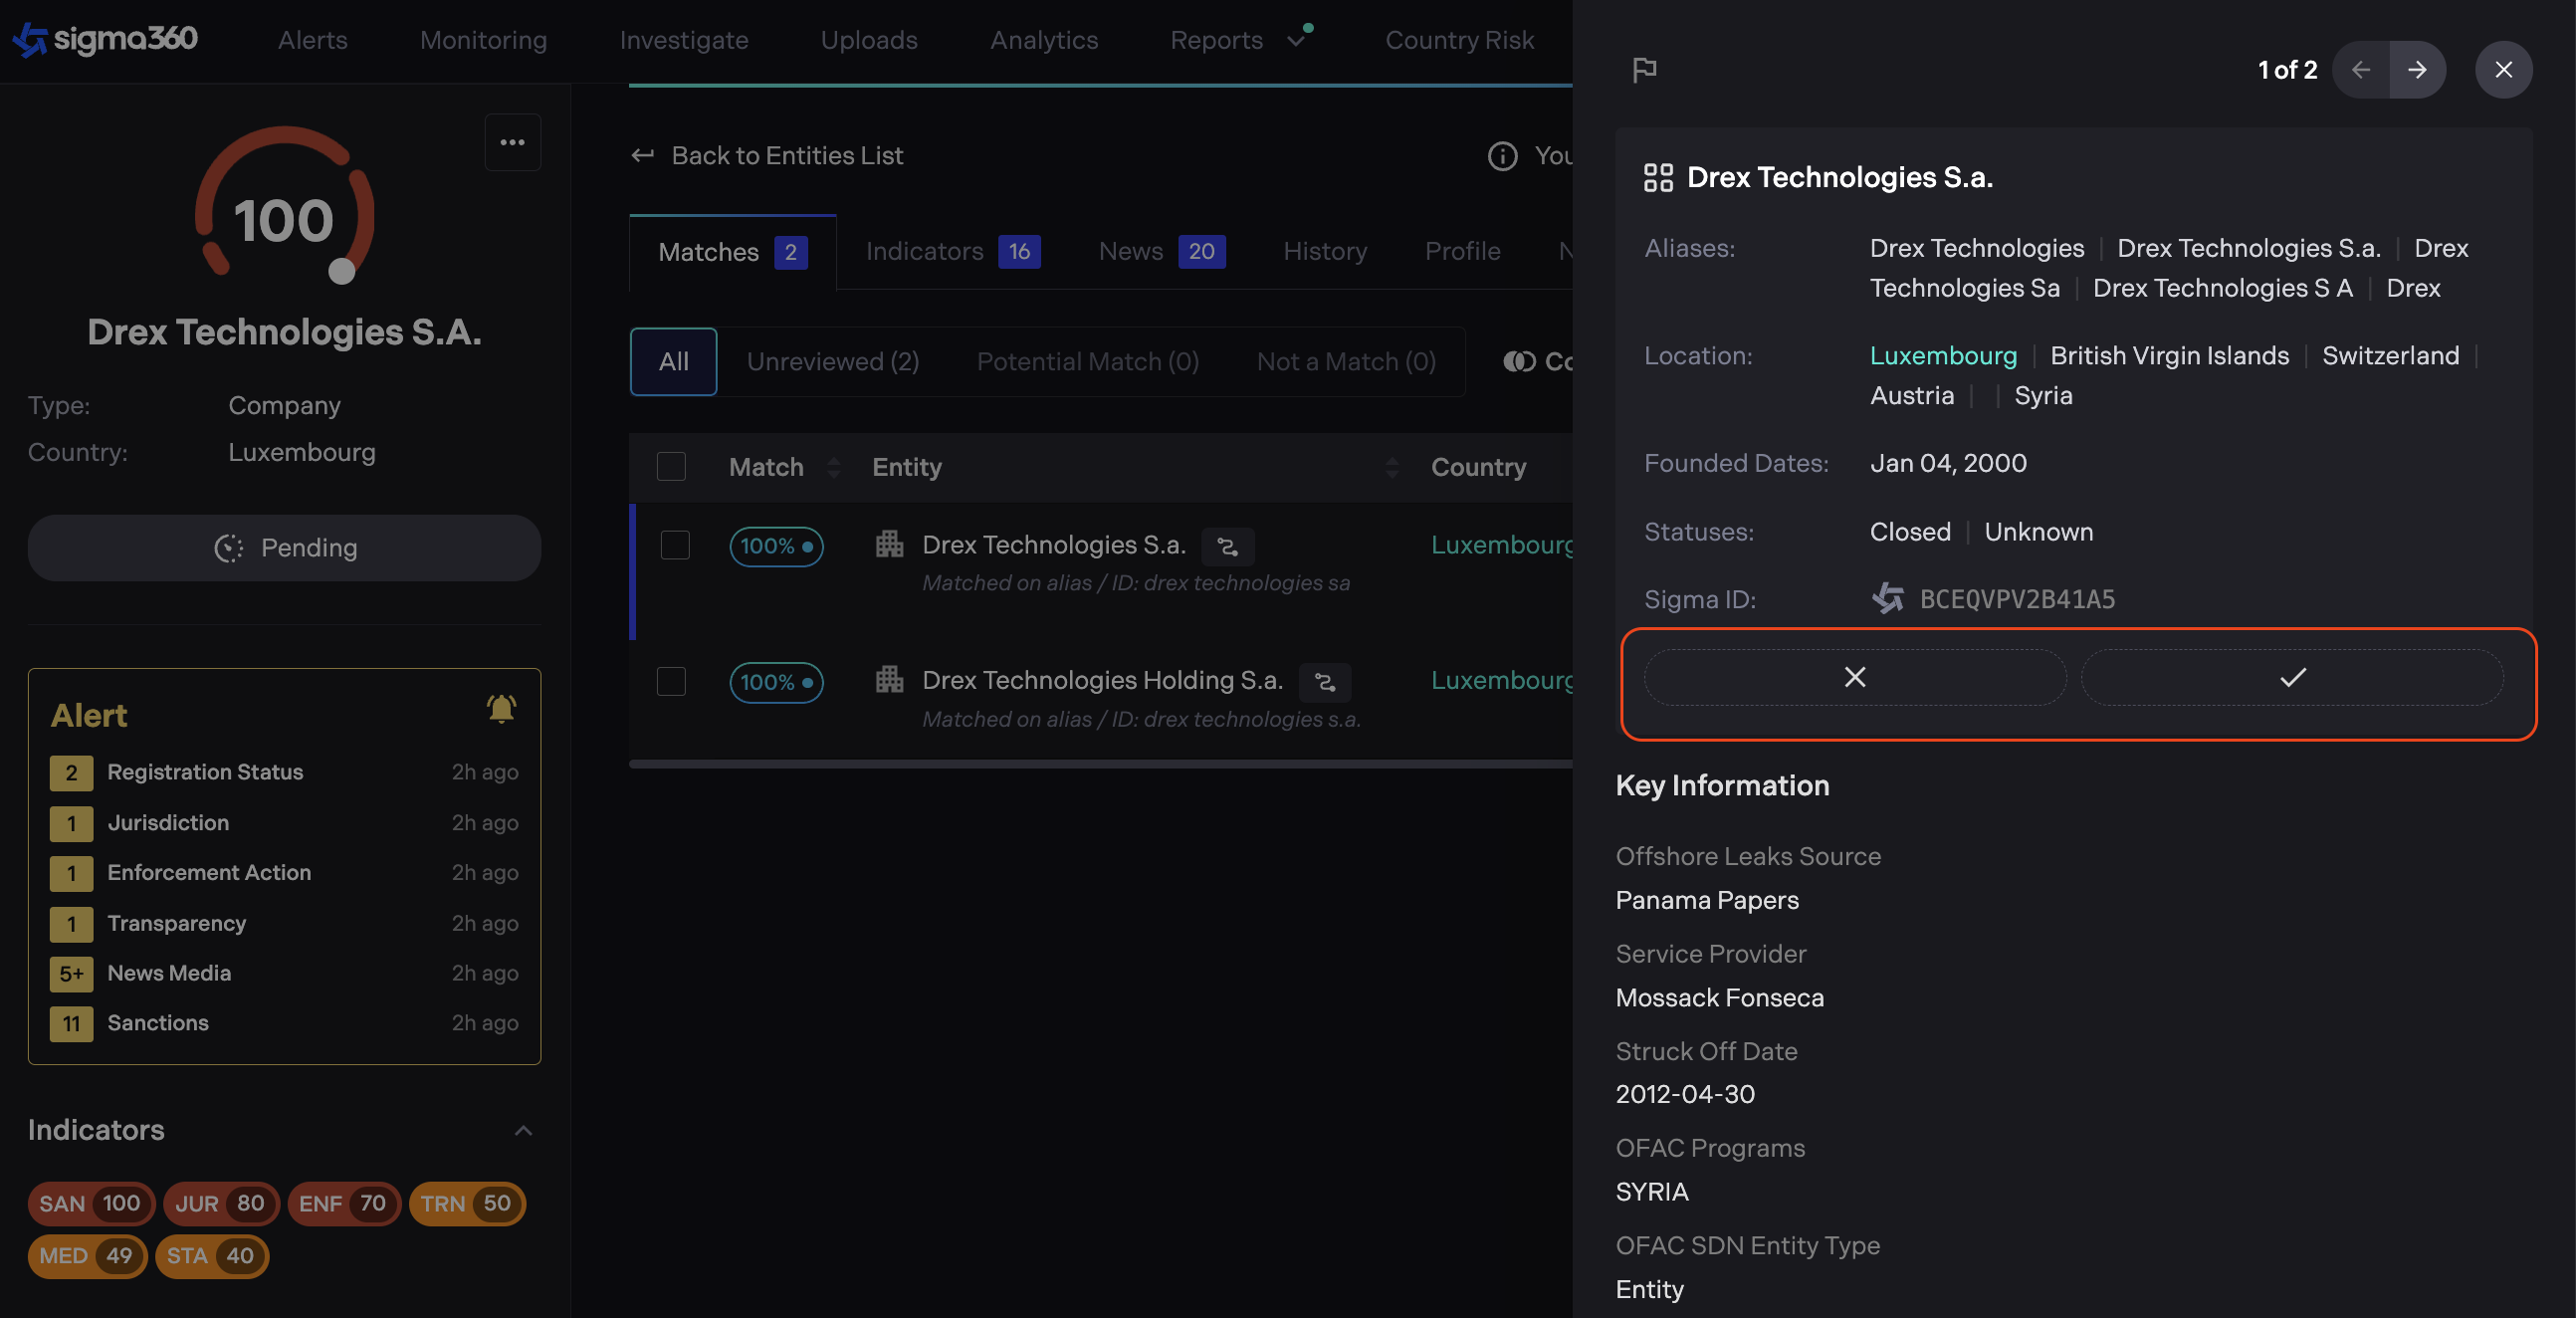
The match details panel now includes decisioning capabilities, allowing users to take action directly within the panel.
- Fields that match the user’s search (e.g., Alias, Date of Birth, Location) will now be highlighted for better visibility.
Indicators Decisioning
In the second step, users assess whether an individual risk attached to a match is valid, relevant, and/or significant enough to warrant escalation or other action according to institutional policies. Users can view additional details about the risk by clicking "Full Details".
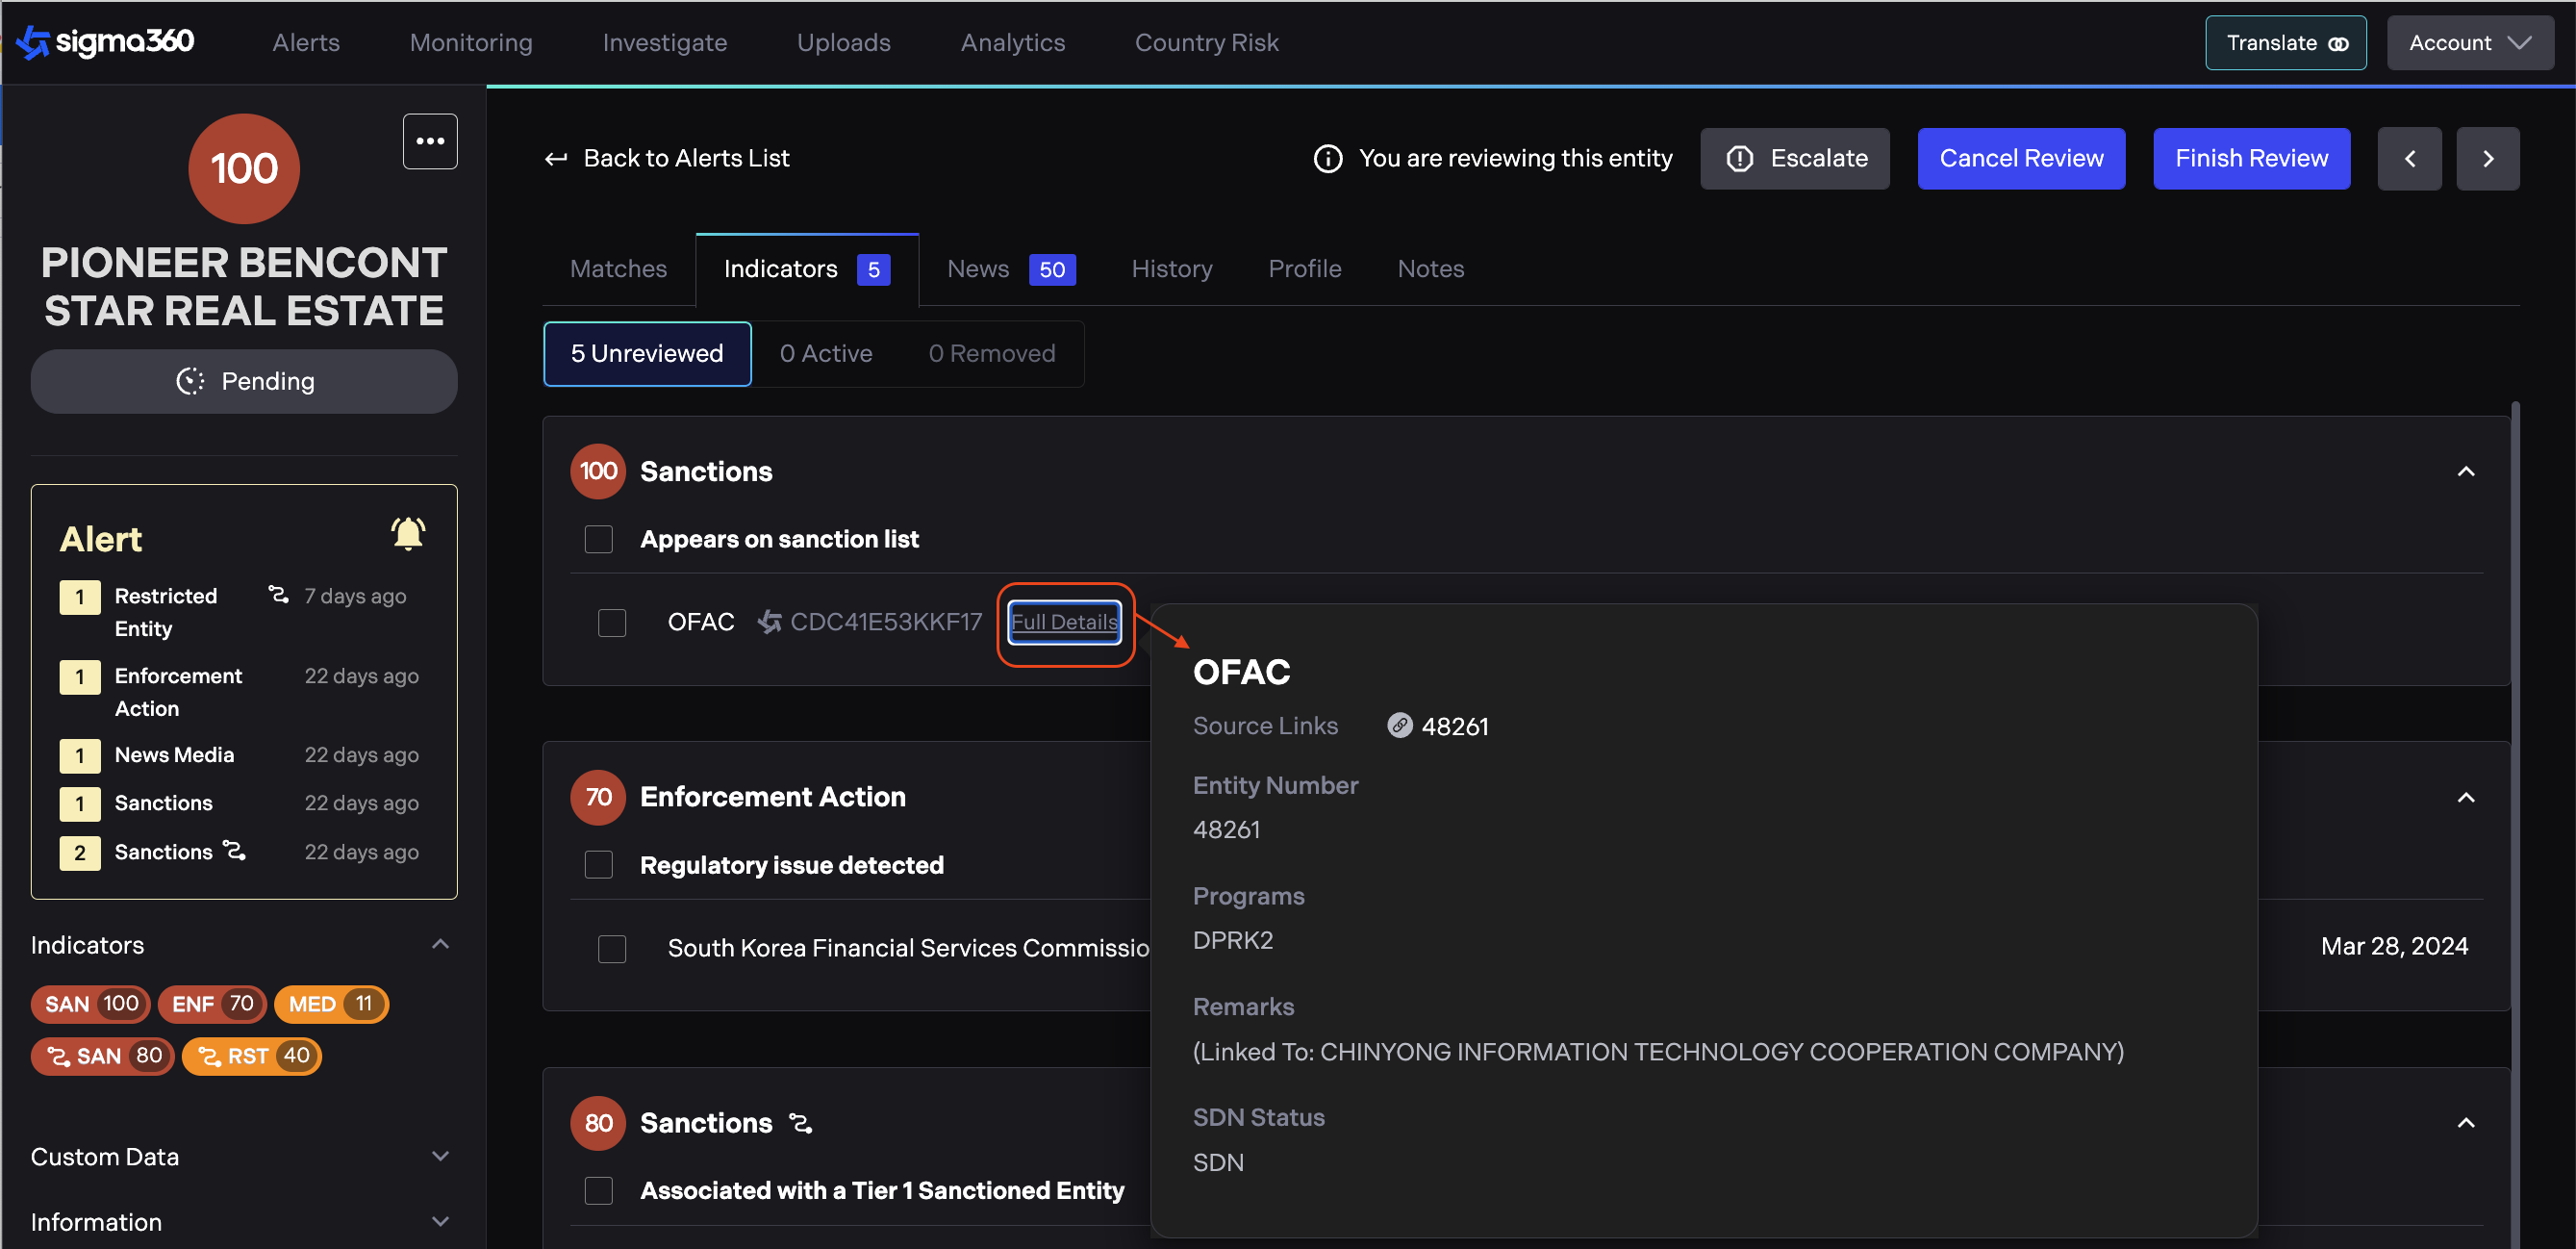
If a risk is relevant and significant, it should be marked as "Active".
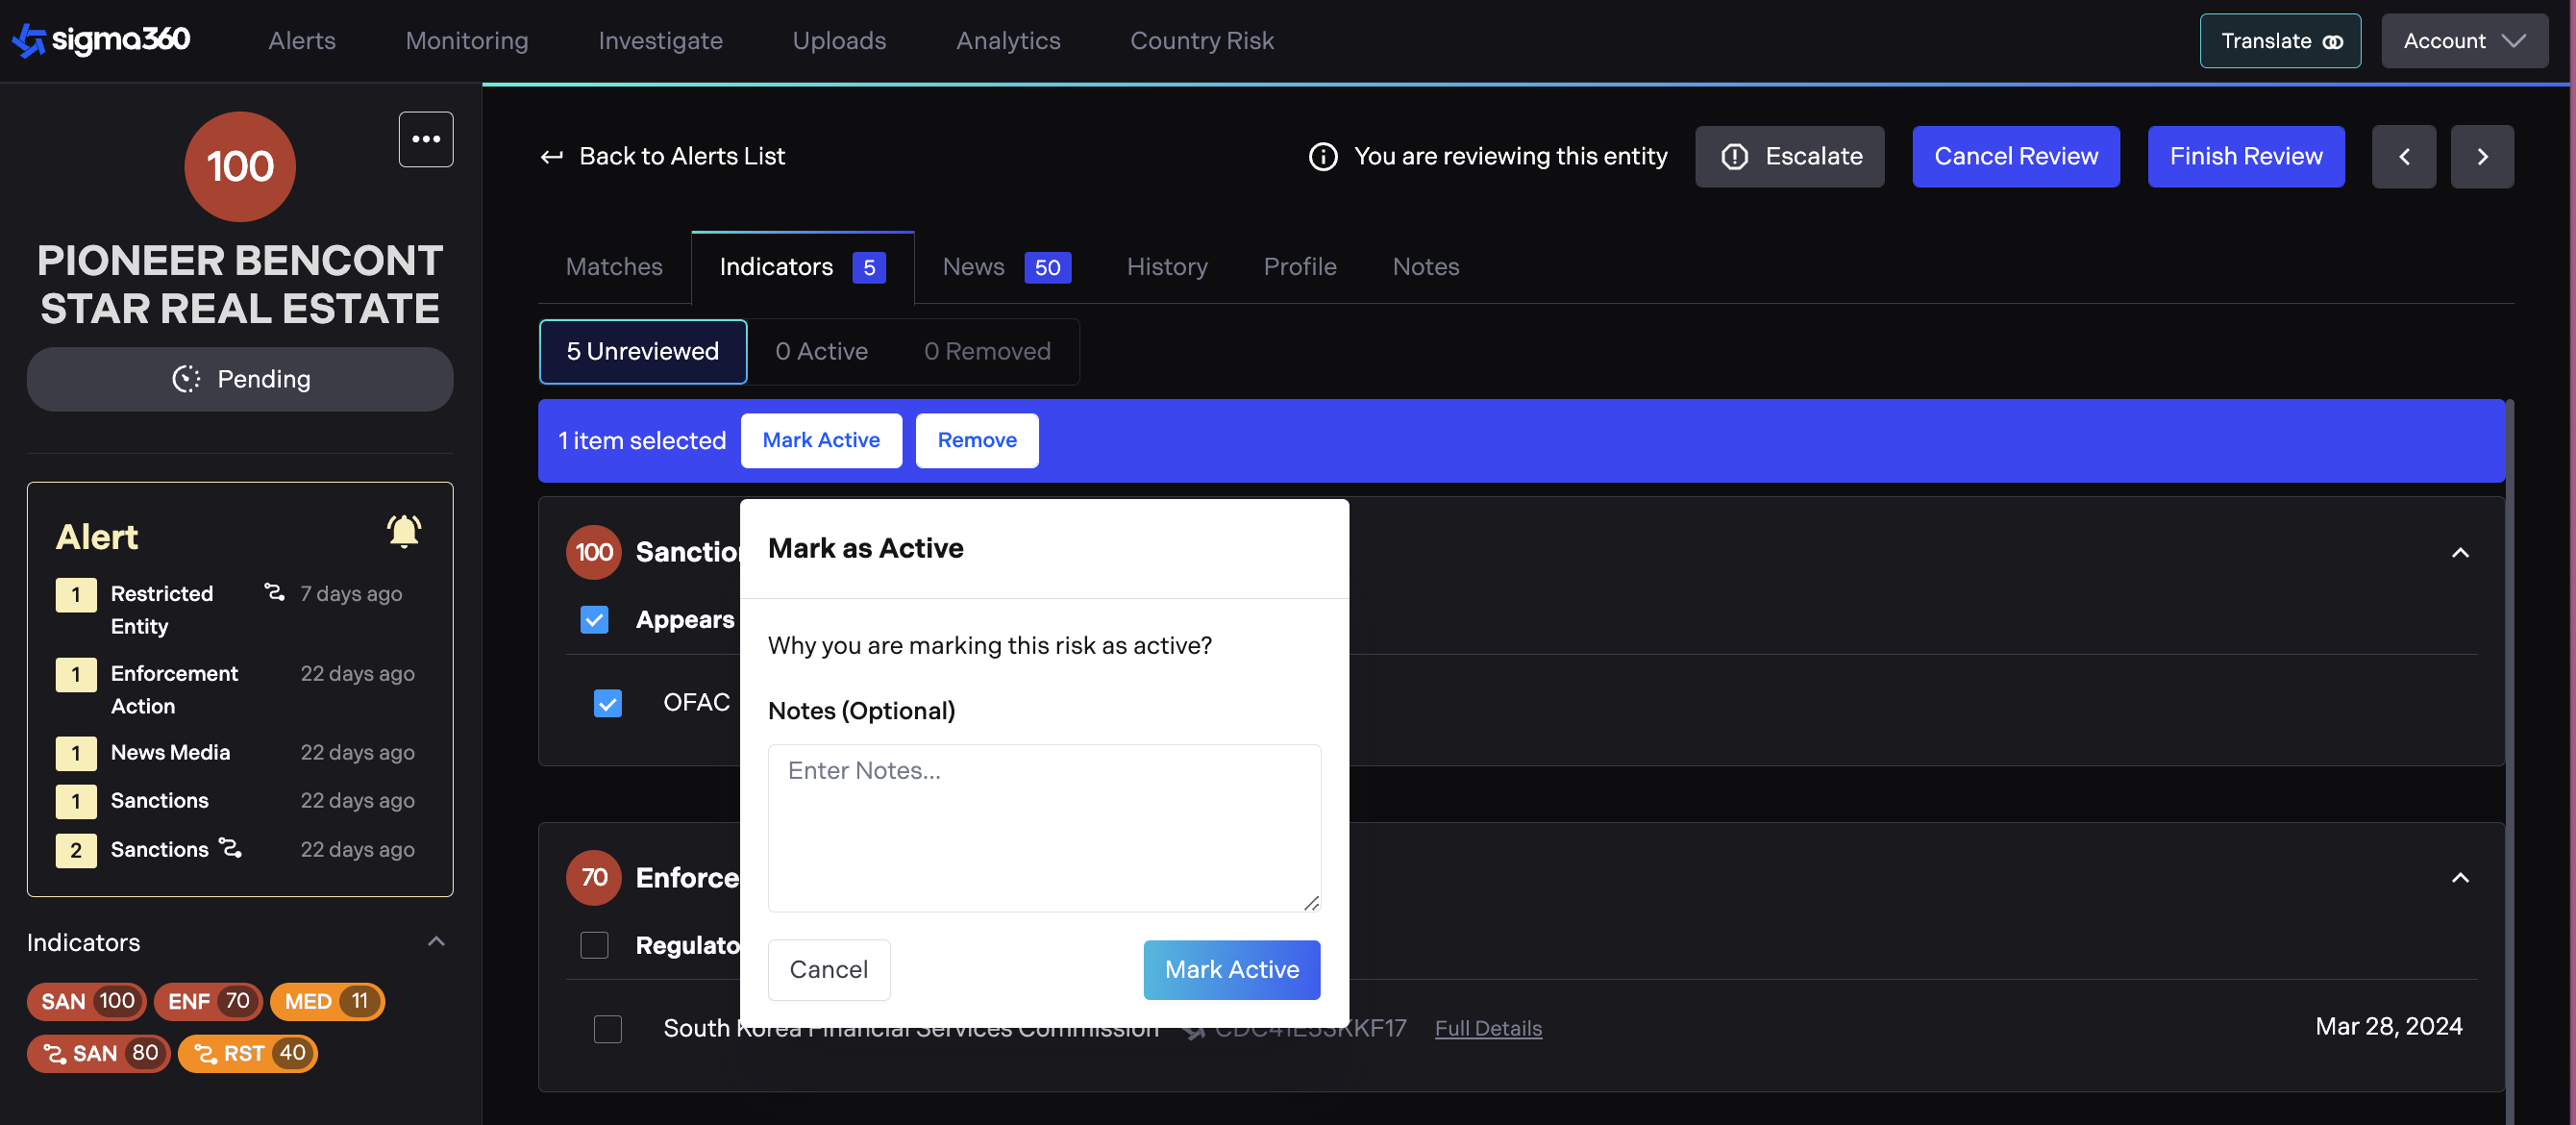
If the risk is deemed irrelevant or too insignificant, it can be "Removed".
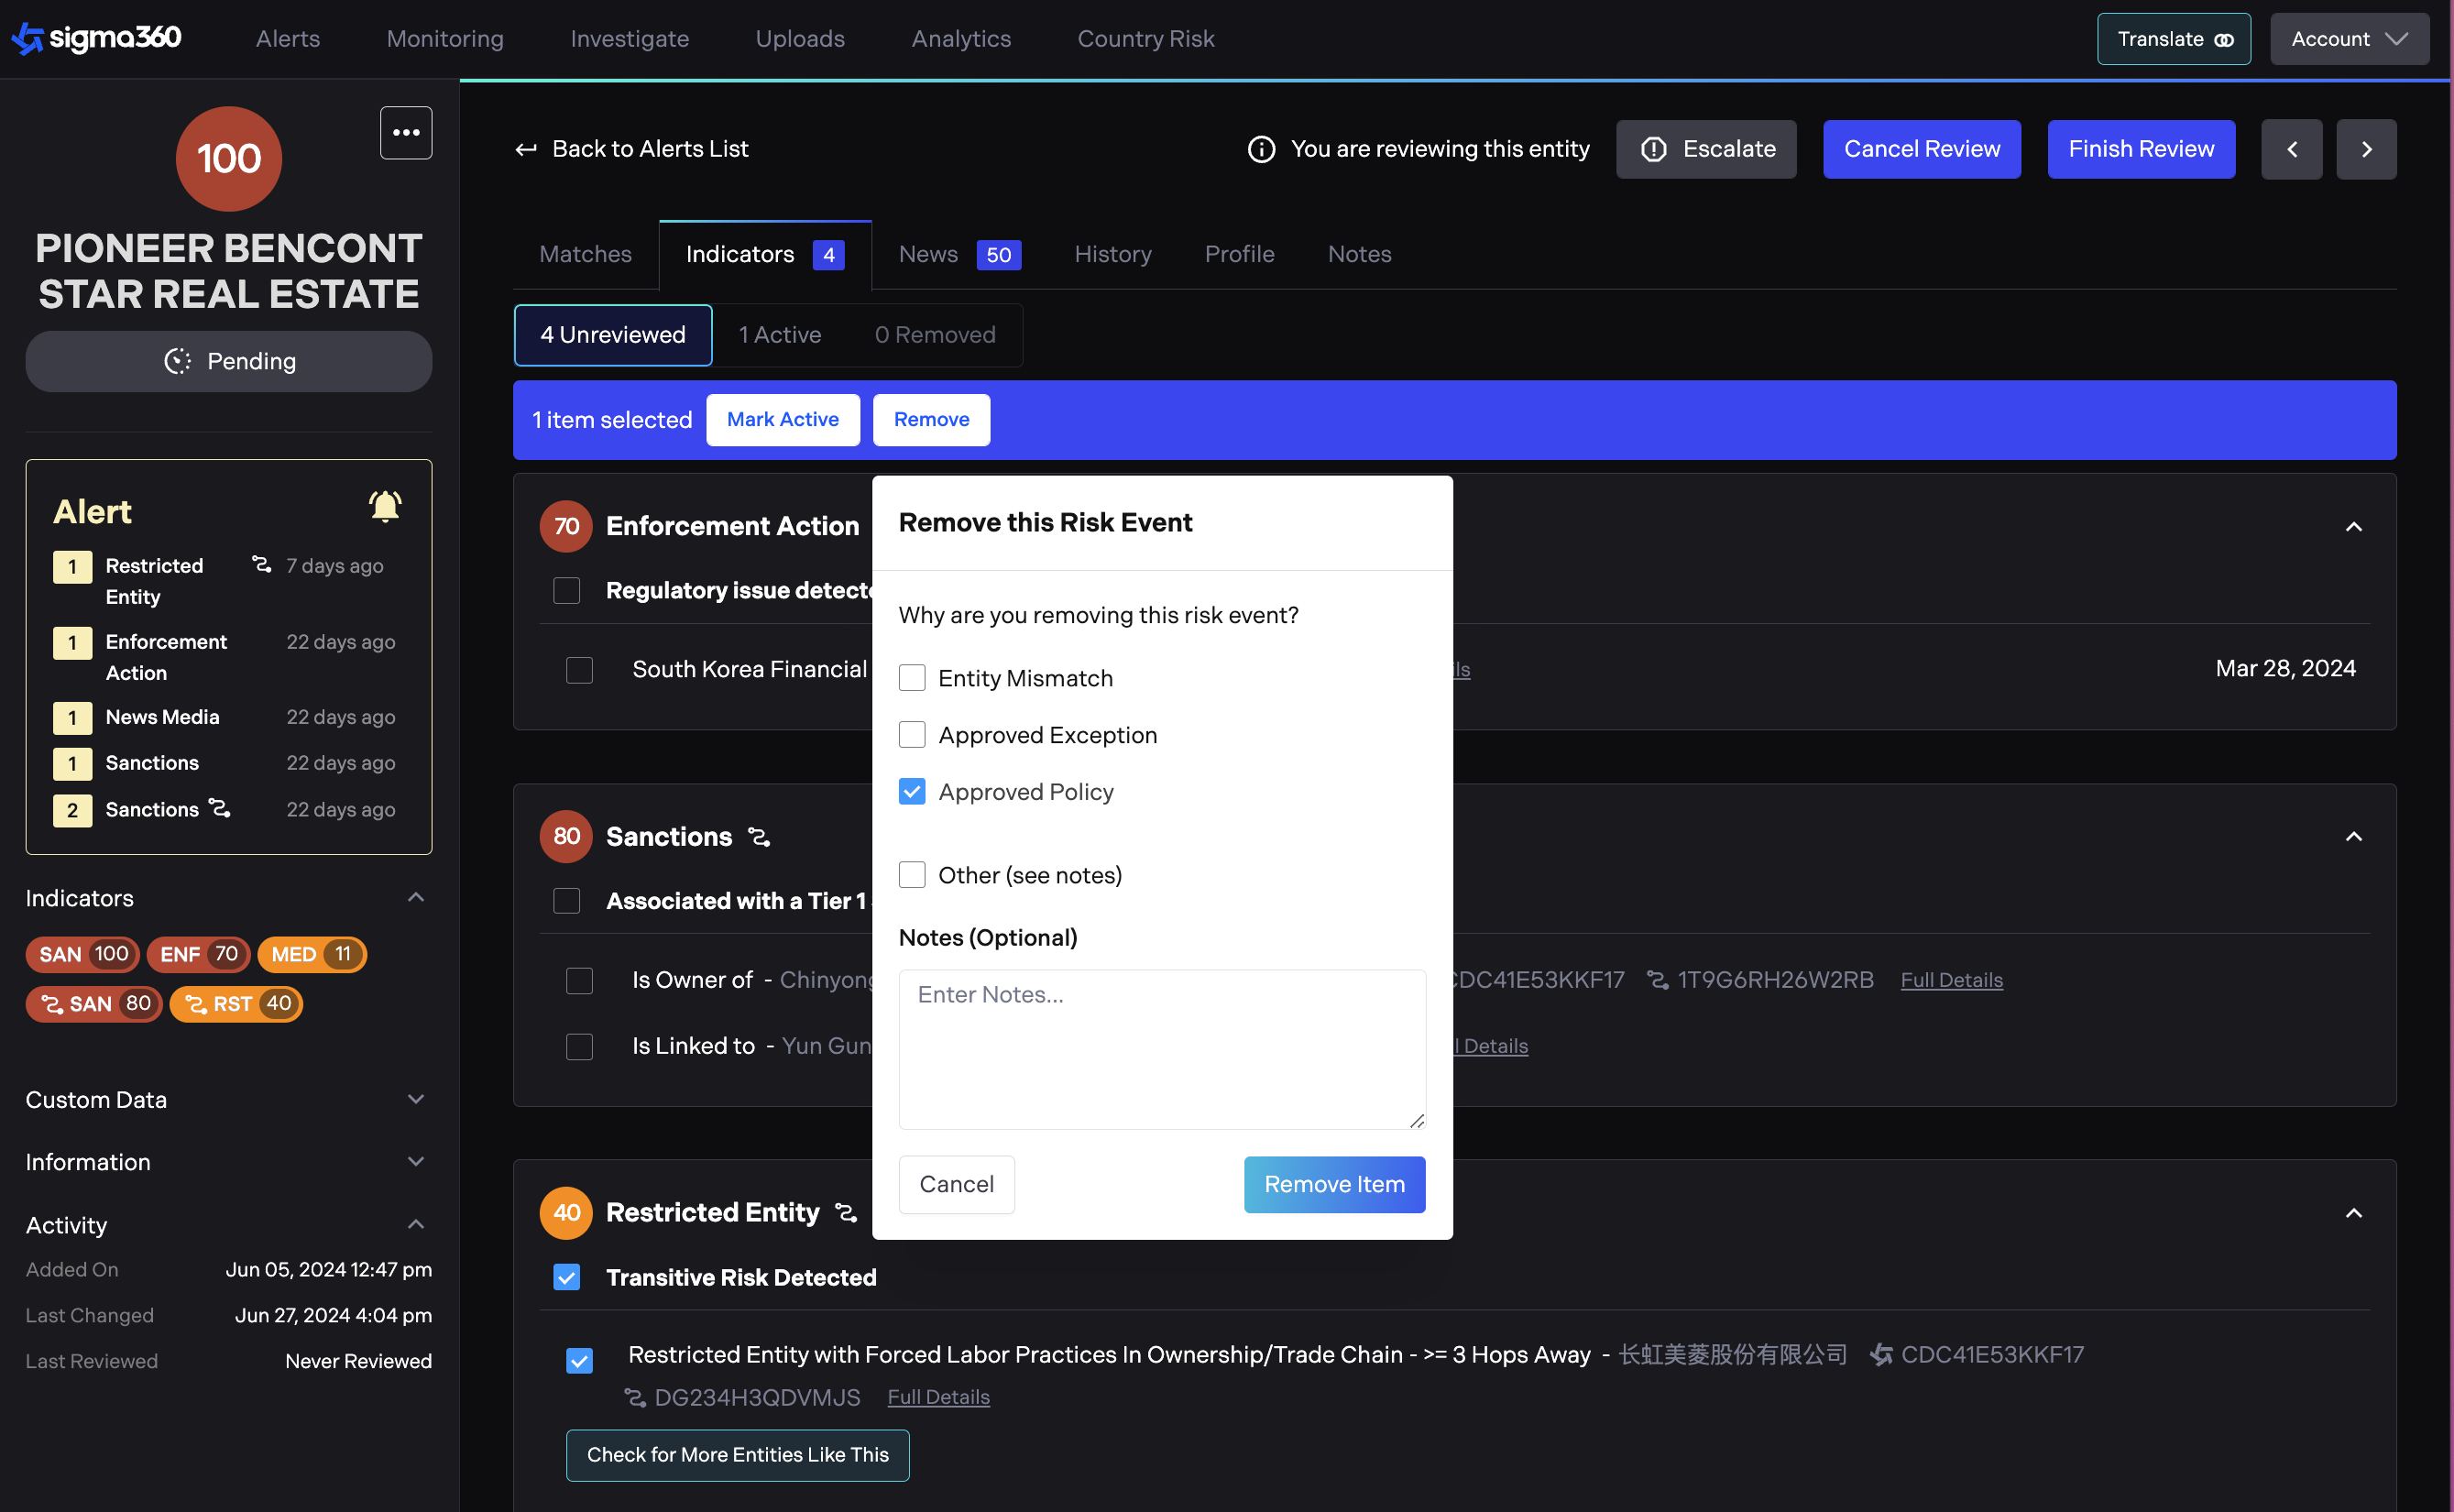
Users should provide the reason(s) for removing the risk event. The reasons include:
-
Entity Mismatch
-
Approved Exception
-
Approved policy
-
Other (with an option to enter notes)
Once risks are removed, they appear in the "Removed" tab and marked with a "Past Decision" badge.
News Media Decisioning
The third step involves evaluating individual articles to determine if a news event is relevant and material.

If a news event is relevant and material, it should be marked as active. If the news event is deemed irrelevant or too insignificant, it can be removed.
Users should provide the reason(s) for removing the news event. The reasons include:
-
Not My Entity - If the entity in the article is a different real world entity with the same name.
-
Article is not Risky - If the article doesn't contain material risks to your organization.
-
My Entity is not Risky - If your entity is not implicated by the risk of the article.
-
Approved Exception
-
Approved policy
-
Other (with an option to enter notes)
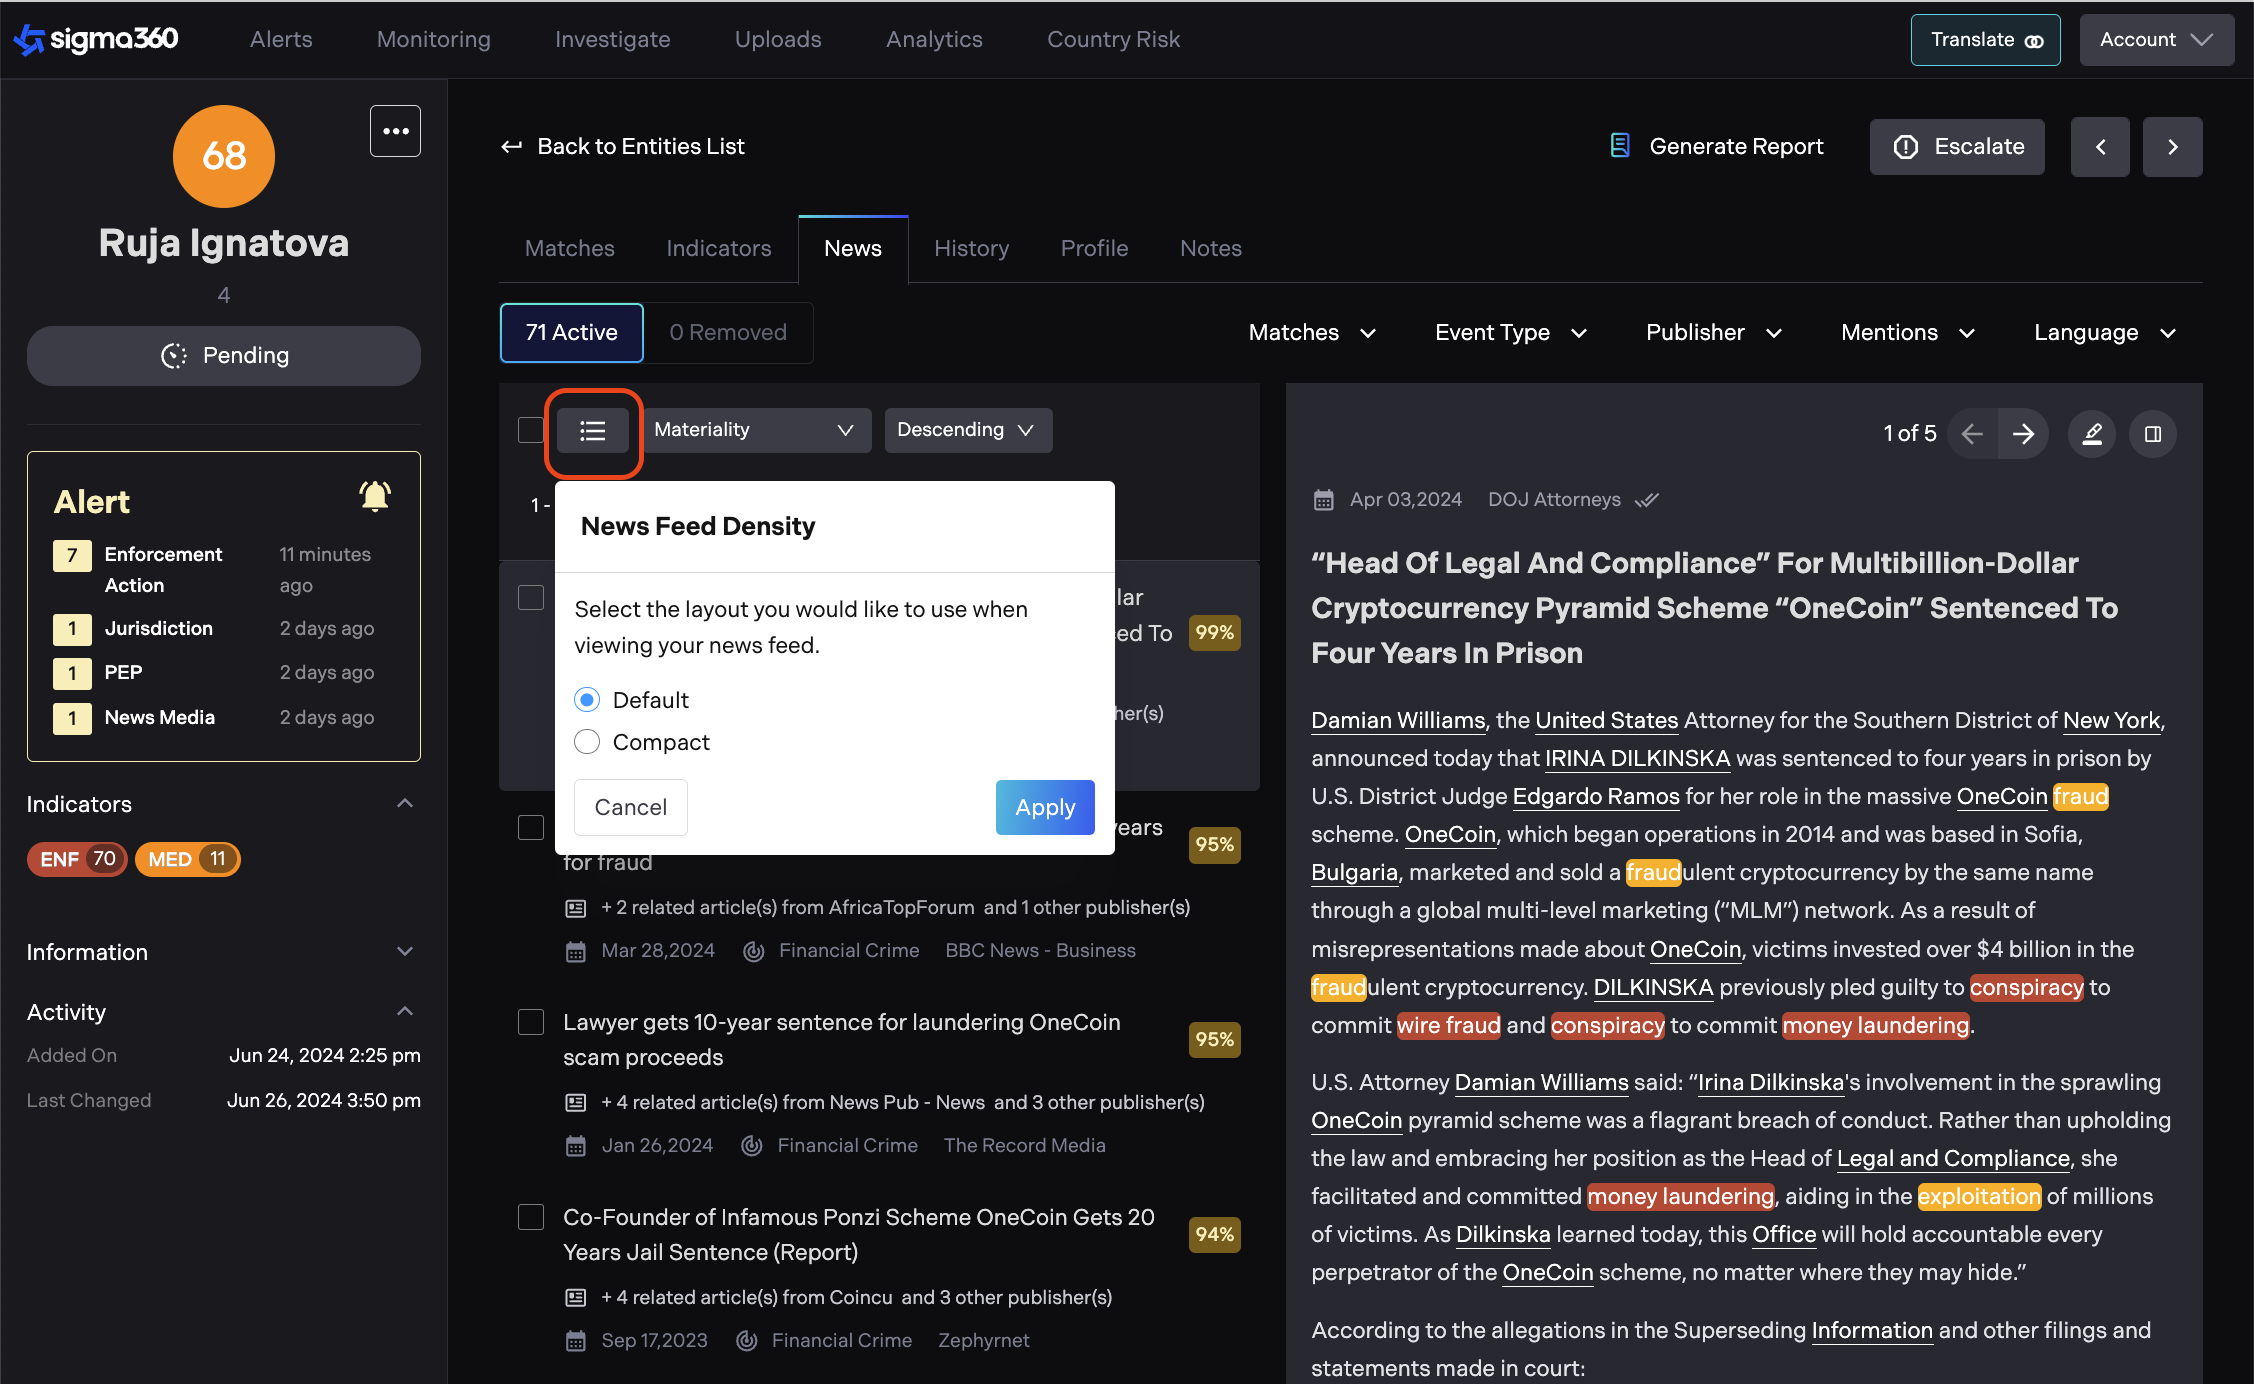
Layout Density
Users can adjust the layout density of the news list on the Entity page based on their preference. The default option will display the article title, publication date, event type, source, and materiality. The compact layout will display only the title and materiality for more streamlined viewing.
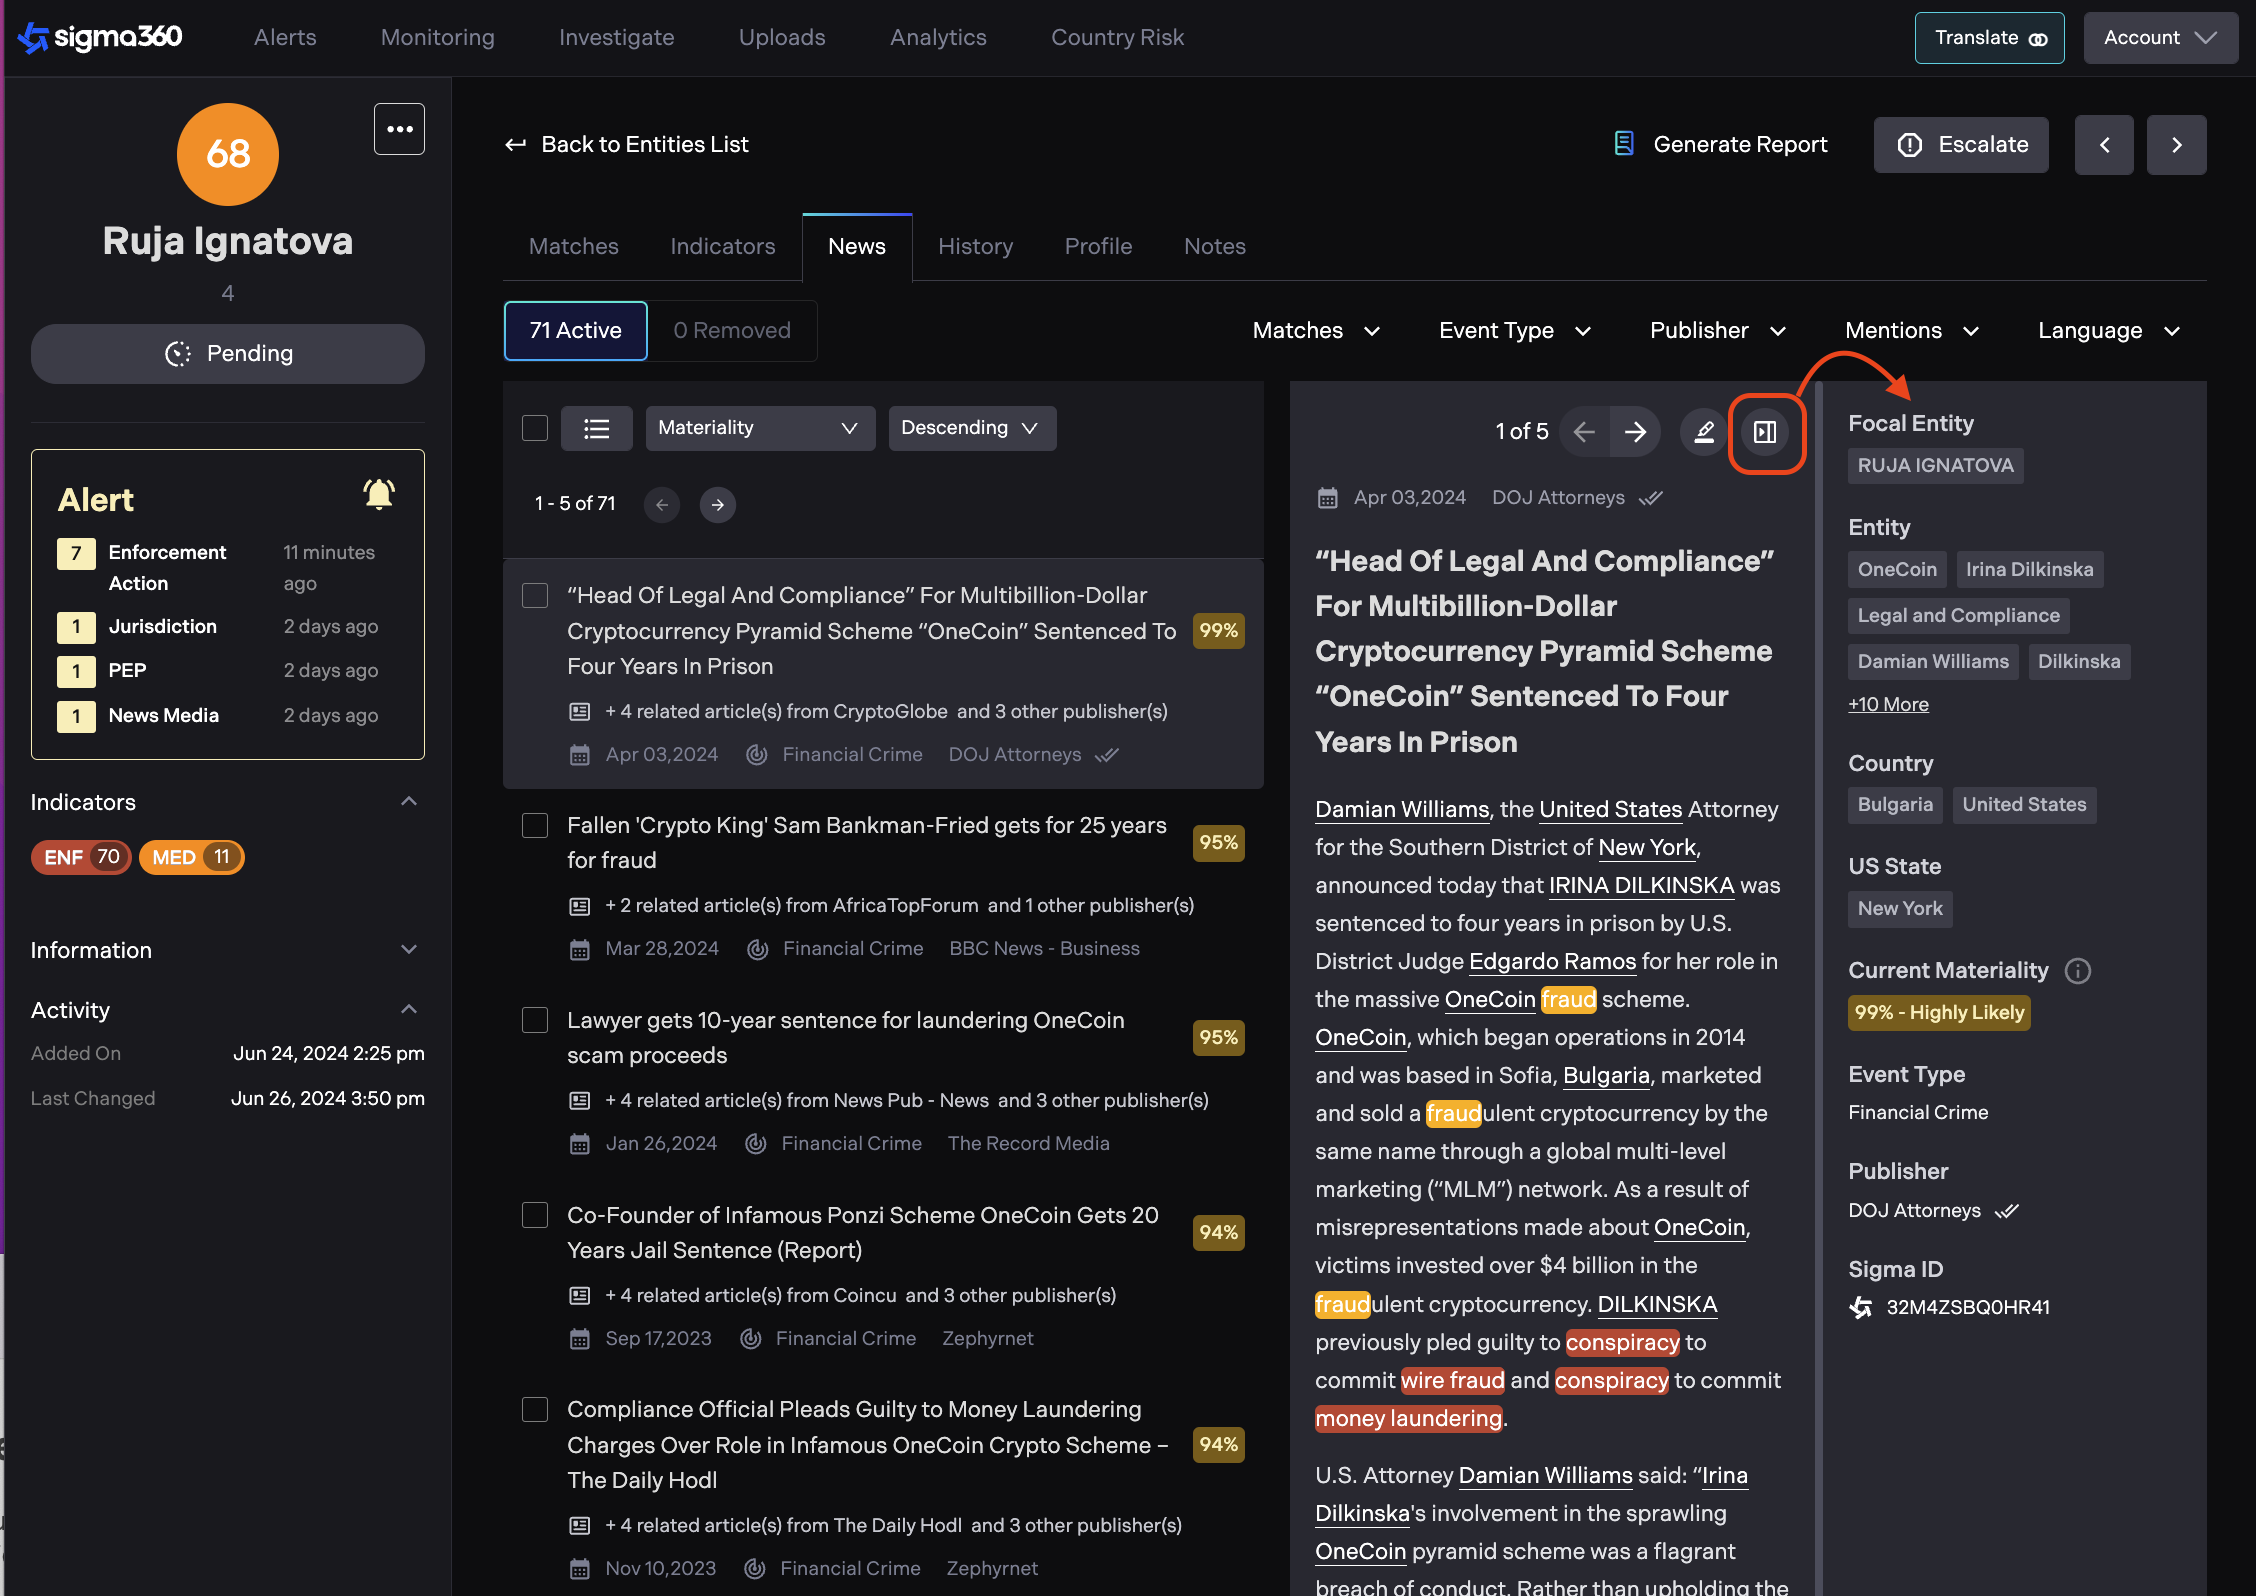
Informational Panel
Users can access article metadata in the right hand panel by clicking on the panel icon.
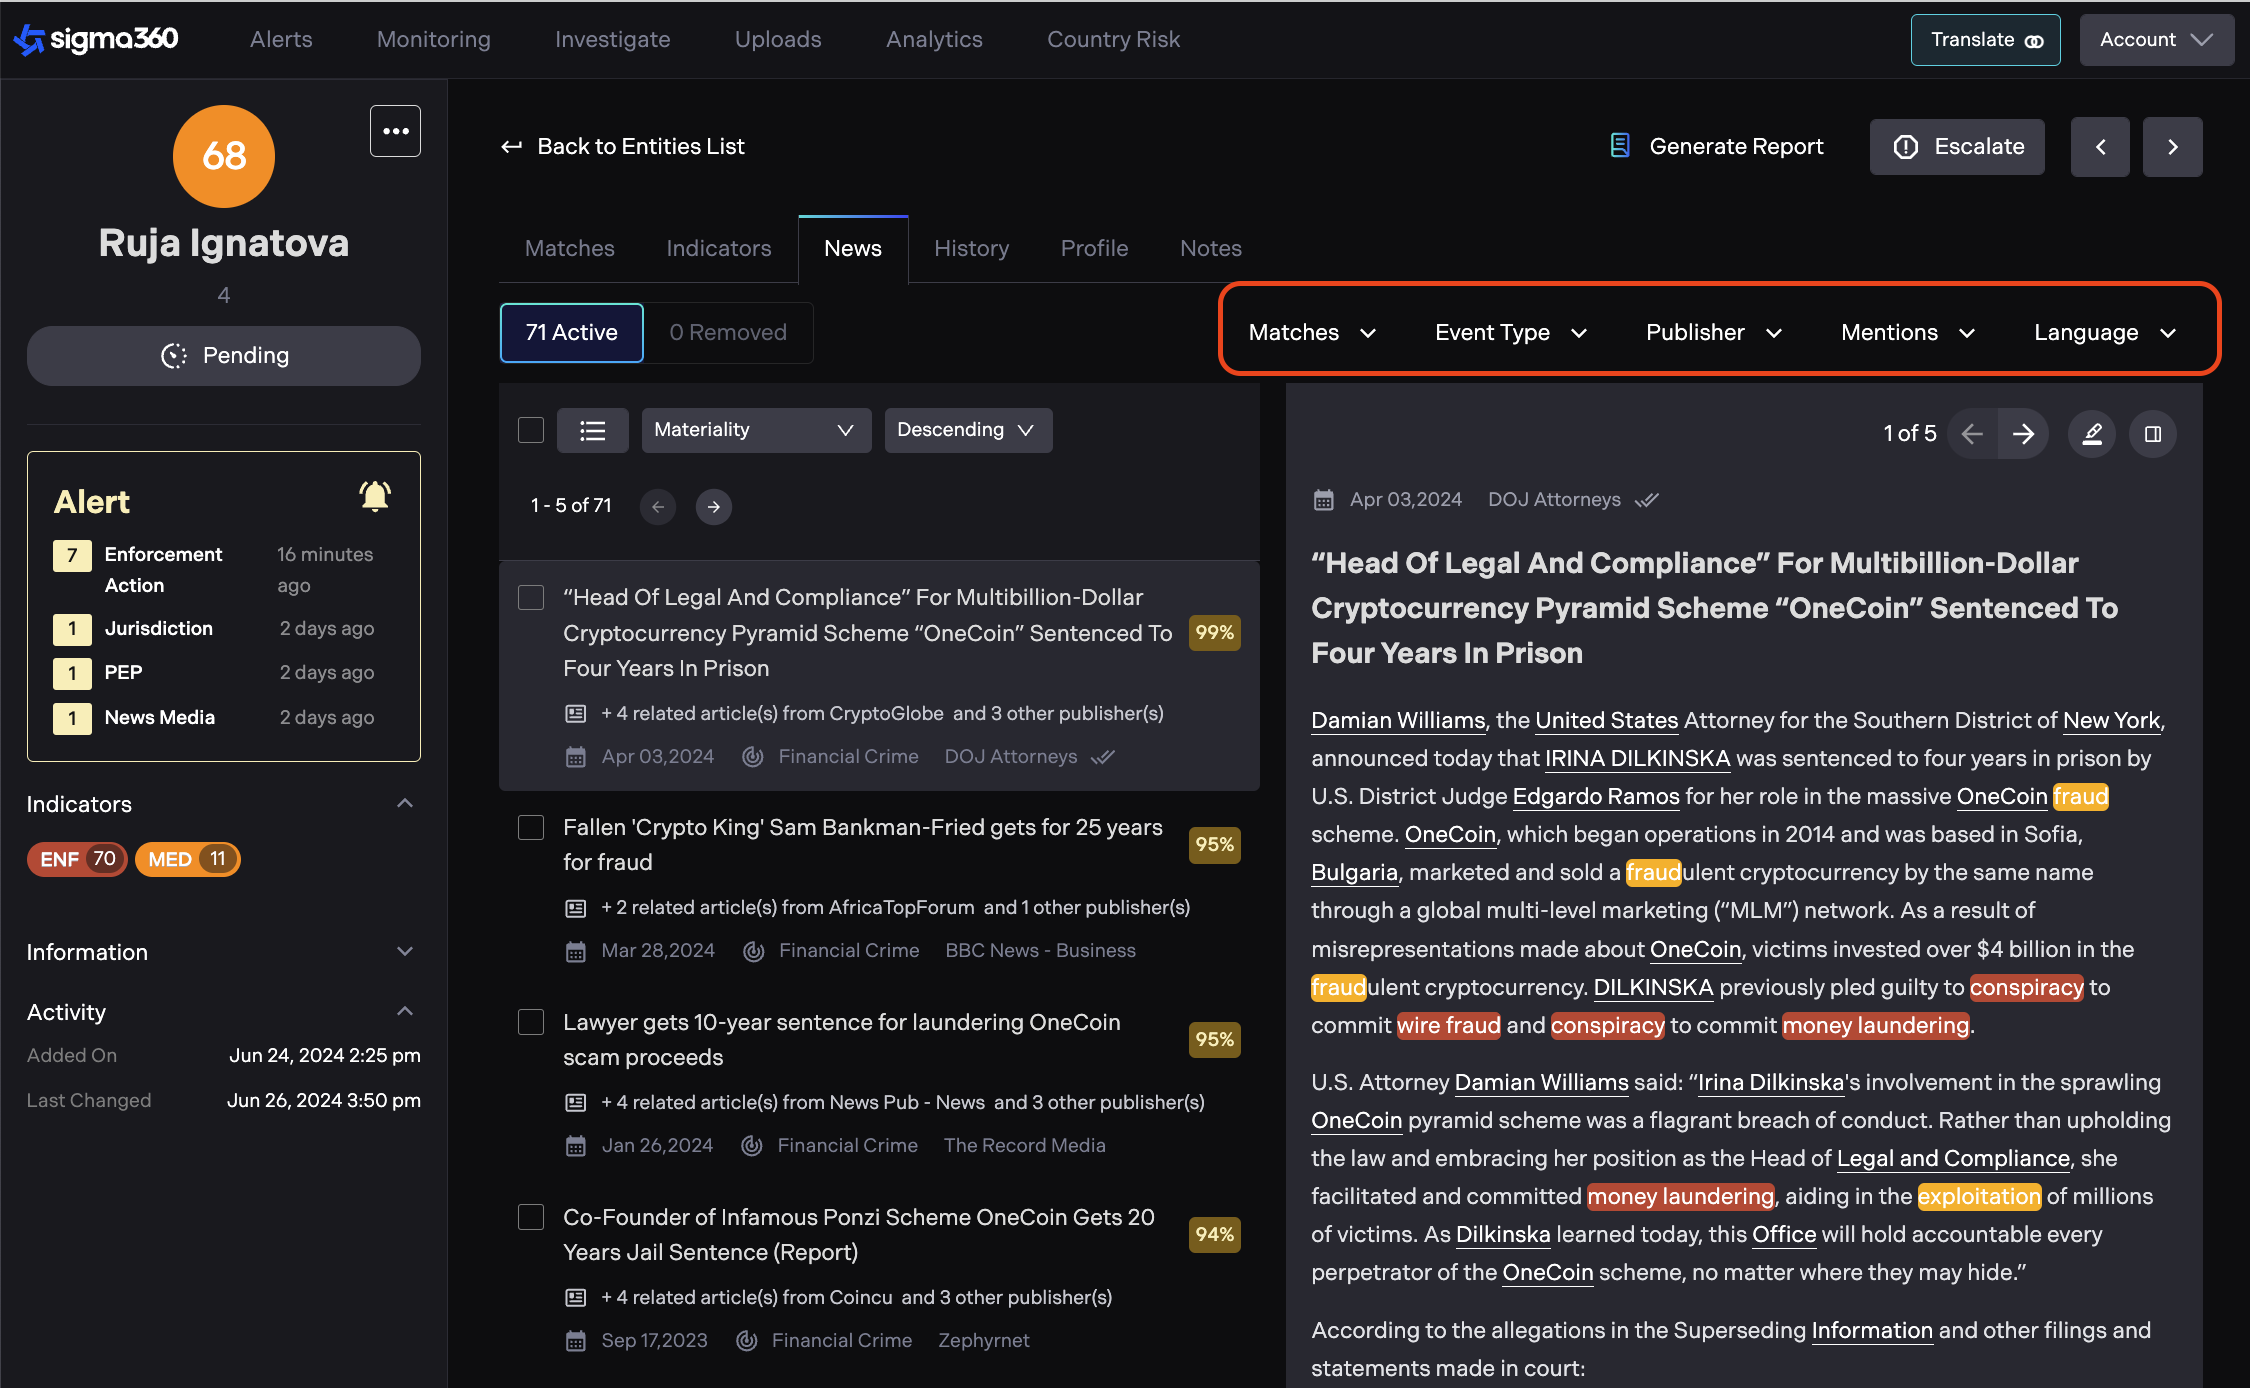
News Filters
All filter options displayed under five dropdown menus: Matches, Event Type, Publisher, Mentions, Language.
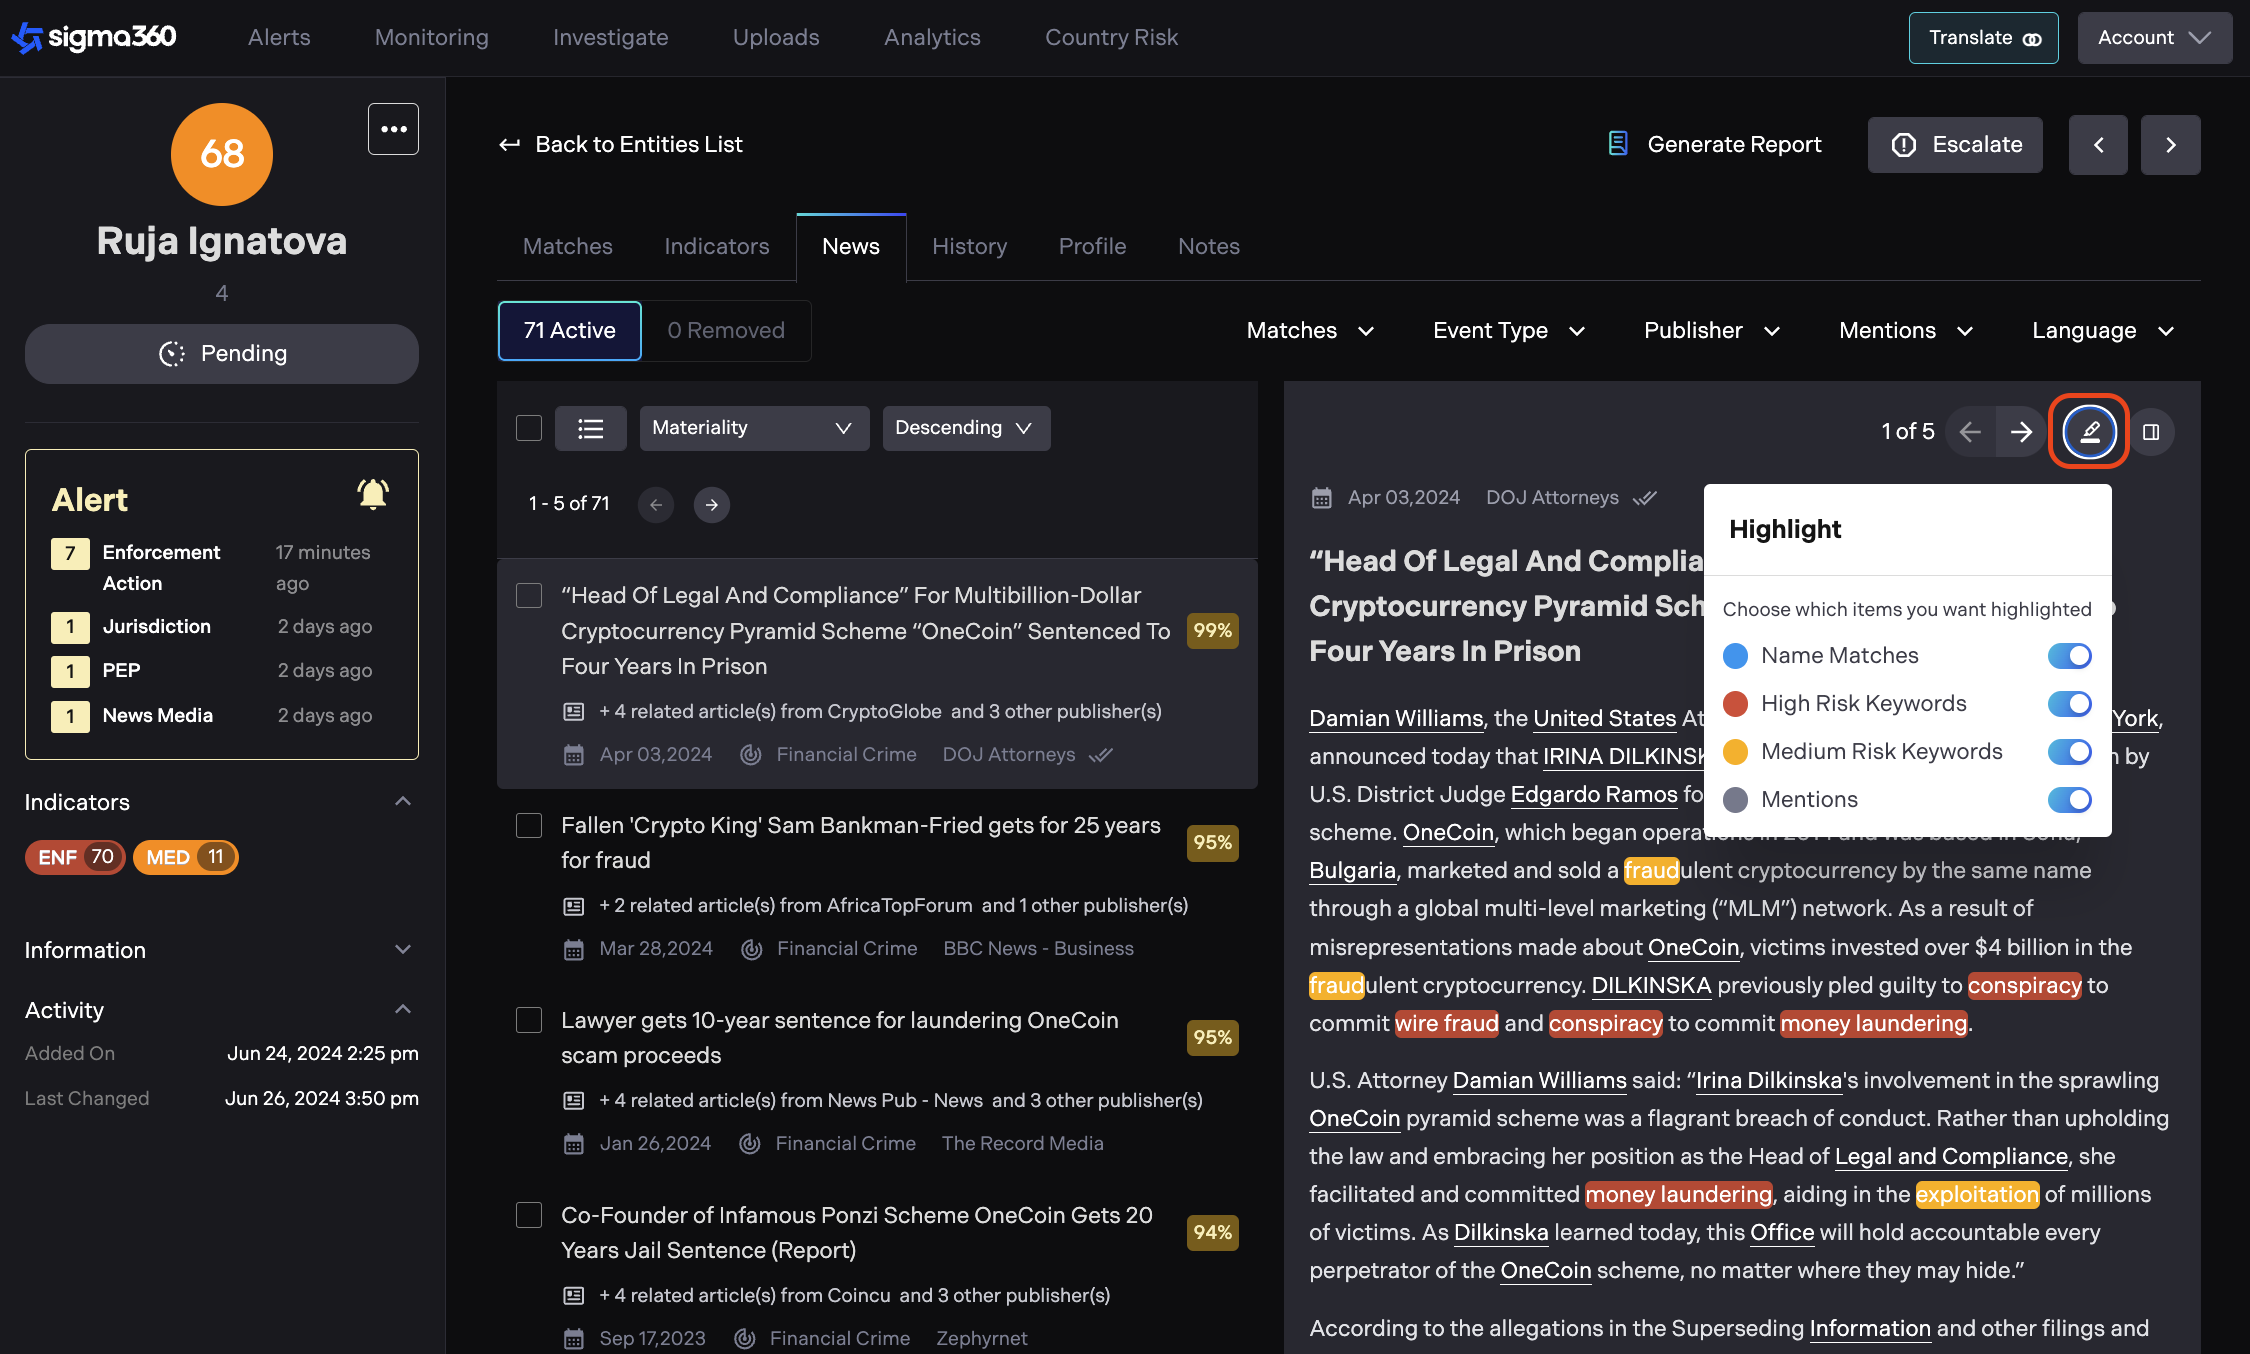
Highlight Configuration
The news viewer highlight function is configurable, allowing users to selectively choose which types of information they want to highlight in the news article. By toggling these options on or off, users can customize their view to highlight the information most relevant to them.
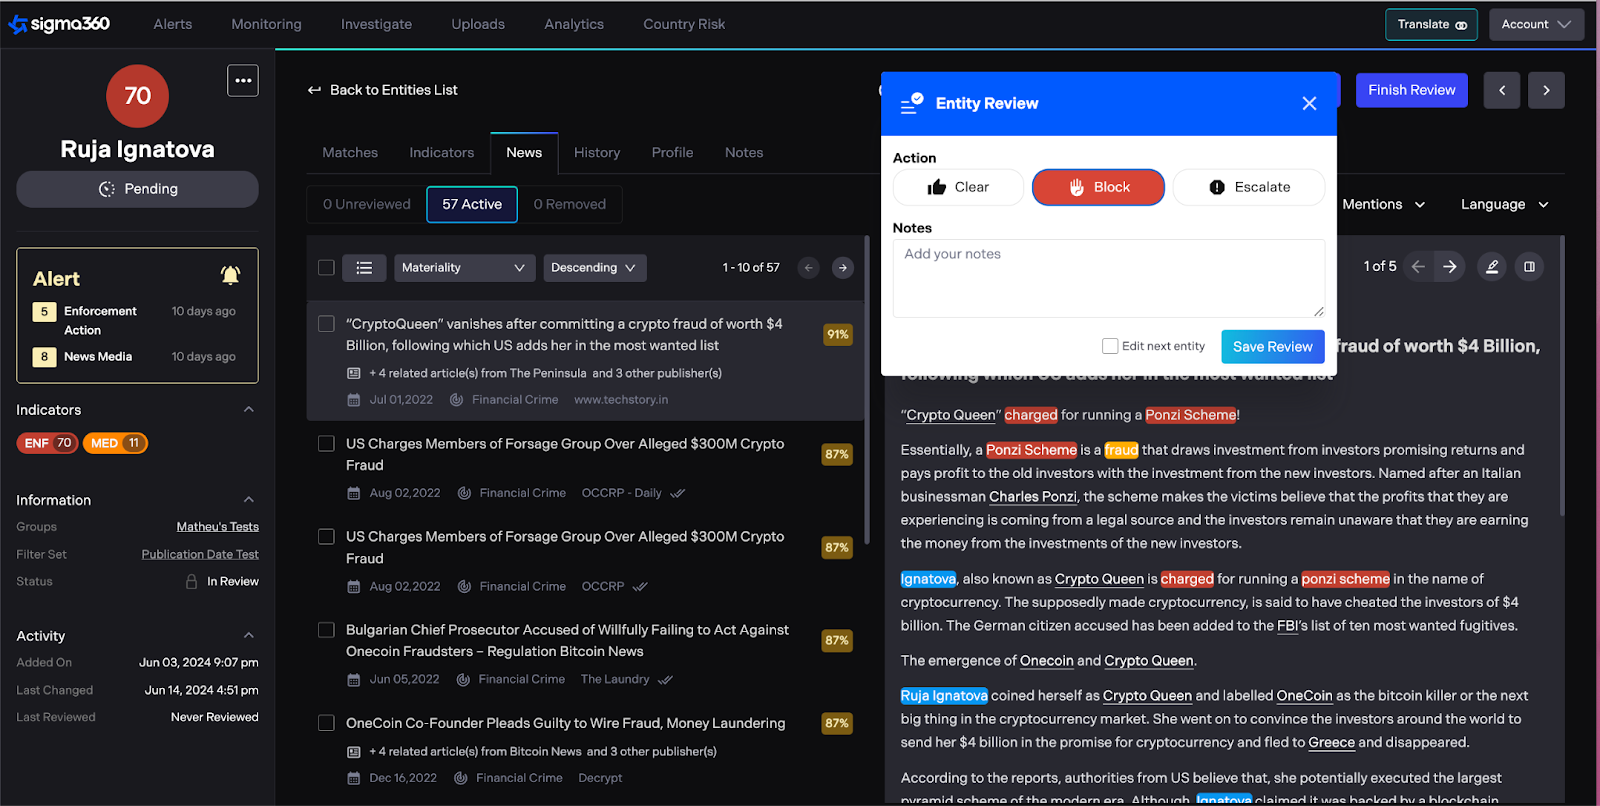
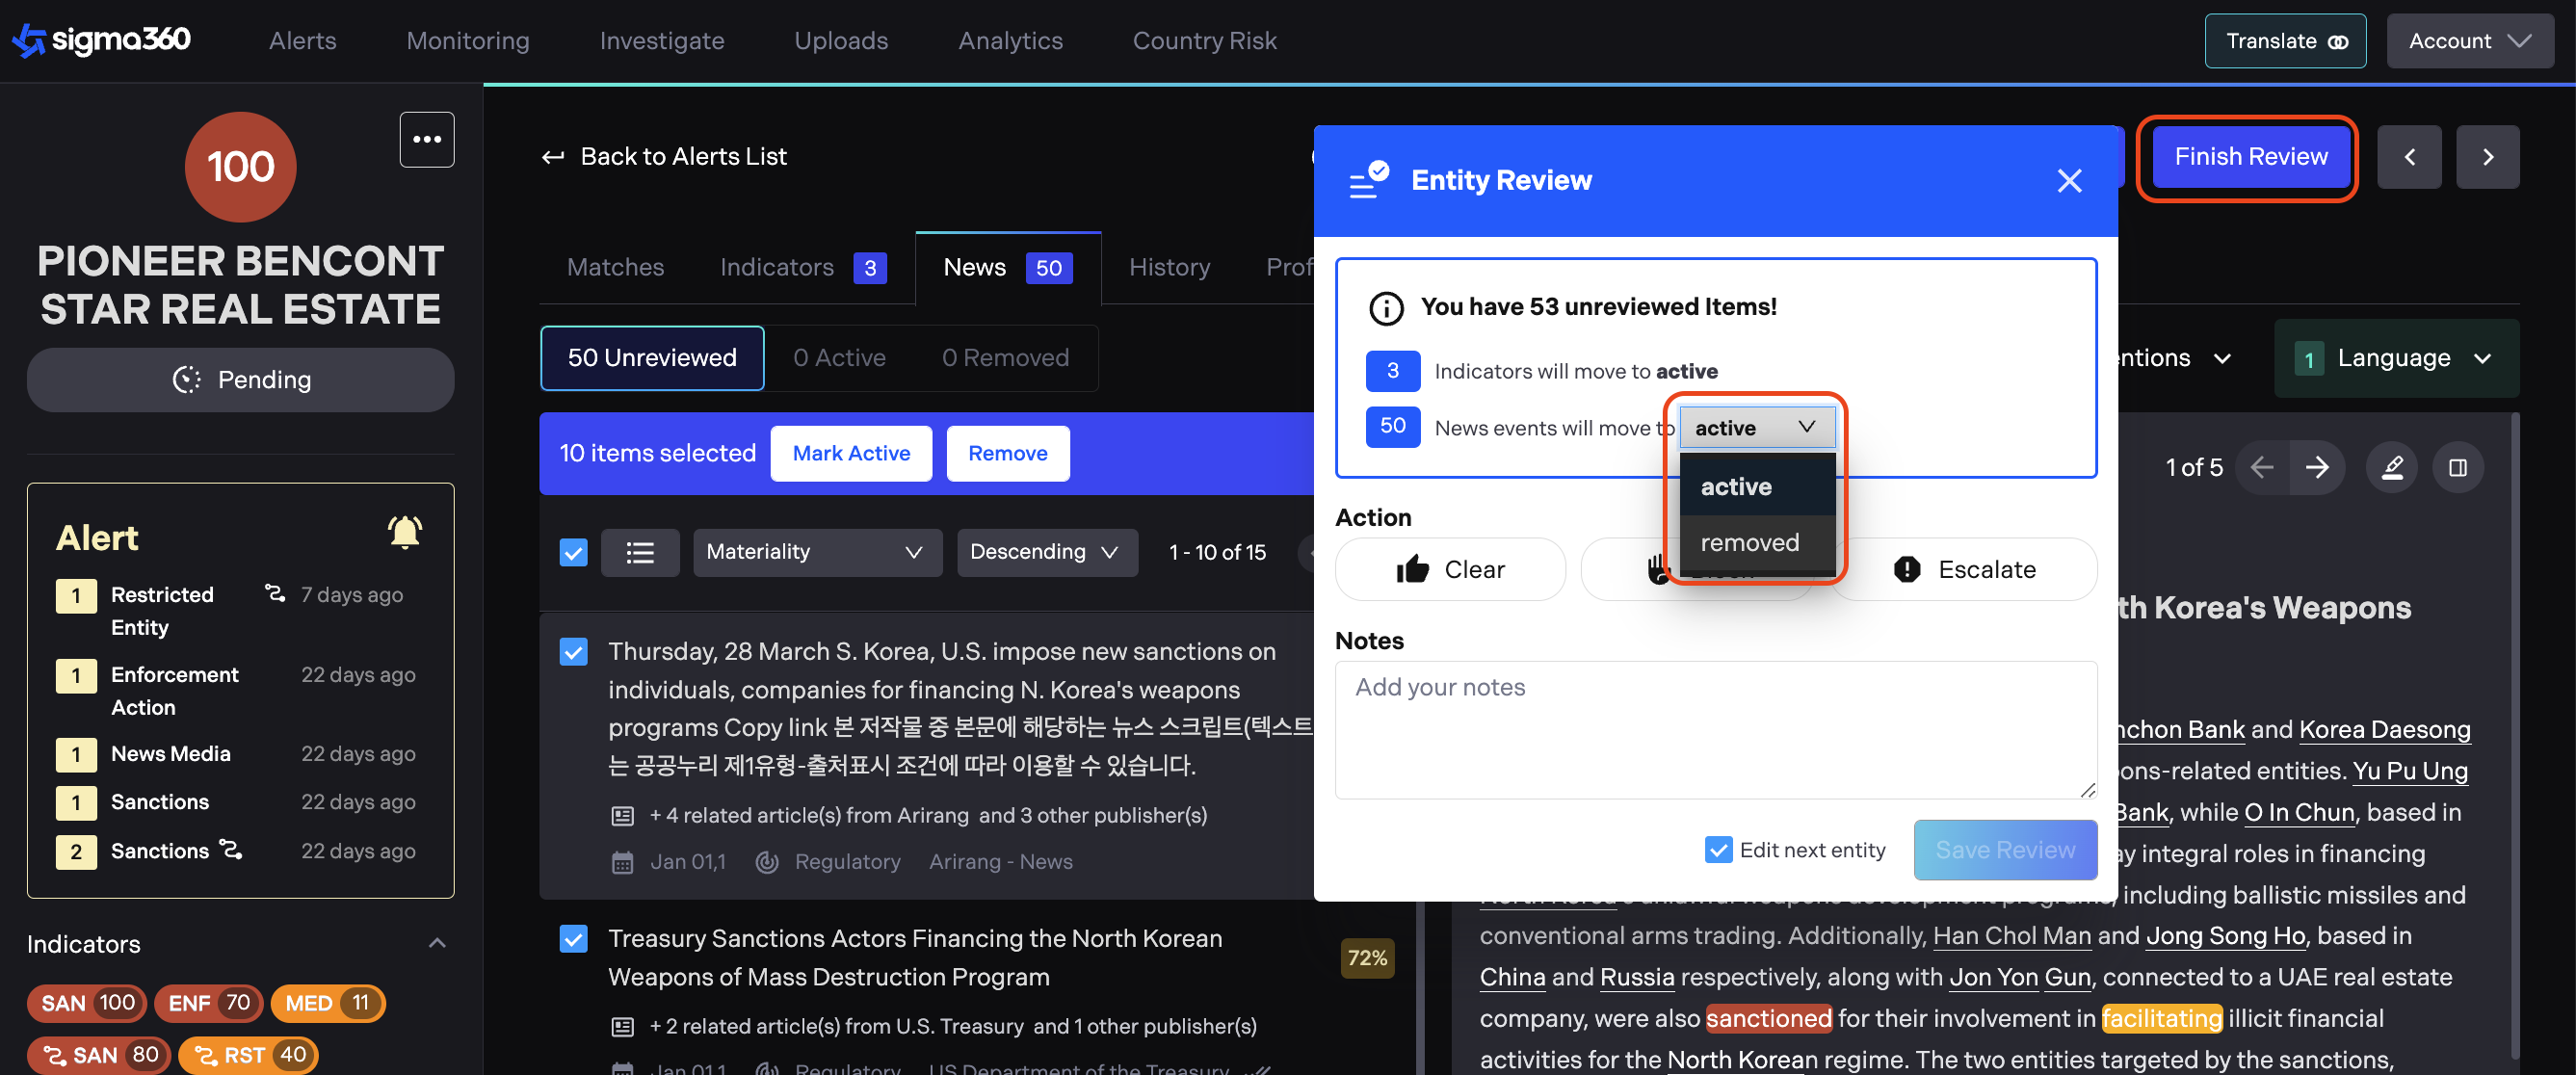
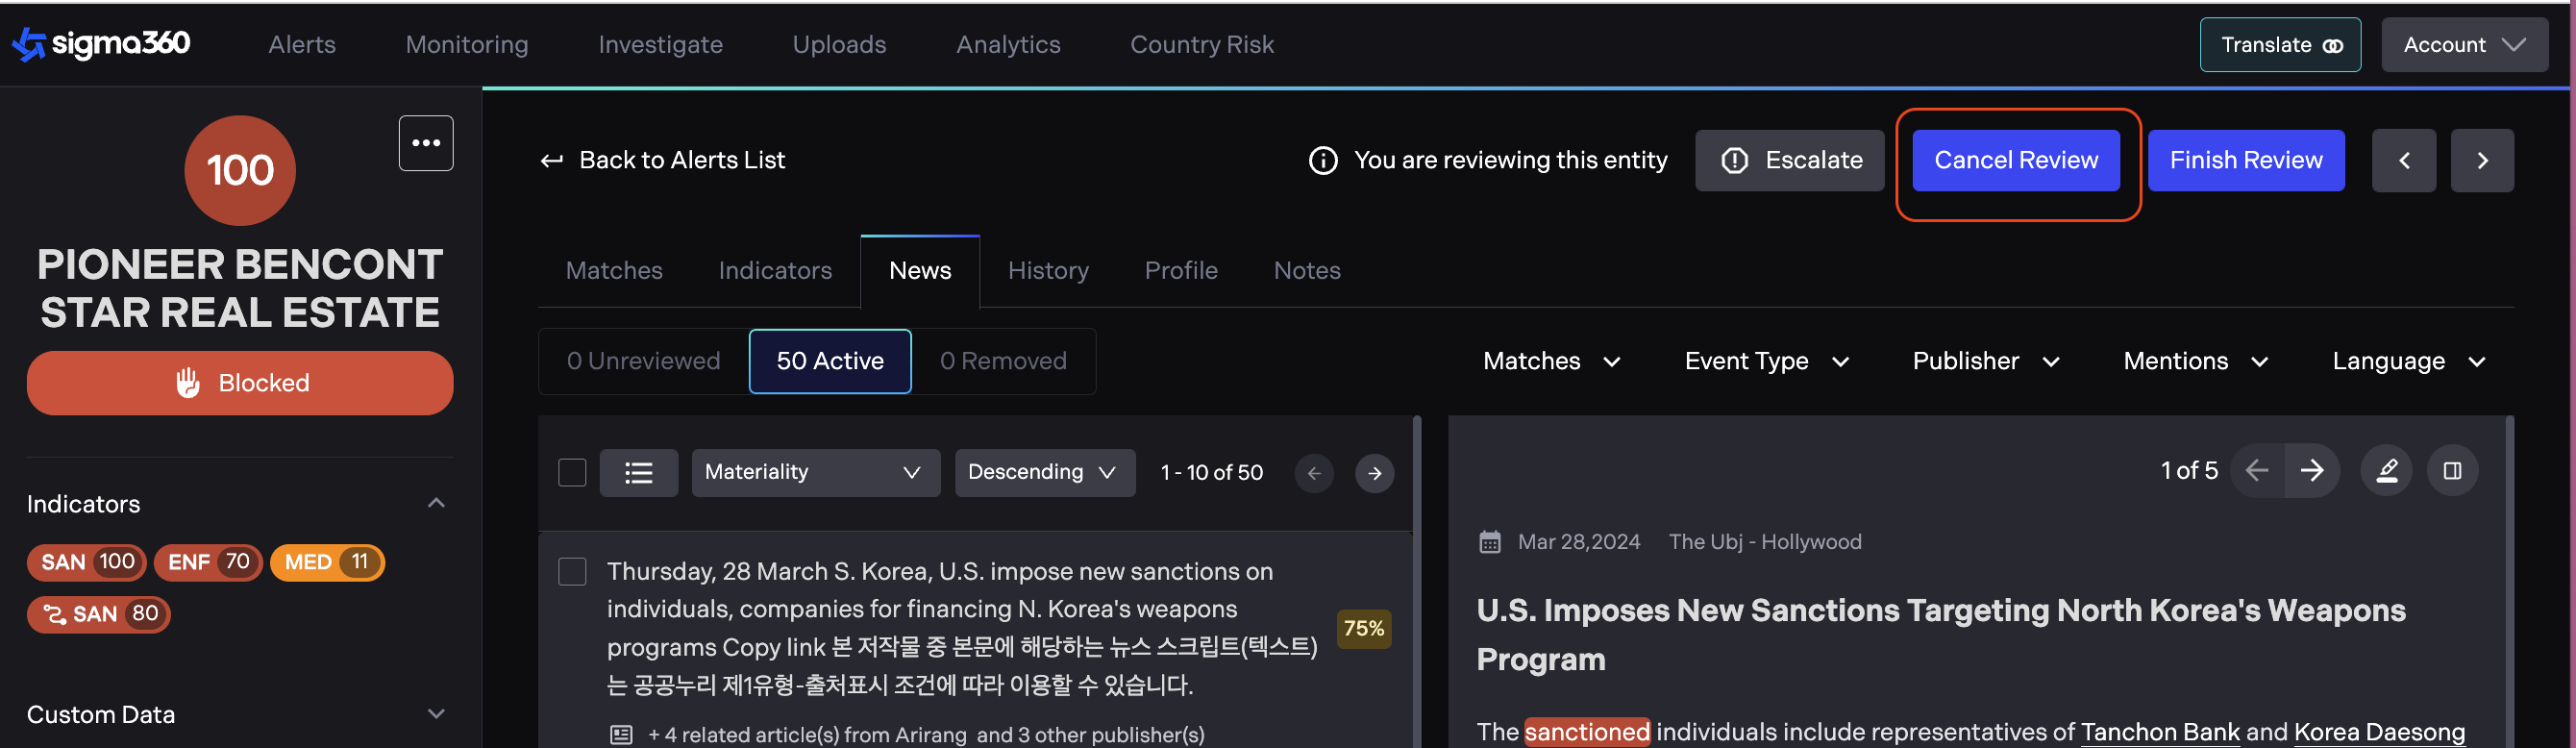
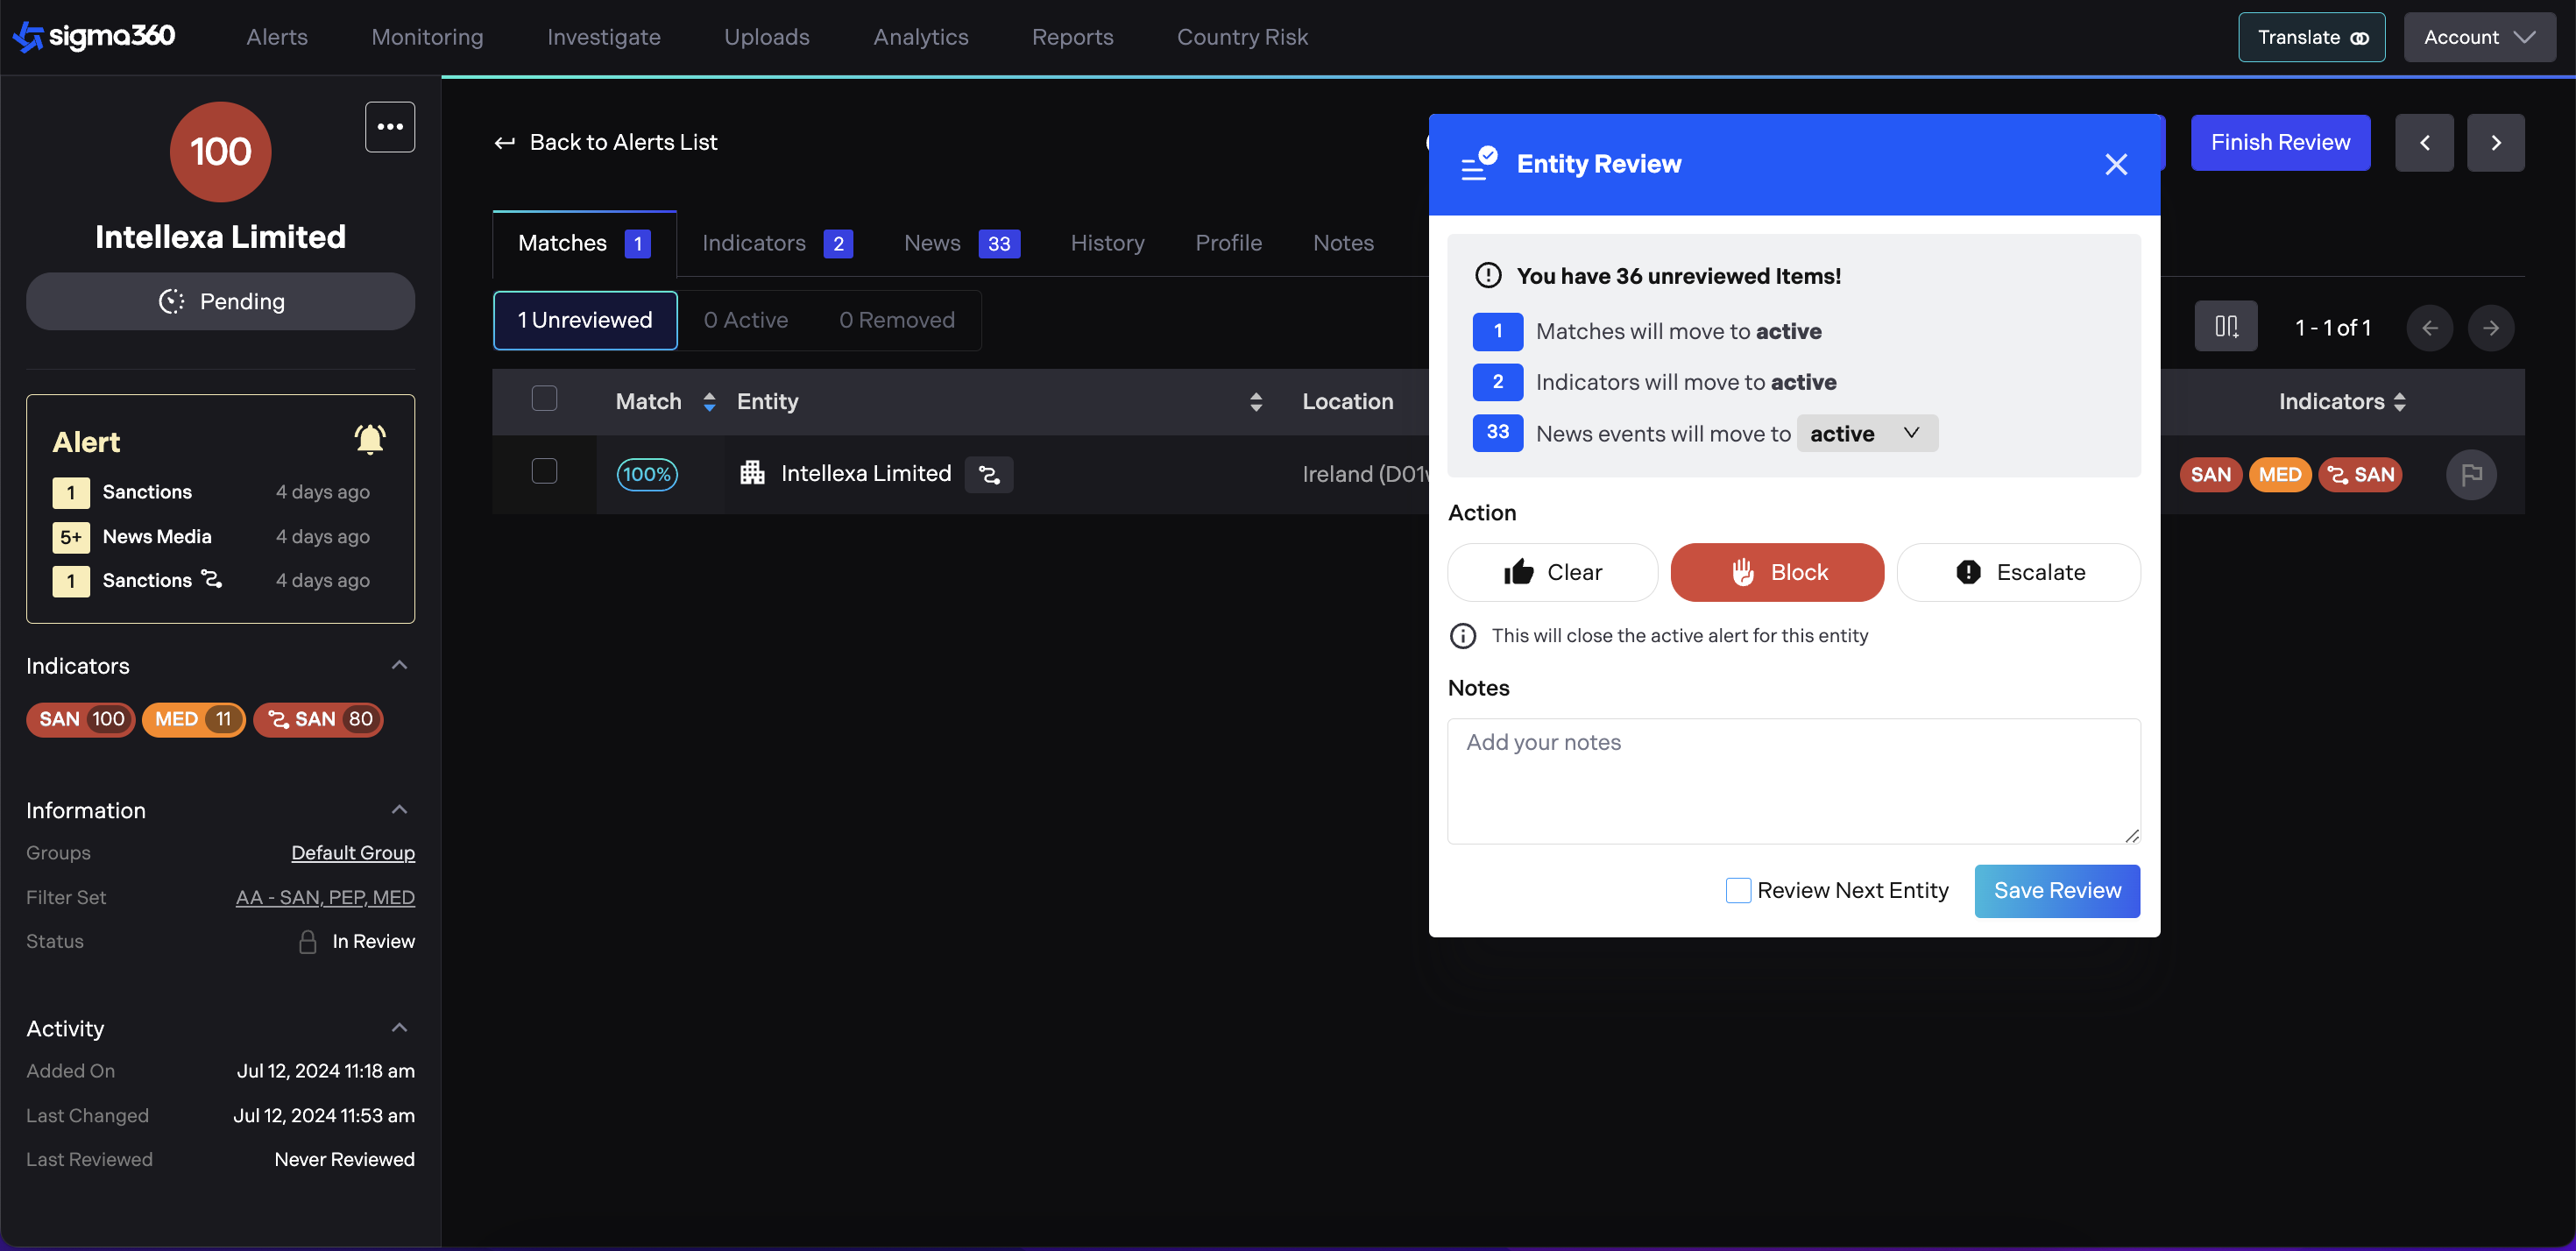
User can mark a review as complete at any moment by clicking the "Finish Review" button. Here's what happens when user does so:
-
All unreviewed matches that are not explicitly marked as "Removed" become "Active Matches".
-
All indicators that are not marked as "Removed" become "Active".
-
Users can choose to mark all News Media that are not currently marked as 'Removed' as either "Active" or "Removed" using a dropdown menu.
Note: Pending decisions will not affect the score and indicator pills until user clicks "Save Review”.
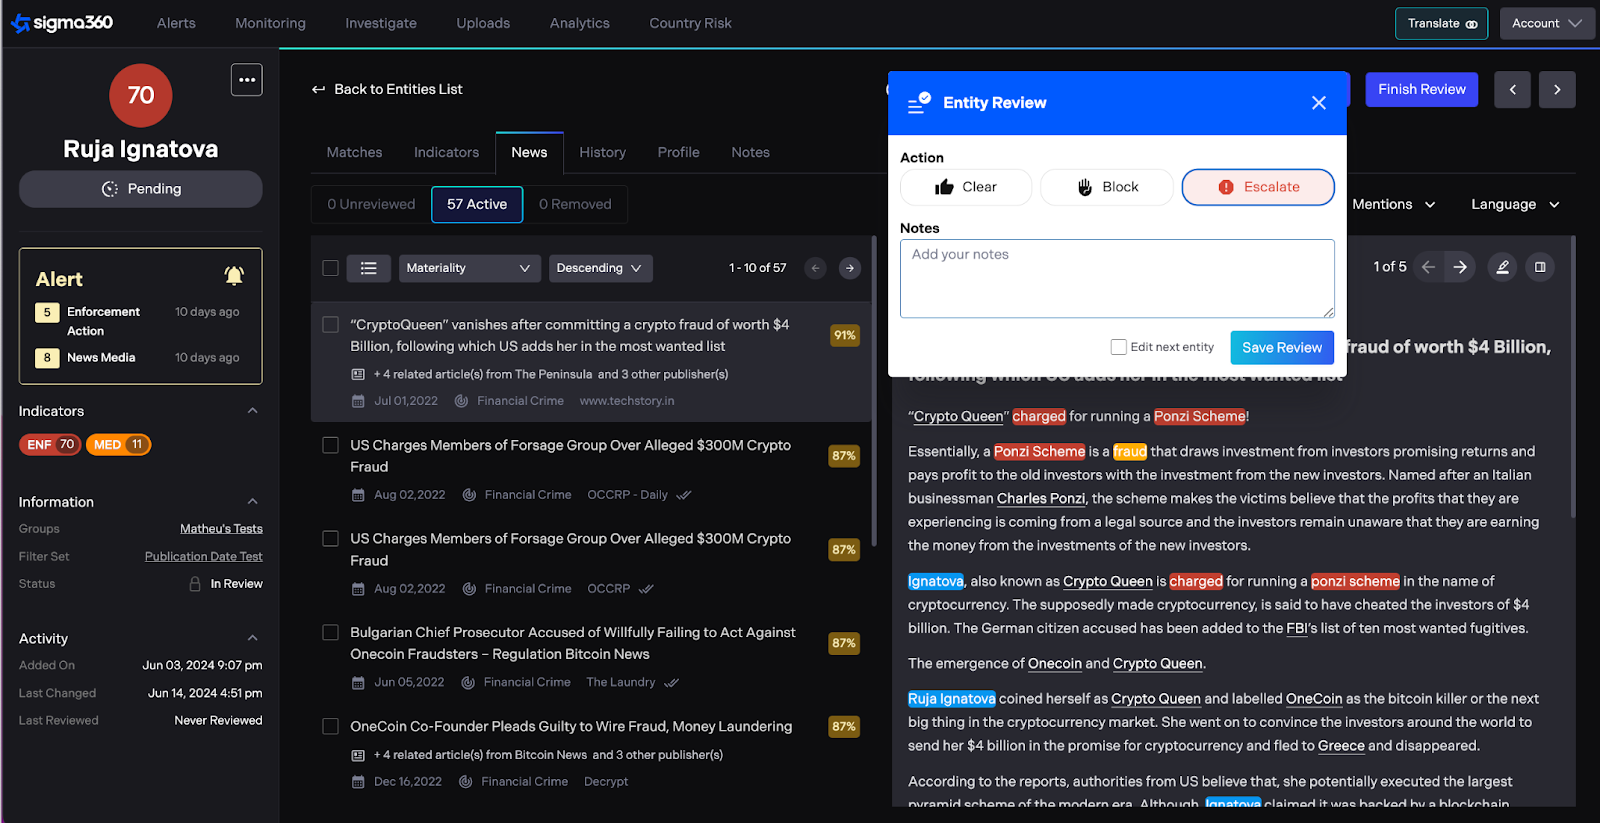
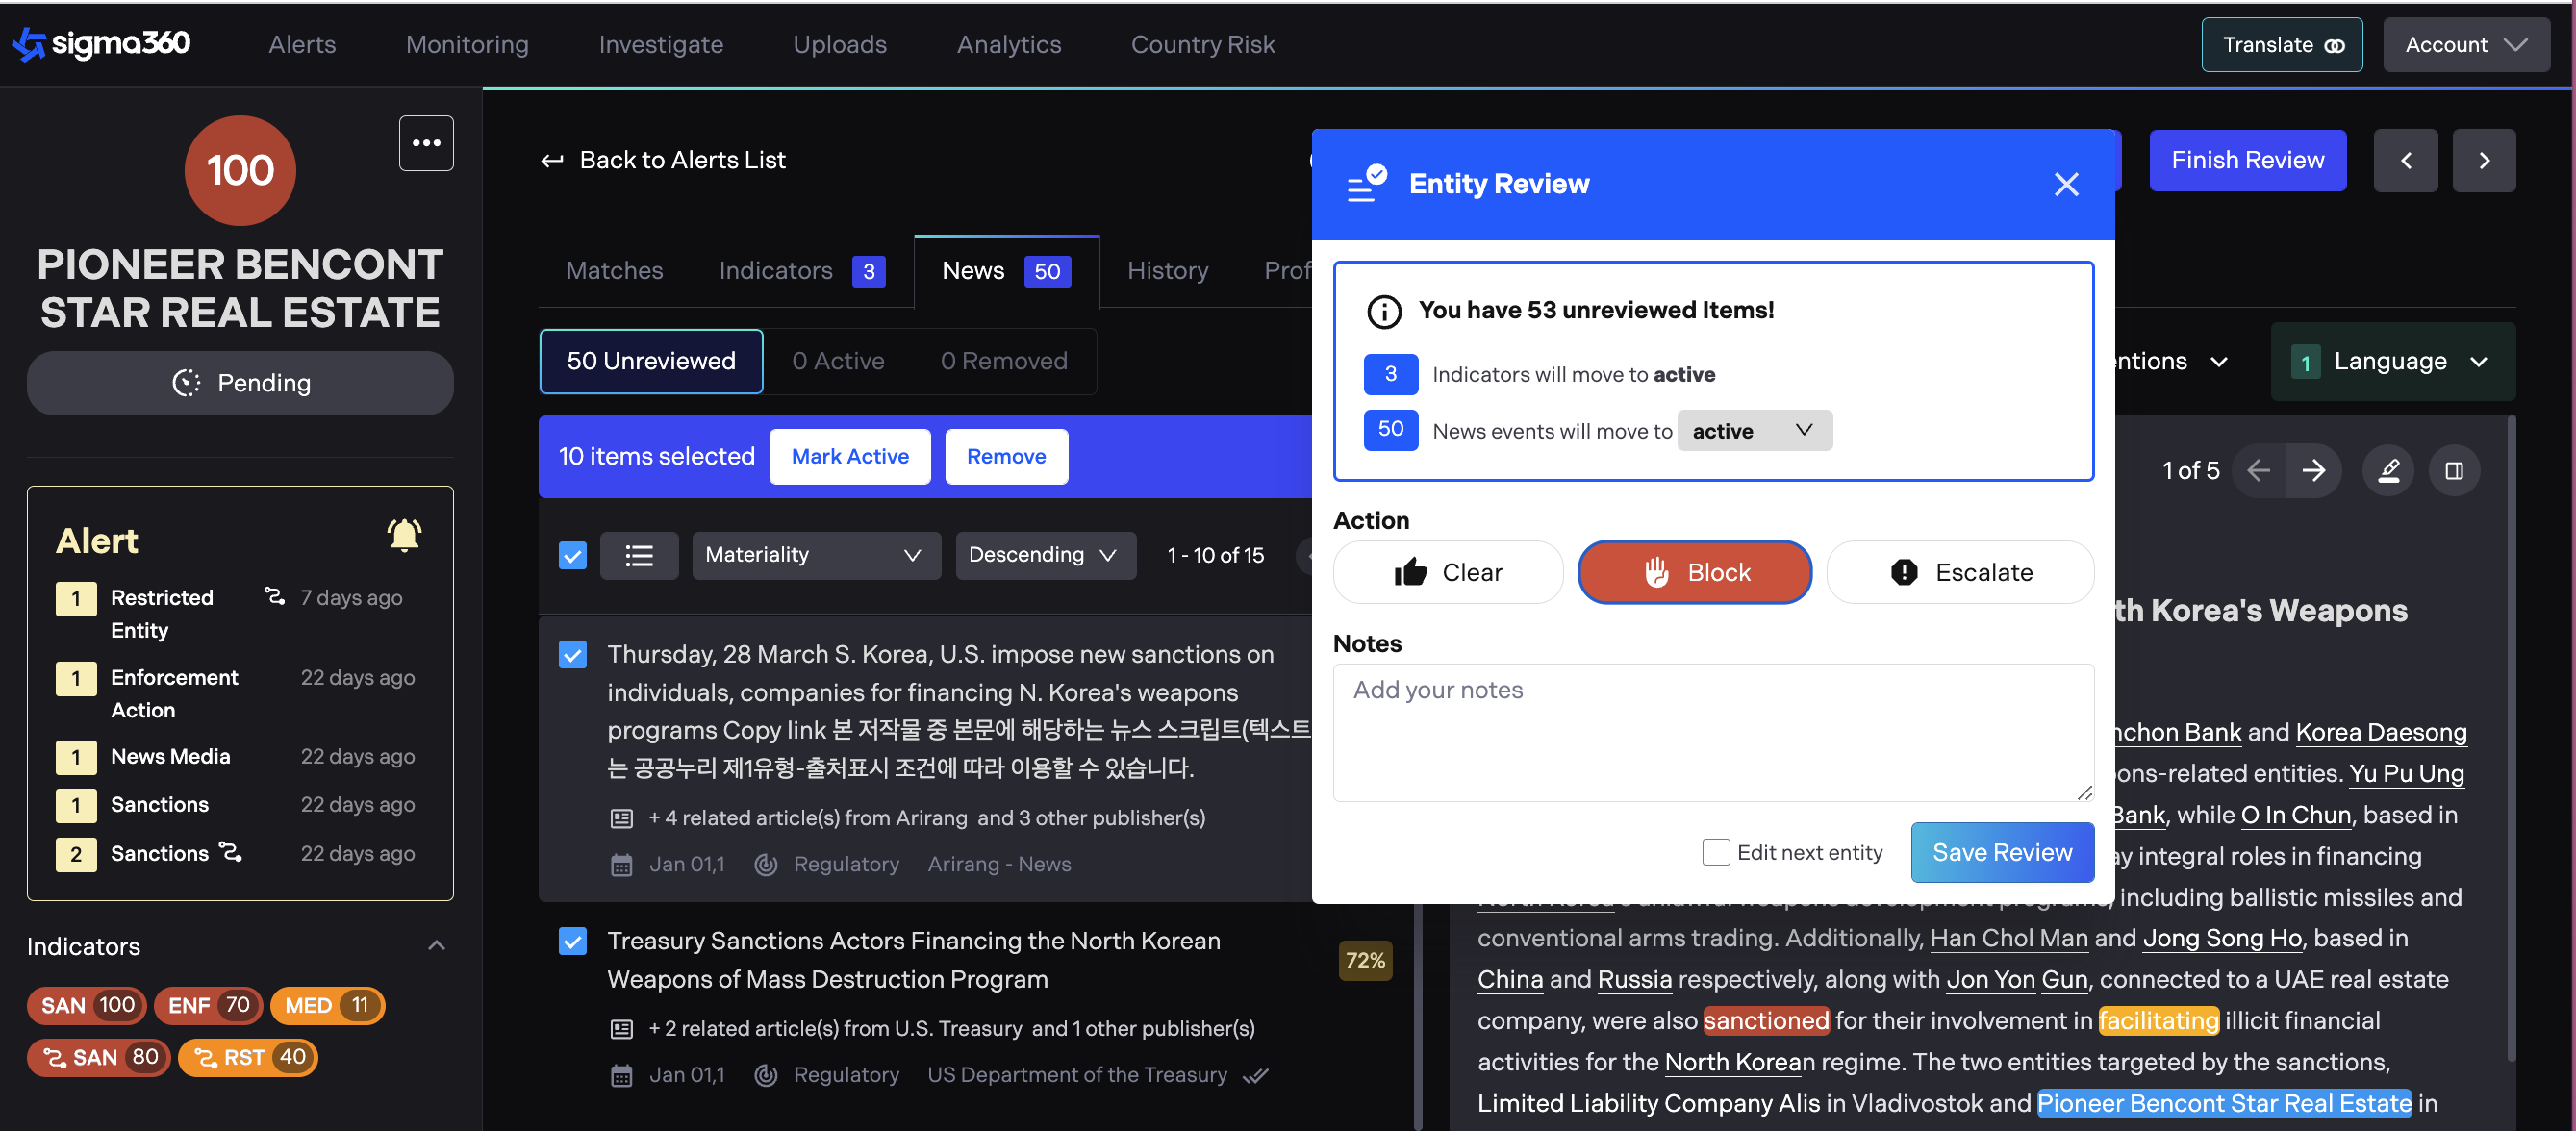
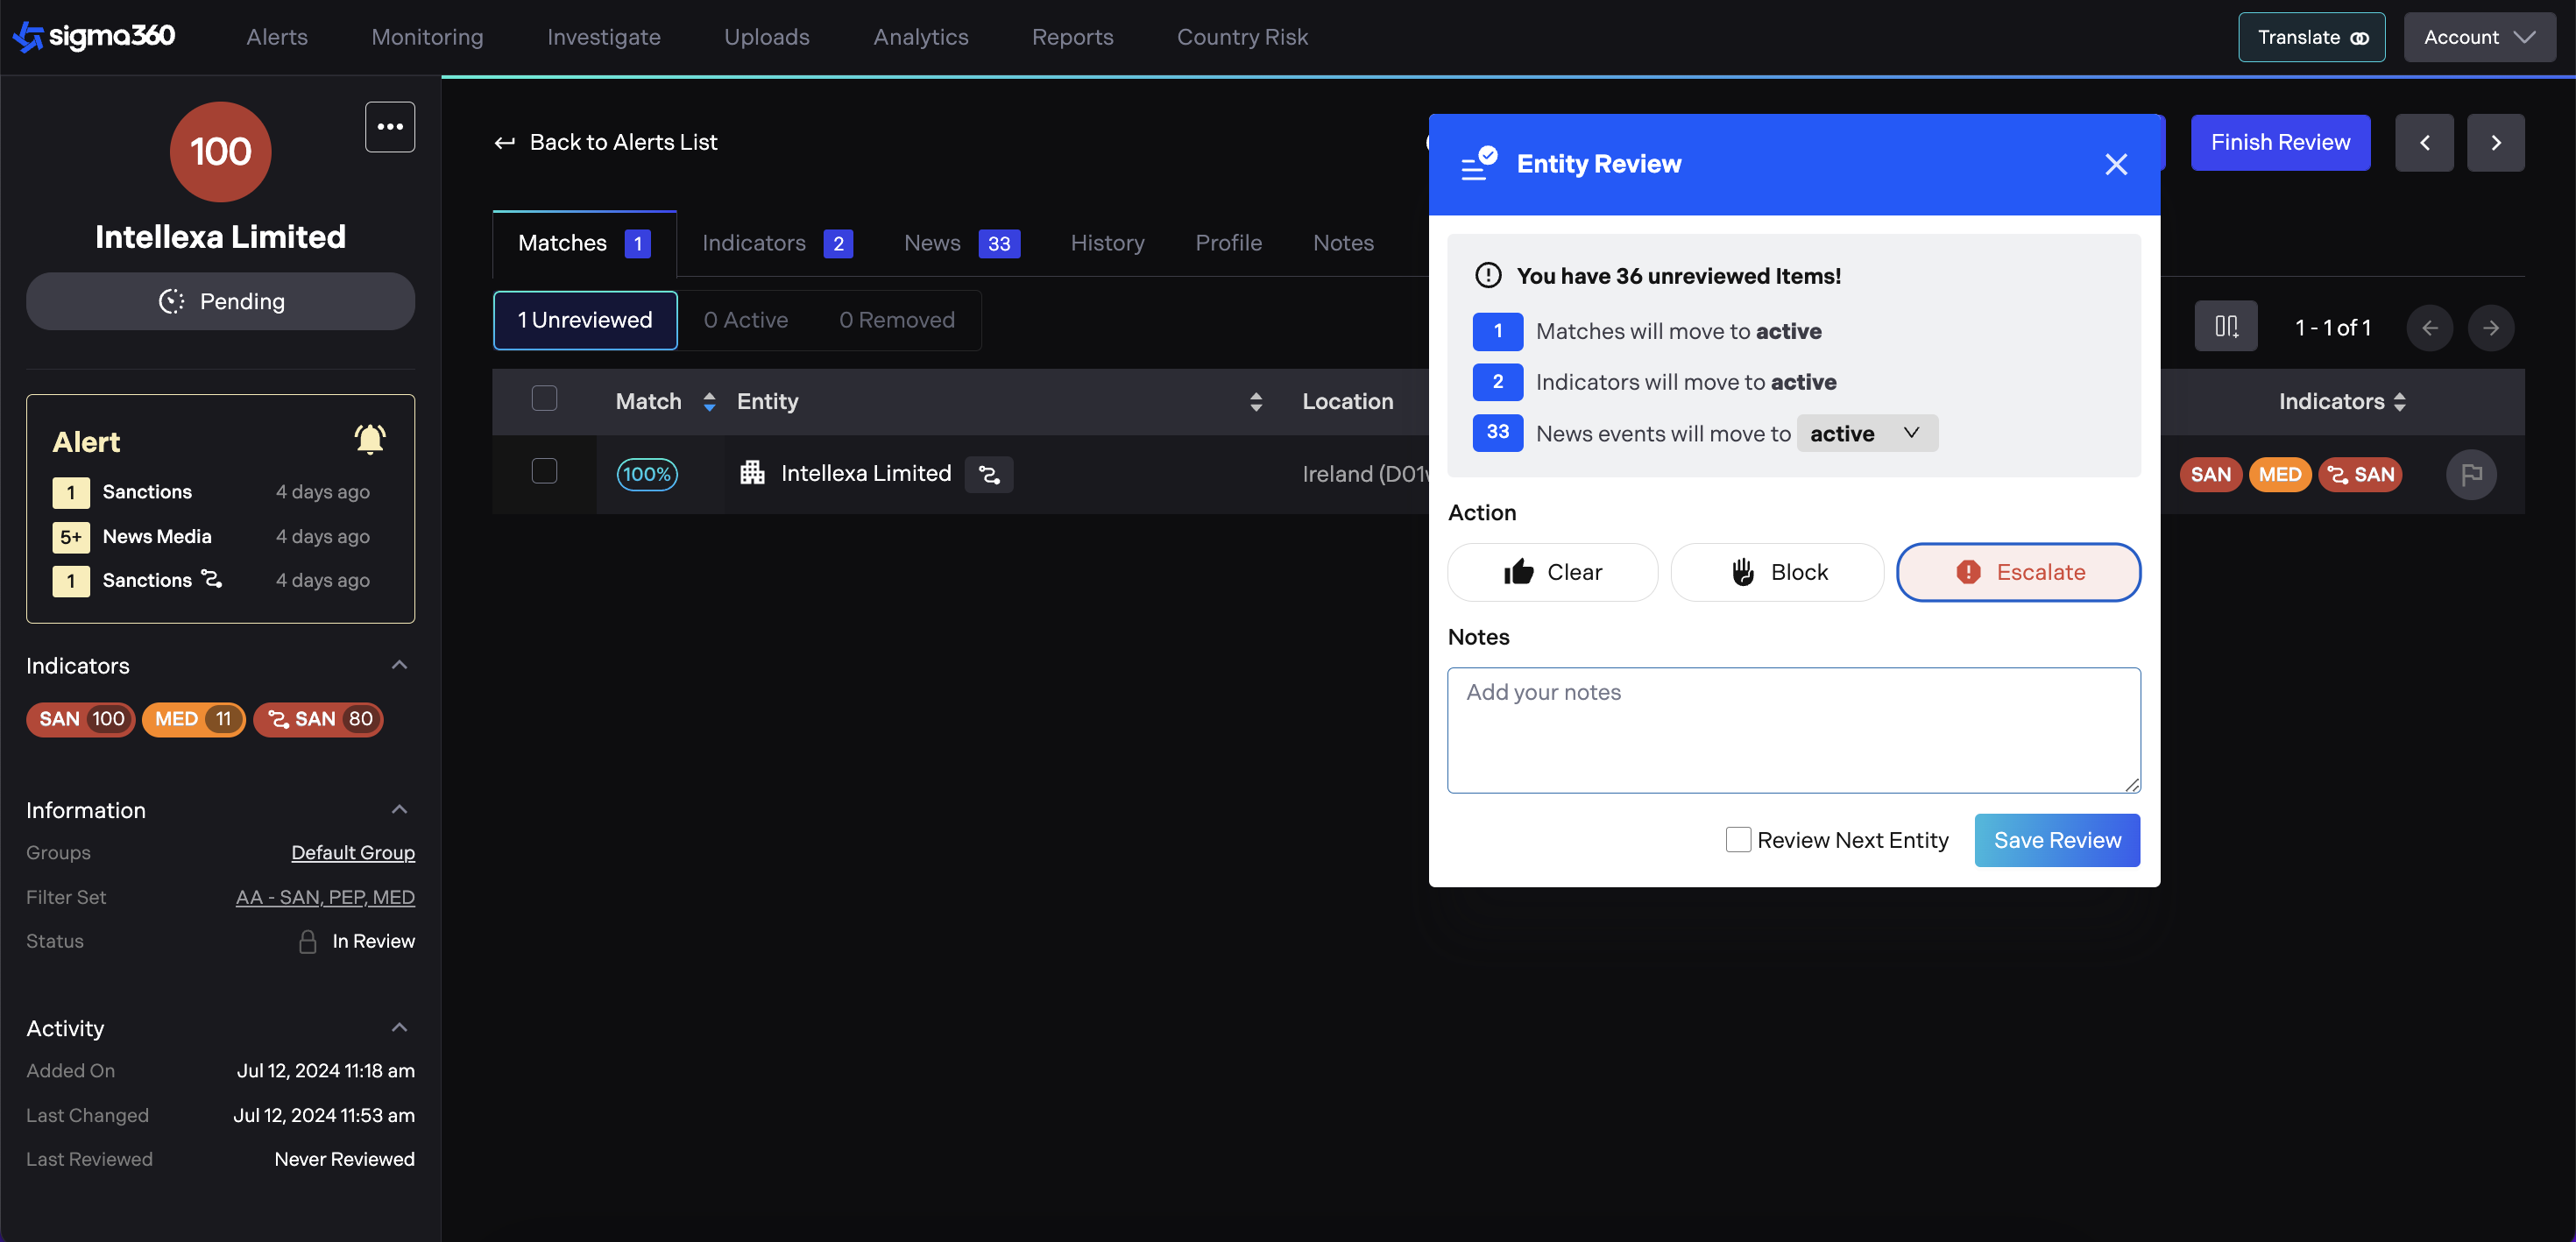
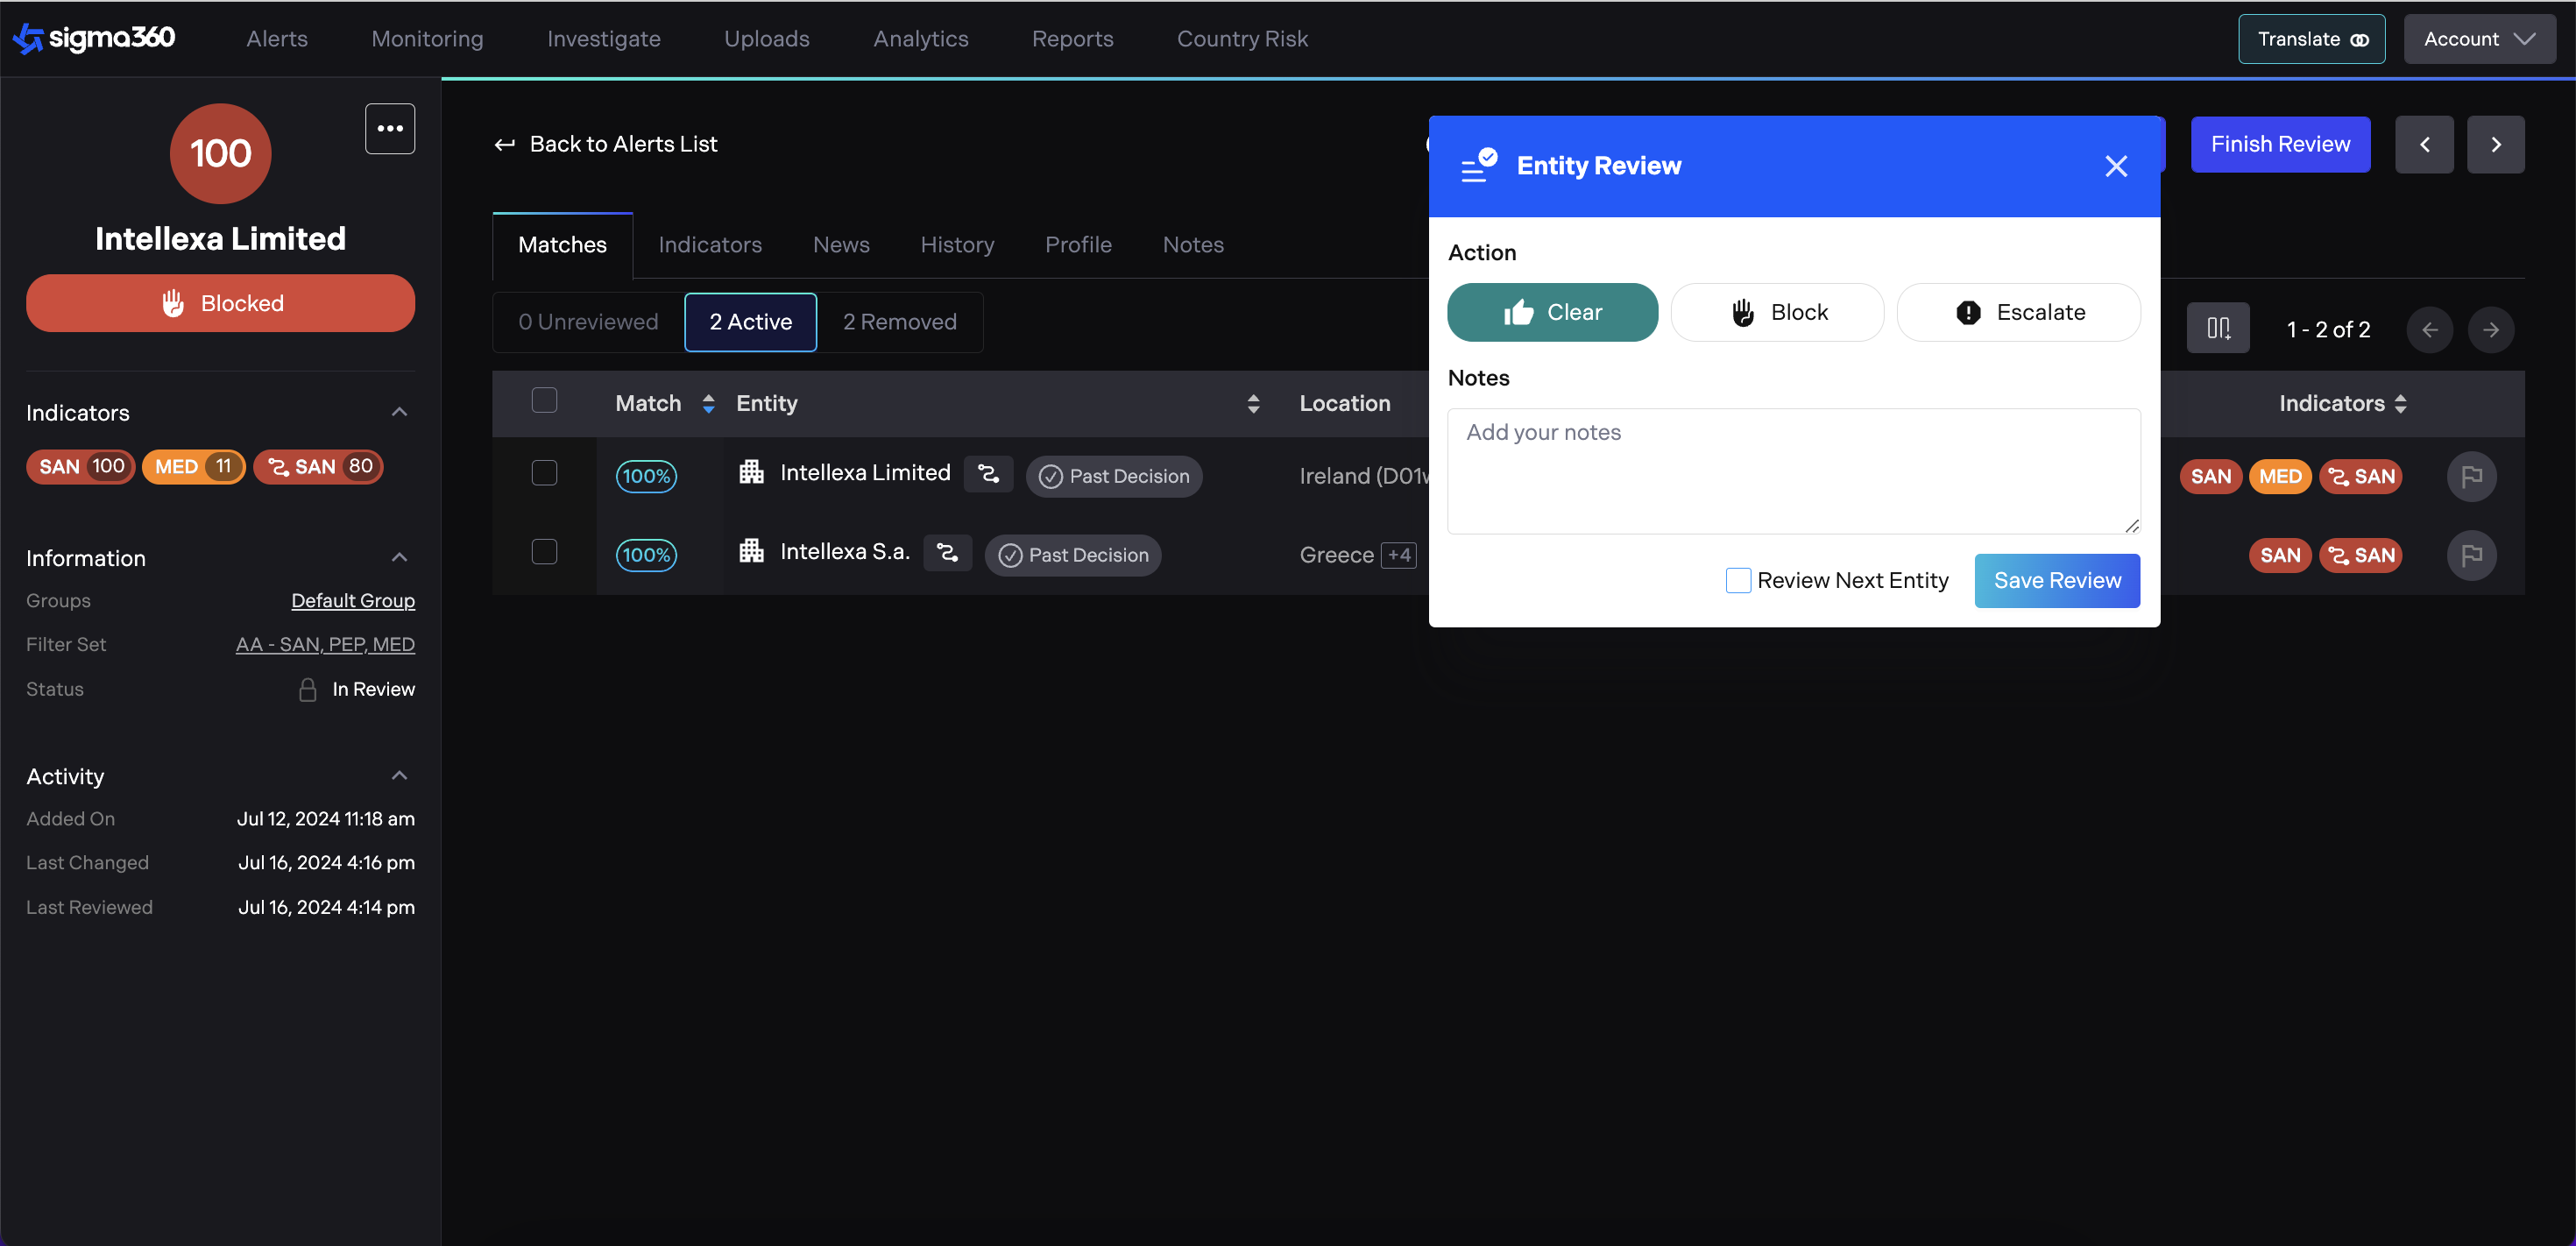
By clicking "Finish Review" a modal will appear with three actions: "Clear," "Block," or "Escalate."
-
The user can choose "Clear" if the Entity poses no risk.
-
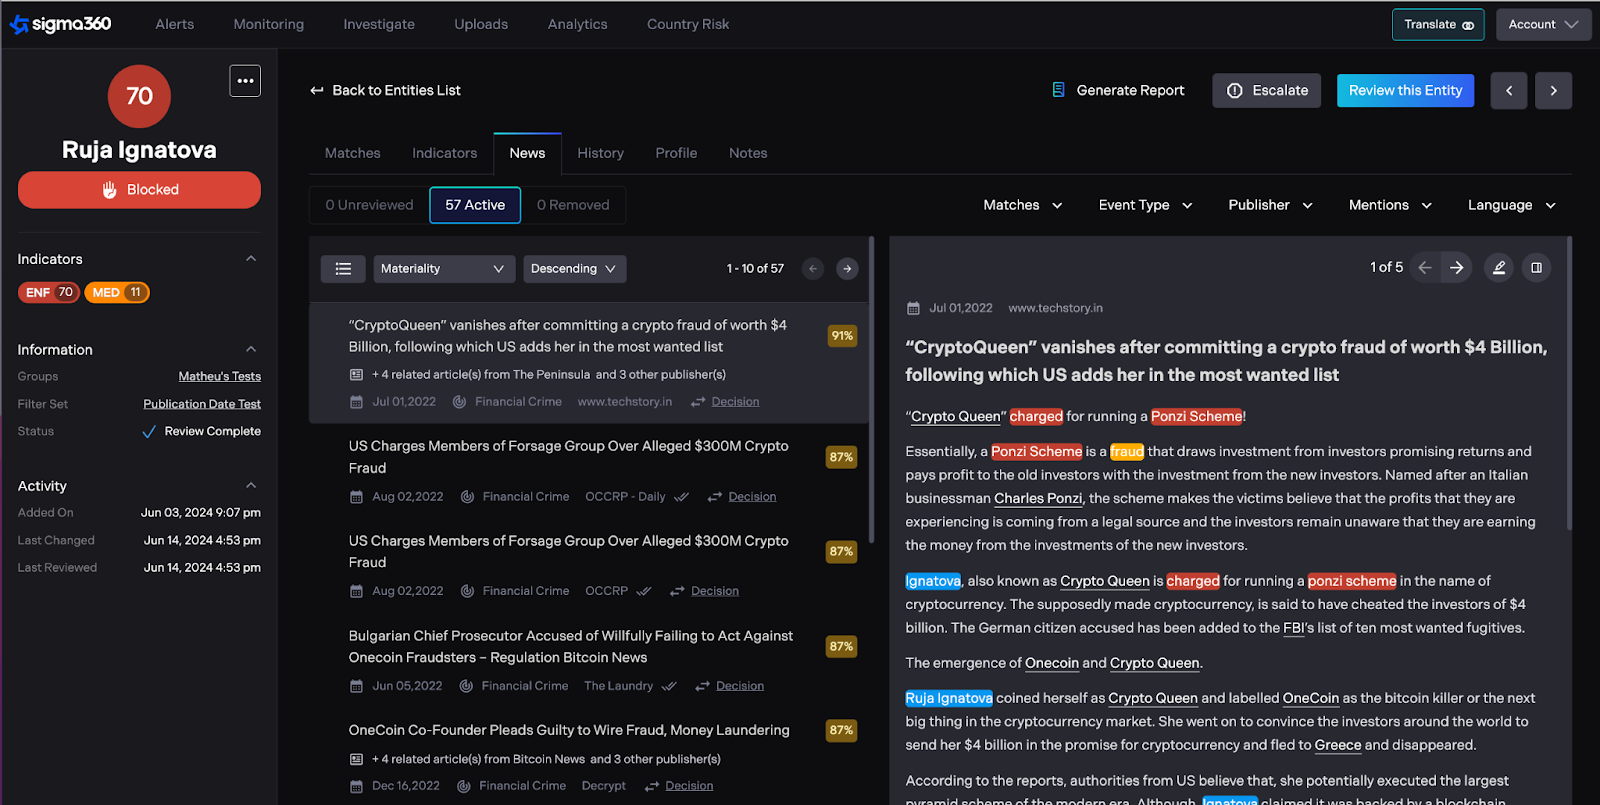
The user can choose "Block" if it is deemed risky.
-
If the Entity is escalated for further investigation, the Disposition Status will remain as "Pending."
More details can be found in the Escalation & Disposition Status section.
Selecting "Review next entity" will automatically move the user to the next record in the Alerts/Entities list that needs review. This movement occurs within the tab the user arrived from, respecting any applied filters and maintaining the chosen sort order. The review of the next entity starts automatically upon selection, eliminating the need for the user to click "Review this Entity" each time they land on a new entity. If a user deselects "Review next entity," the review for the current entity finishes, and the user remains on that specific entity upon completing review. The 'Review next entity' checkbox is session-sticky.

By clicking the "Cancel Review" button, review will be canceled and none of the changes made on any tabs will be saved. This action will discard any changes and return the user to the previous state.
When an Entity is “In Review” status by another person, a modal will be displayed indicating who claimed the Entity for review. Users still can view the Entity page but can not initiate a review, make match decisions, or change filter sets.
Duration of “In Review” Status
-
"In Review" status will last for a maximum of 7 day. After this period, the Entity will automatically revert to "Needs Review" status and become available for other users to review.
-
There is no limit to the number of Entities that can be "In Review" at the same time for a single user. This allows for efficient processing of multiple Entities that require compliance review.
Escalation & Disposition Status
Escalation
While on the Monitoring page, users can select an Entity for escalation. The “escalation" button is the most right one in the action row.
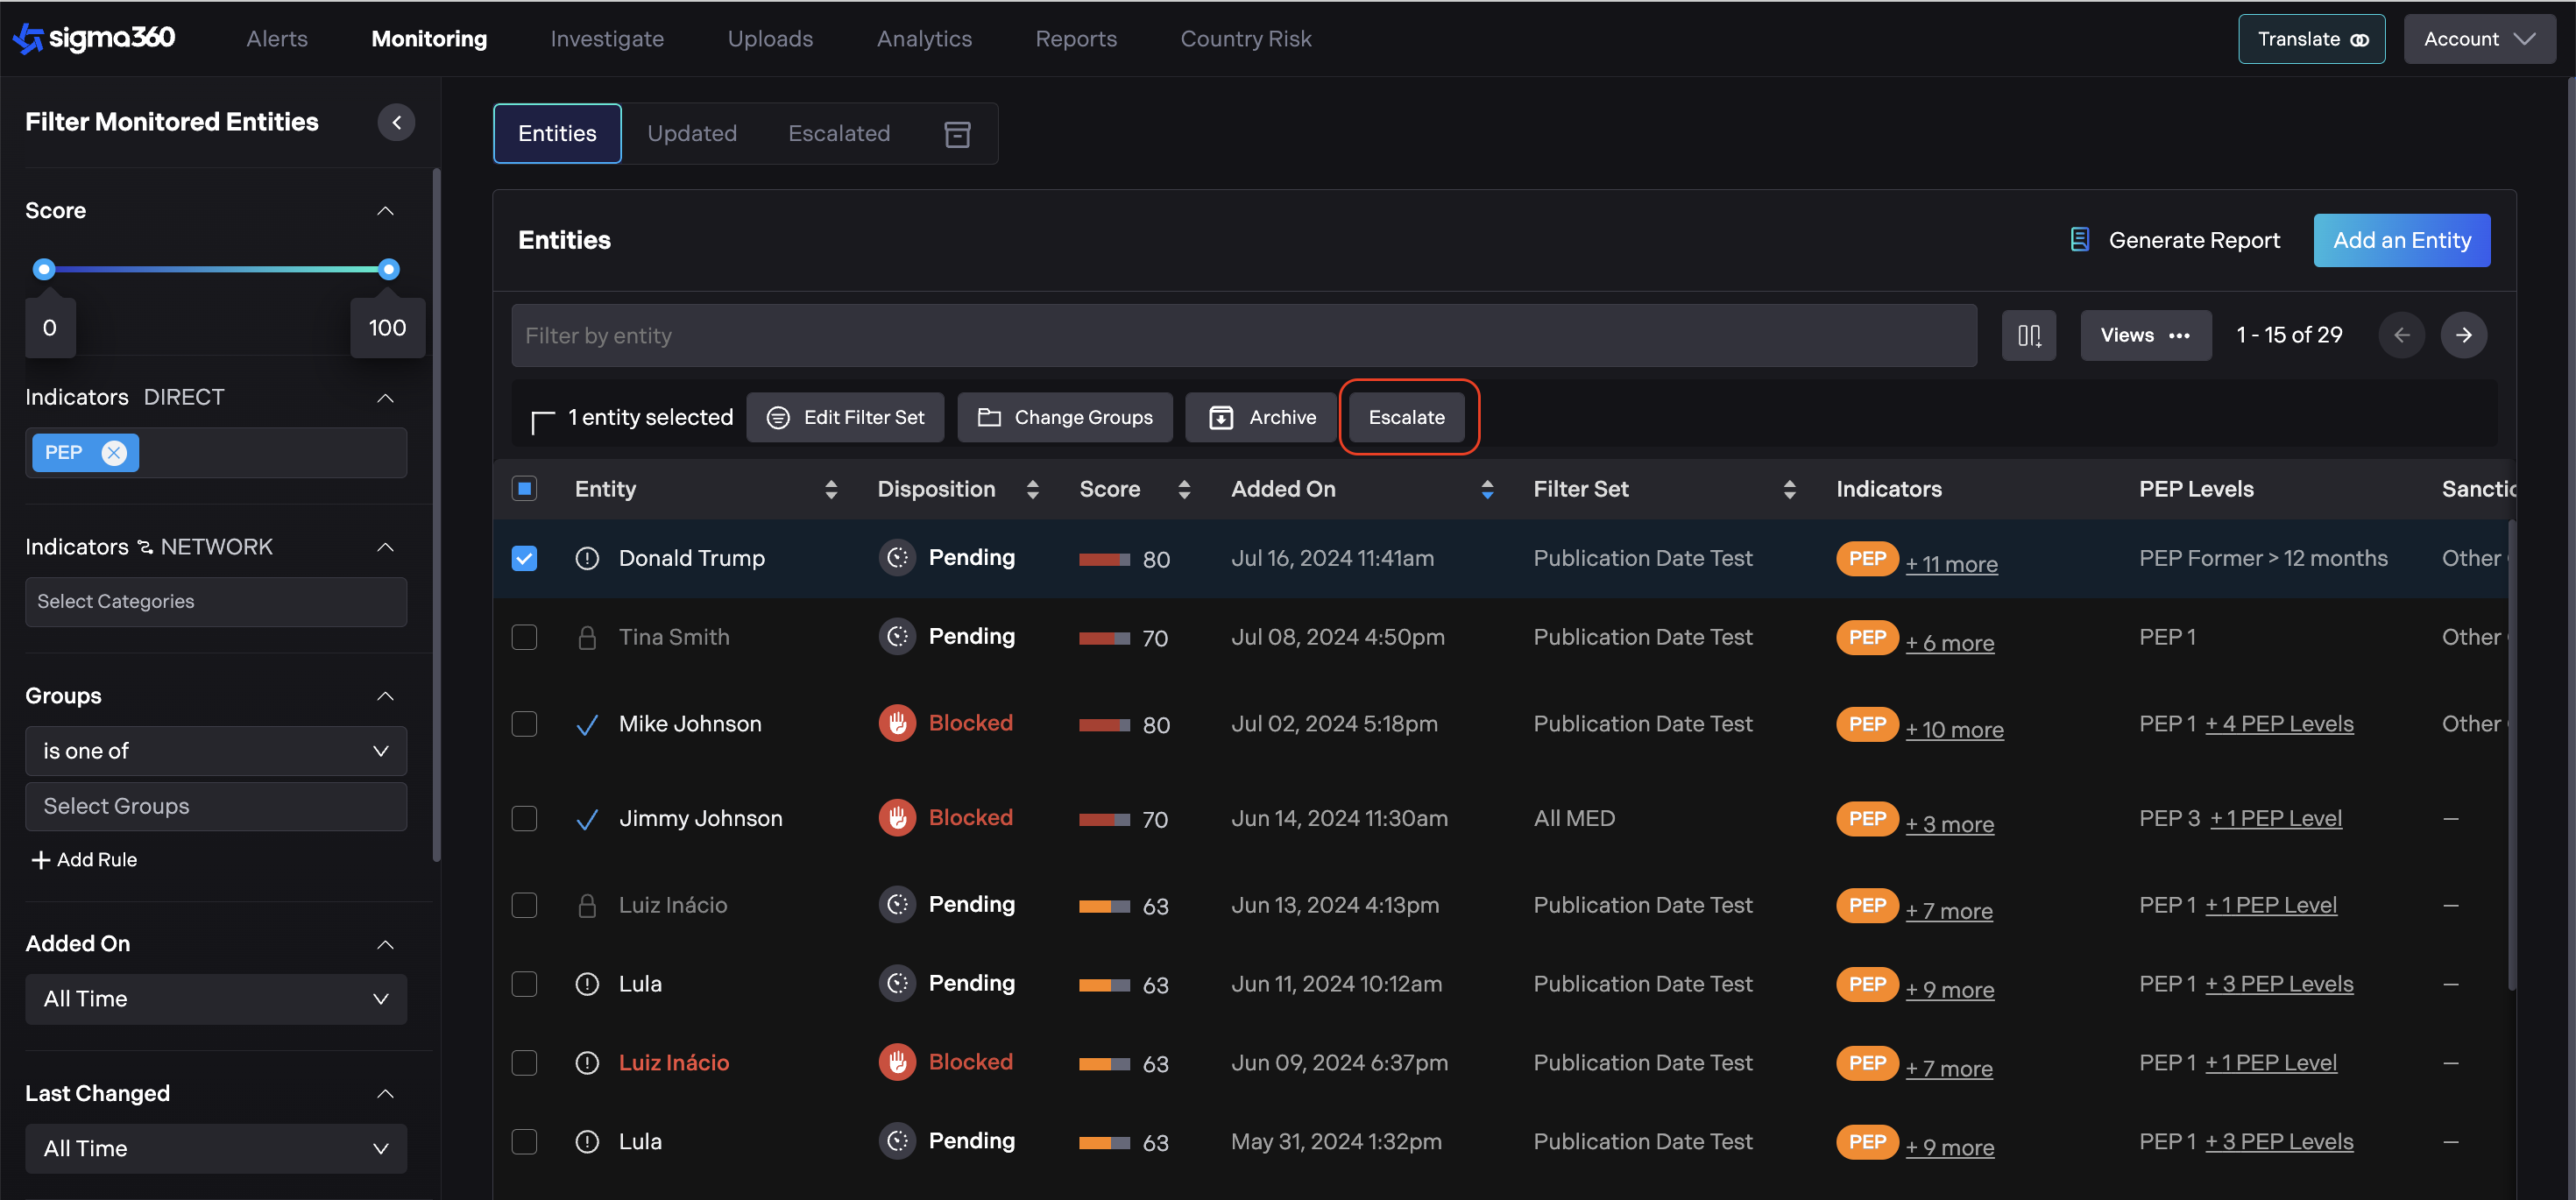
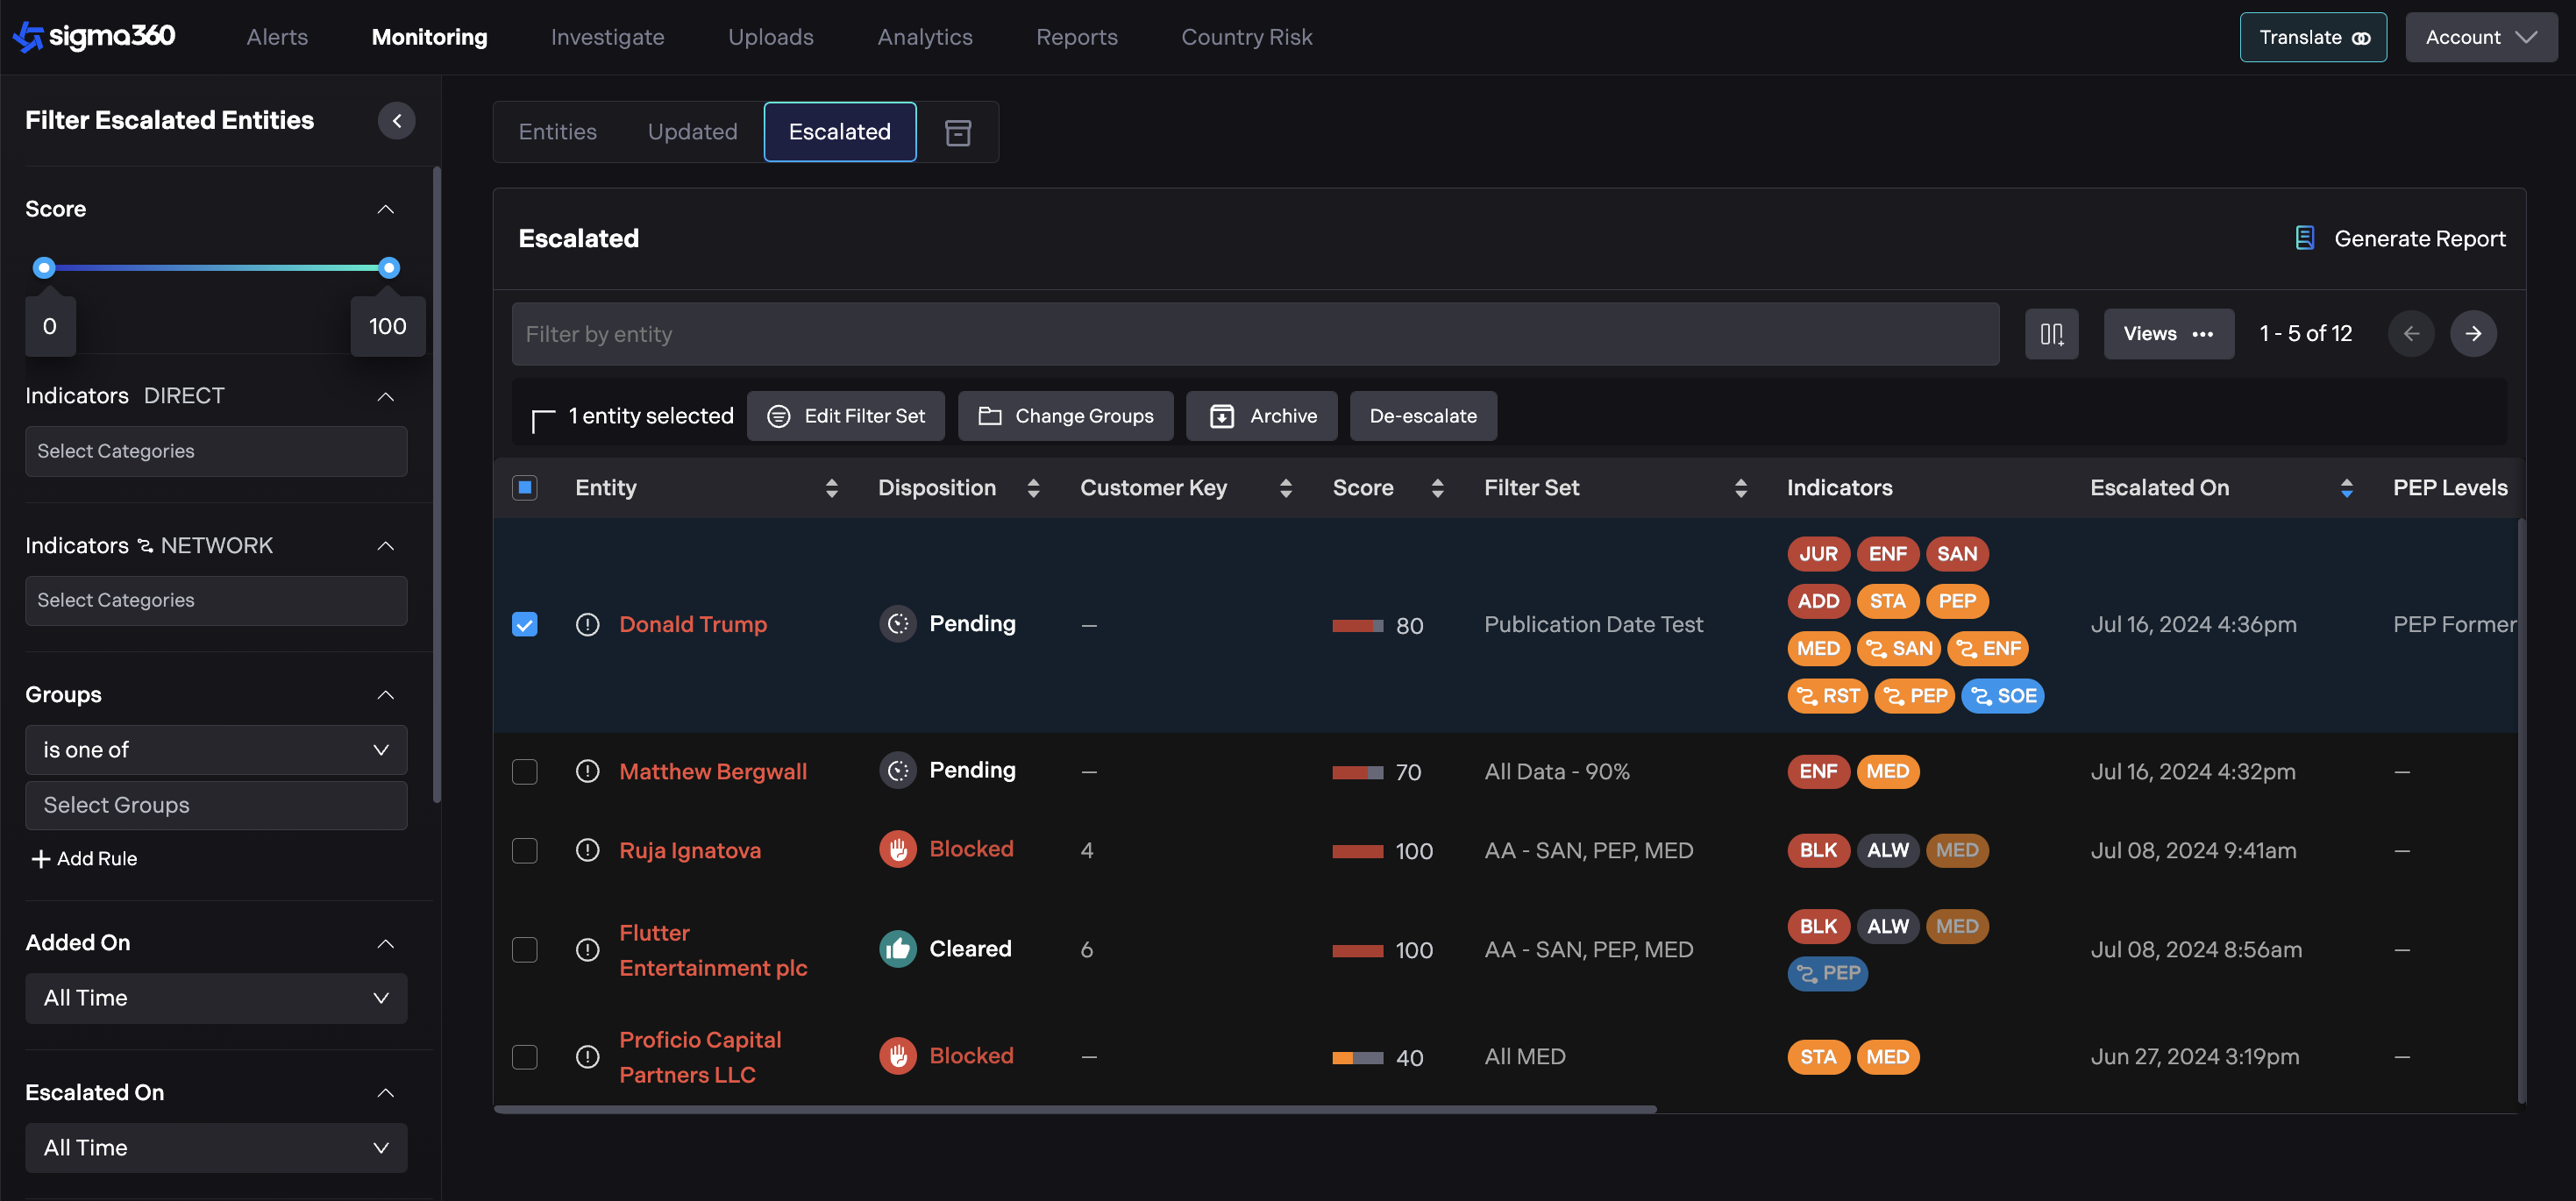
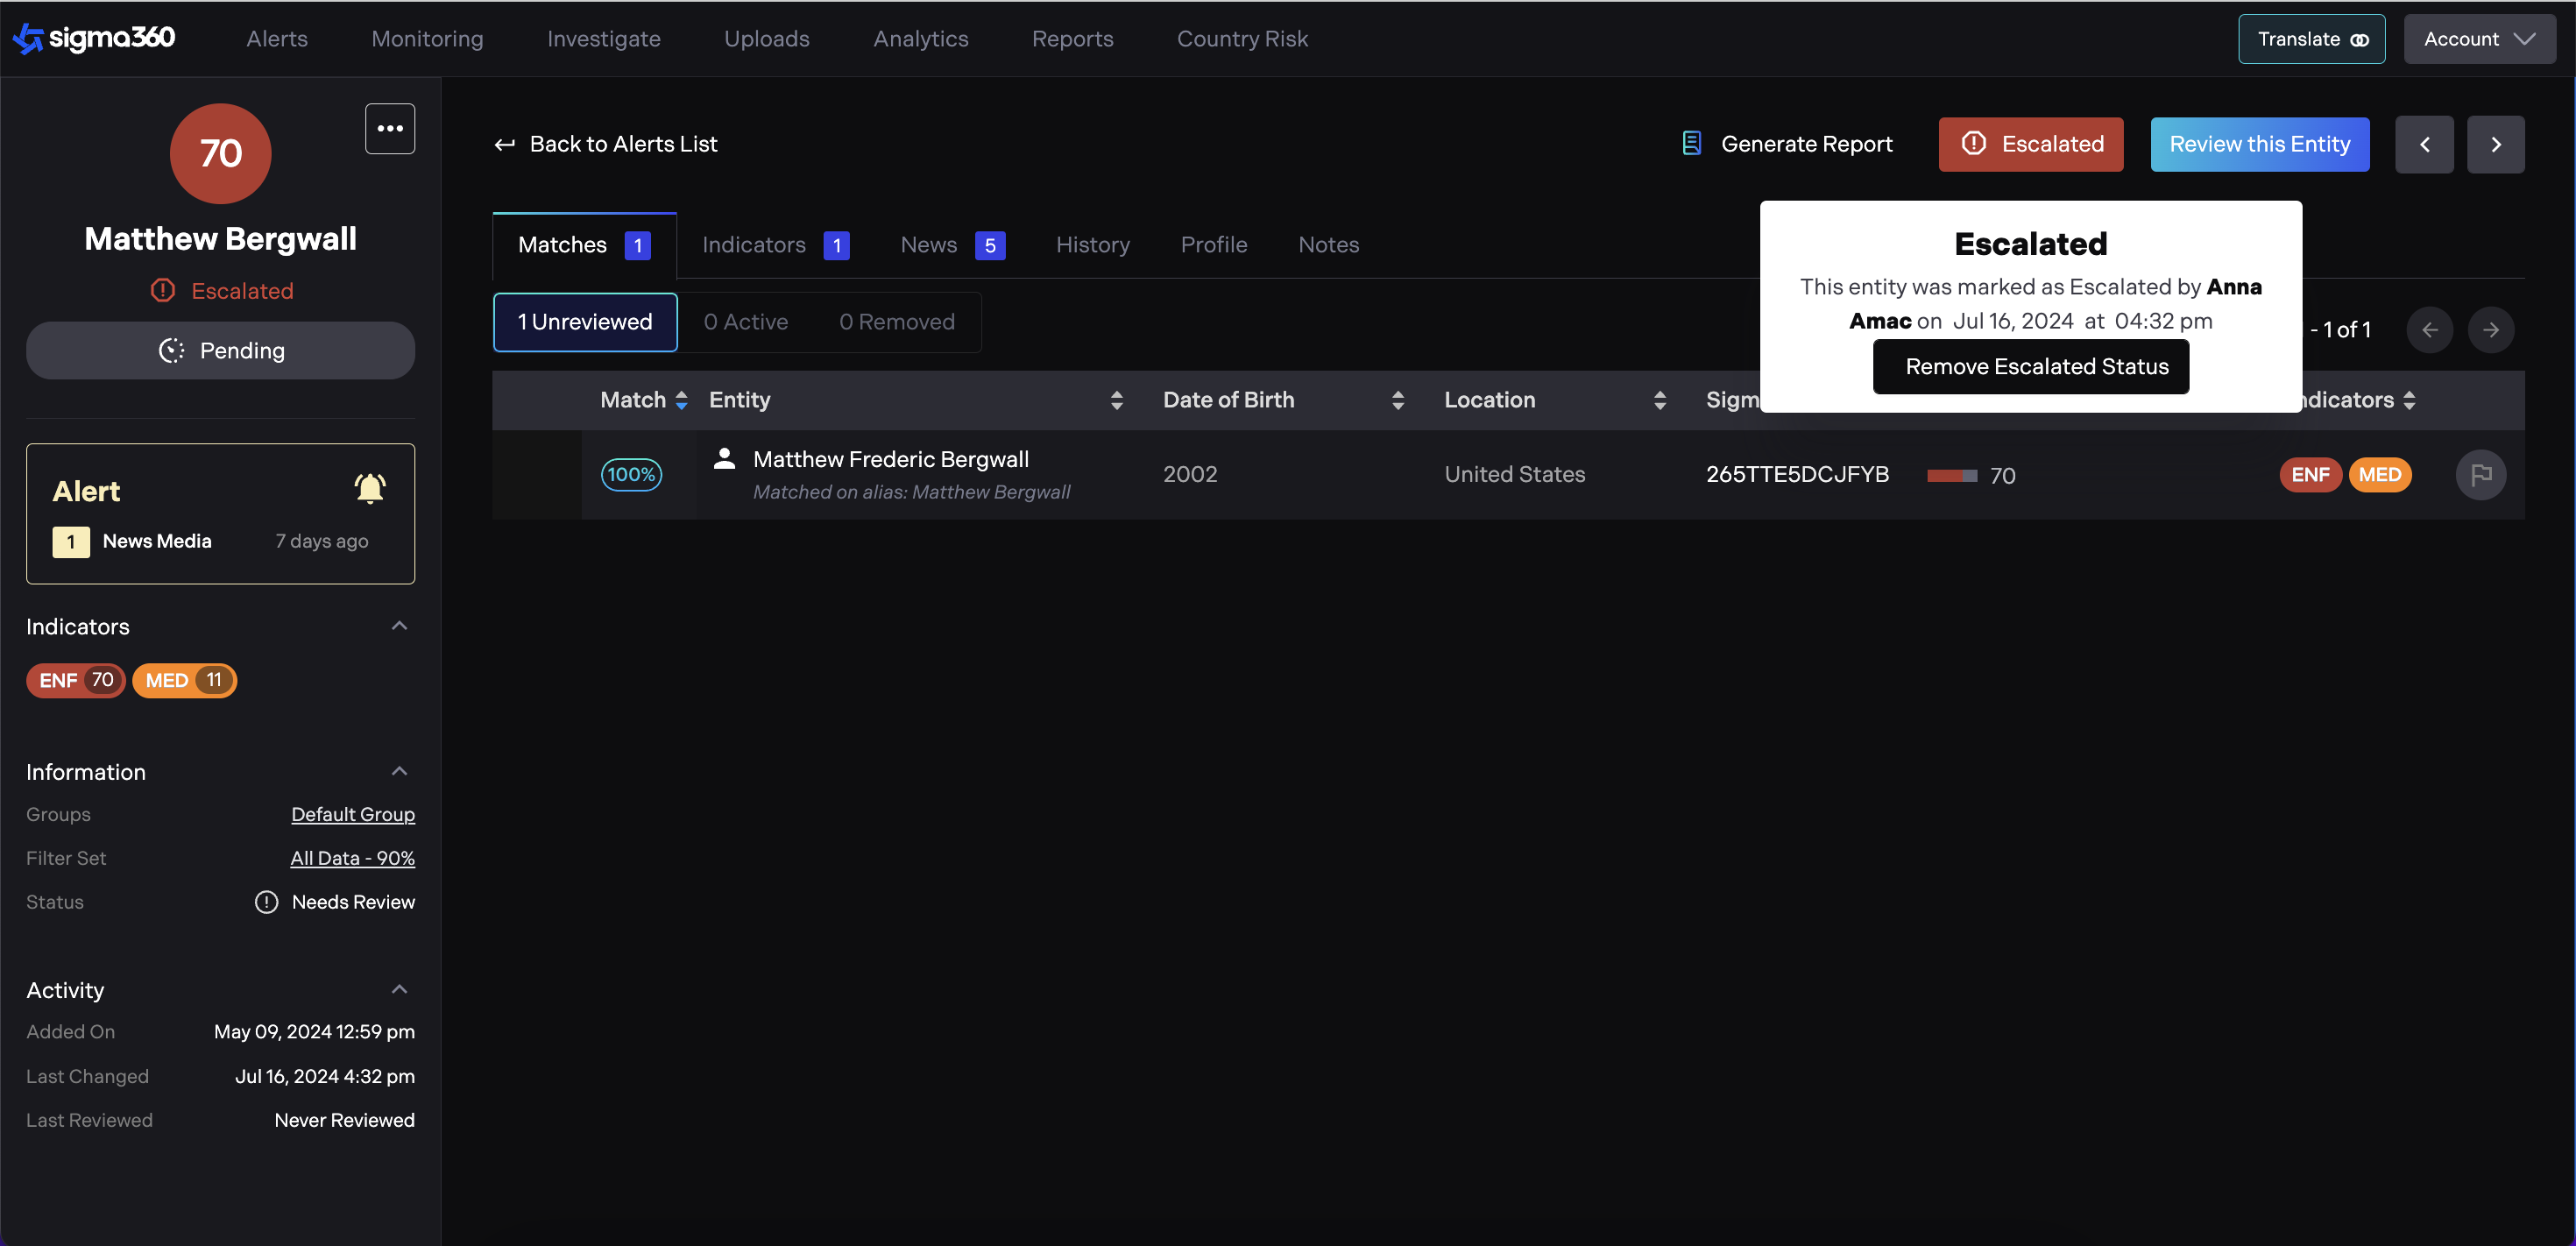
Once an Entity is escalated, it will turn red. Users can see all Escalated Entities on a separate "Escalated Entities" Tab.
While on an Entity page, users can perform escalation without starting a review. The “Escalate" button is on the right upper side.
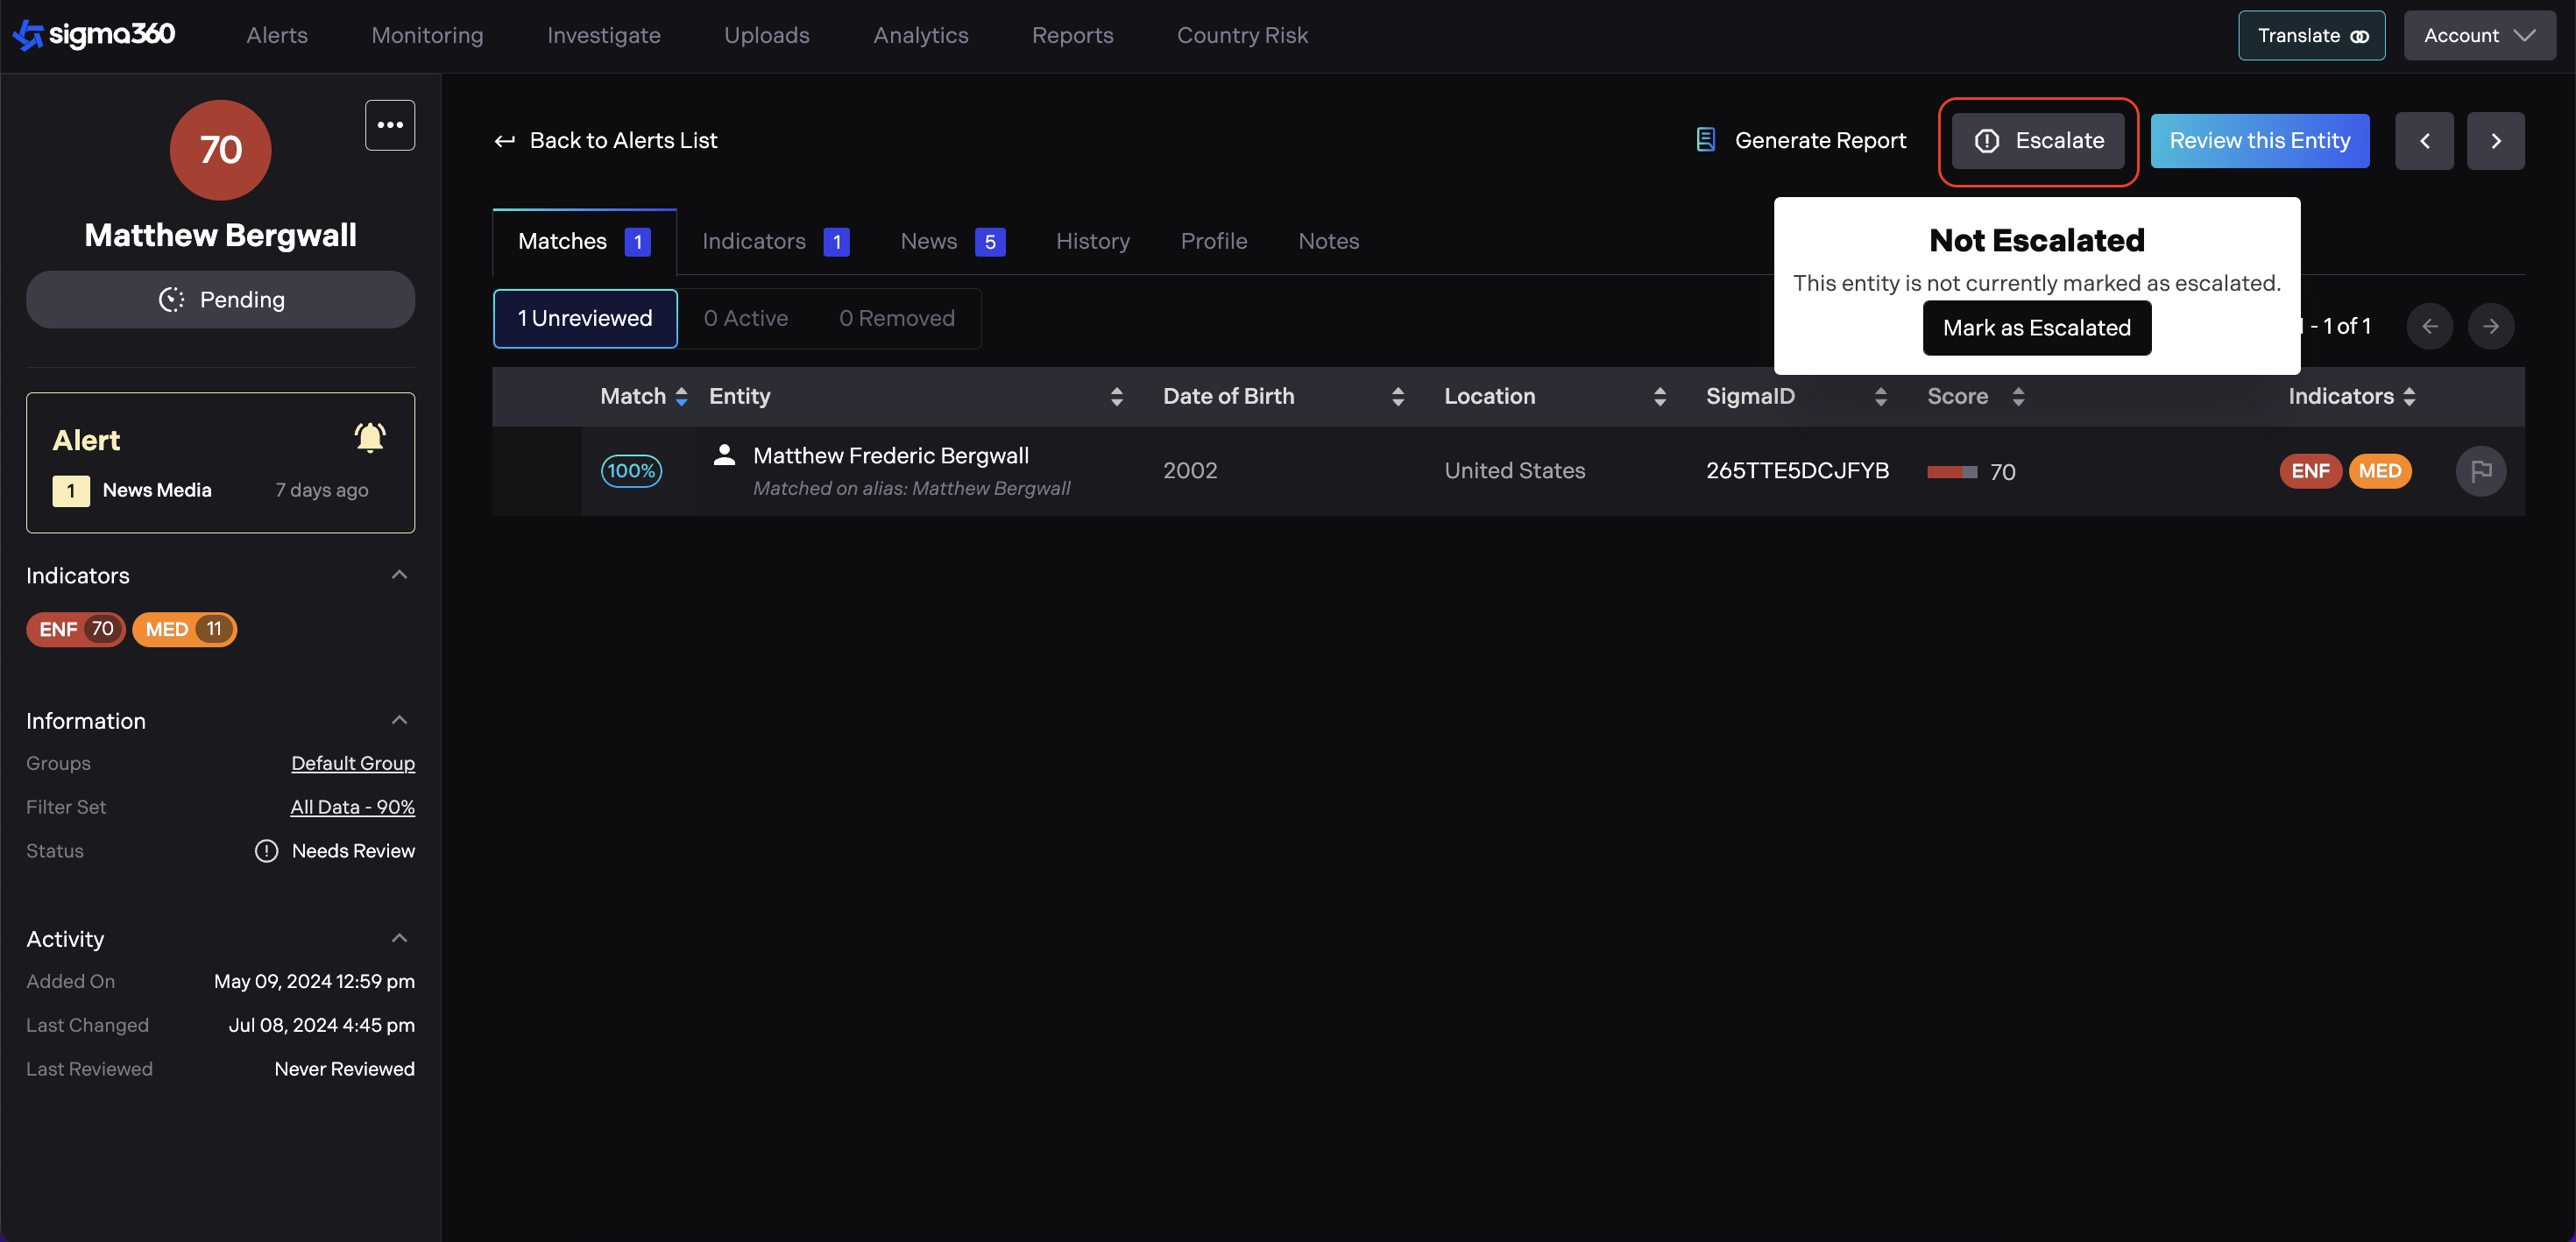
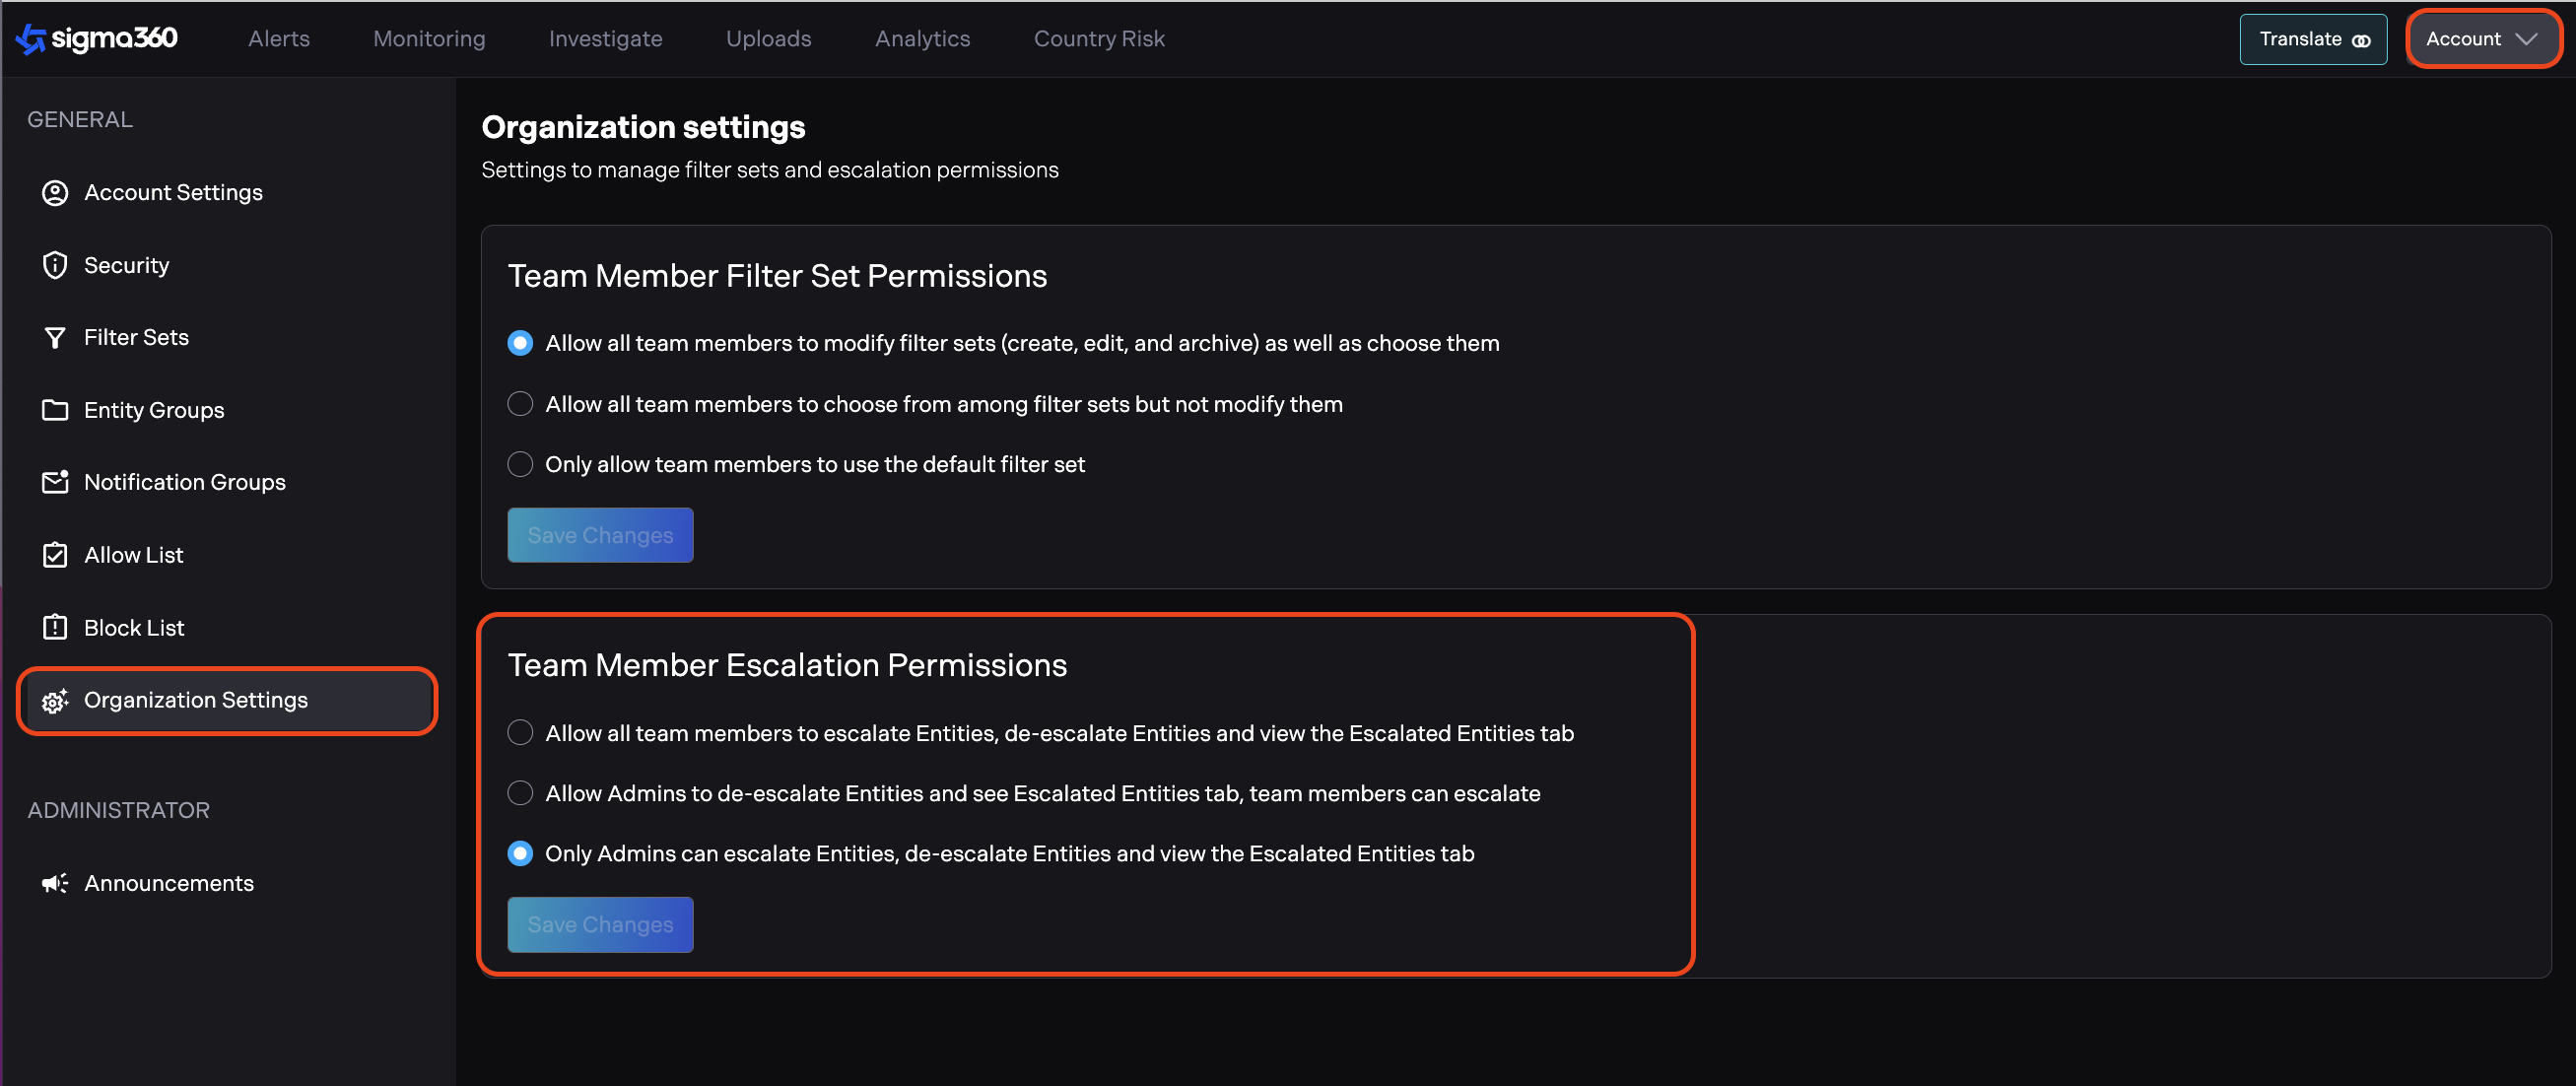
The Admin role can configure permissions for users to escalate, de-escalate, and view the Escalated Entities tab. Account -> Organization Settings -> Escalation Permissions
Users with permission to de-escalate an entity will see the de-escalation button available to them. For some users, the escalation button will be disabled due to limited permissions.
Disposition Status
Disposition Status allows users to establish a business decision or recommendation for any Entity, supporting seamless integration with CRM or case management systems.
Upon uploading an Entity to Sigma360, the Entity will be assigned Cleared status if no risk is detected, or Pending status if risk is identified. No further automated updates will be applied to Disposition Status following the initial Entity upload.
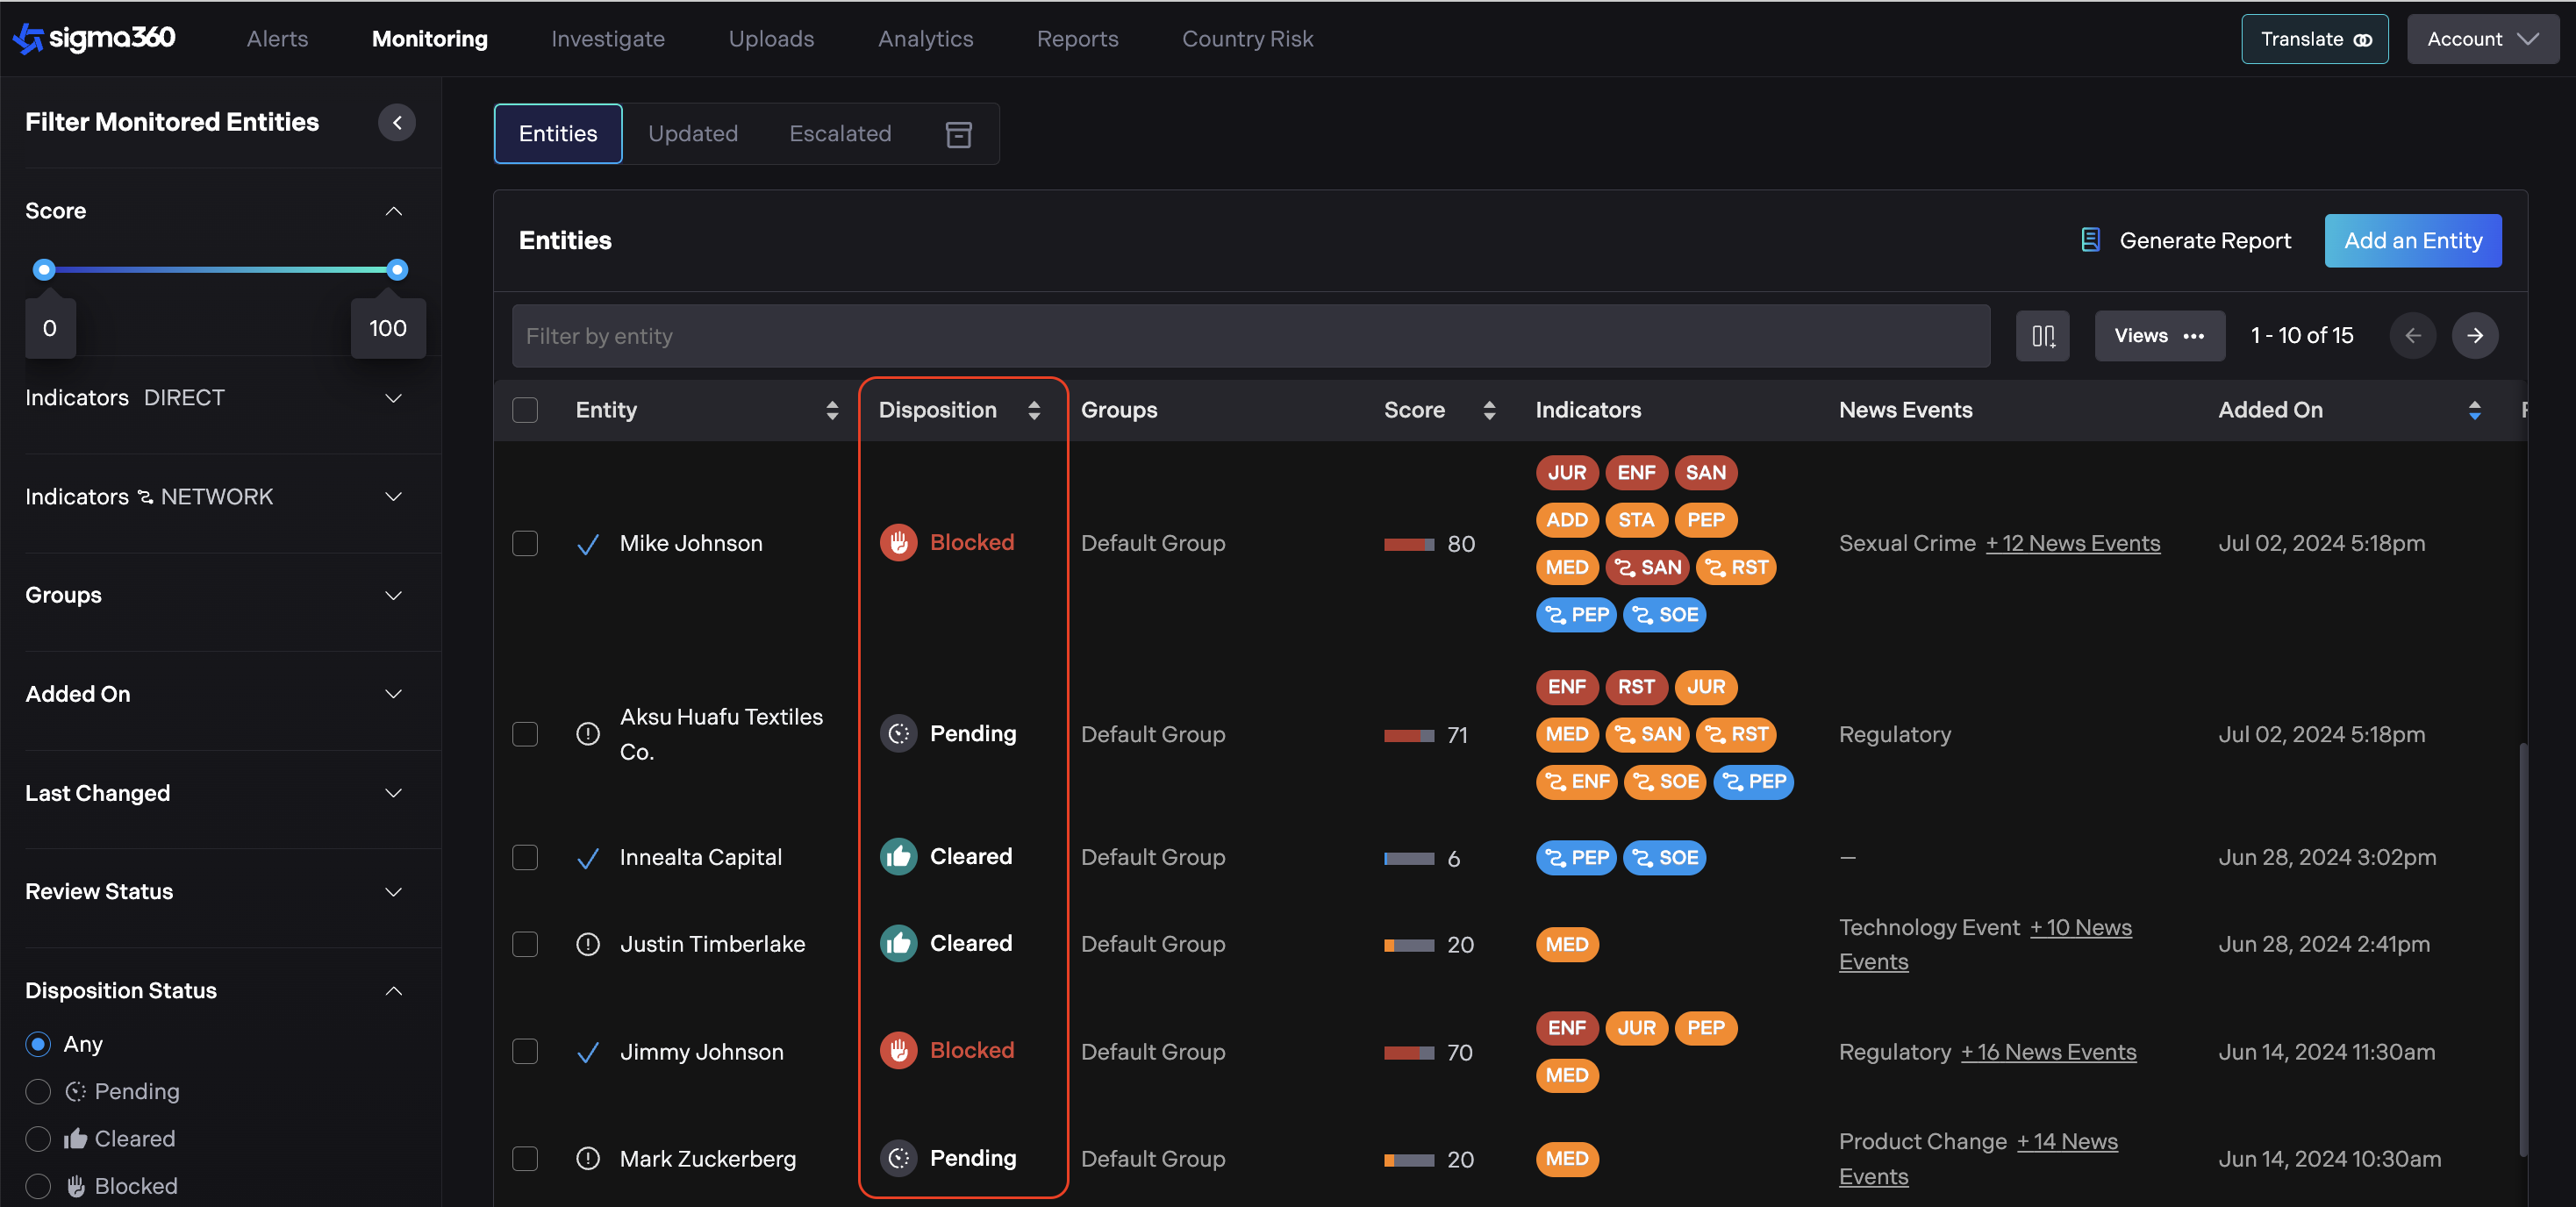
Disposition Status can be sorted and filtered on the Monitoring Page.
Completing a review requires setting the Disposition Status as Cleared or Blocked, unless the user wants to escalate Entity for further investigation.
The user should start the review on an Entity with a "Pending" Status. Unreviewed Items such as Matches, Indicators, and News should be reviewed. By clicking "Finish Review" a modal will appear with three actions: "Clear," "Block," or "Escalate."
a) The user can choose "Clear" if the Entity requires no additional review.
b) The user can choose "Block" if the Entity does not meet policy requirements for doing business.
c) If the chooses "Escalate", the Disposition Status will remain as "Pending."
In each case, the entity will continue to be monitored for new risks unless it is archived.
After a user reviews the escalated Entity and chooses a Disposition Status, the escalation status will be automatically removed.
To change a previously set Disposition Status, the user needs to initiate a new review and select the new disposition during the review process.
Notes & History
Notes
Users can create notes on the entity. By clicking "Add a Note," a text area will appear for input.

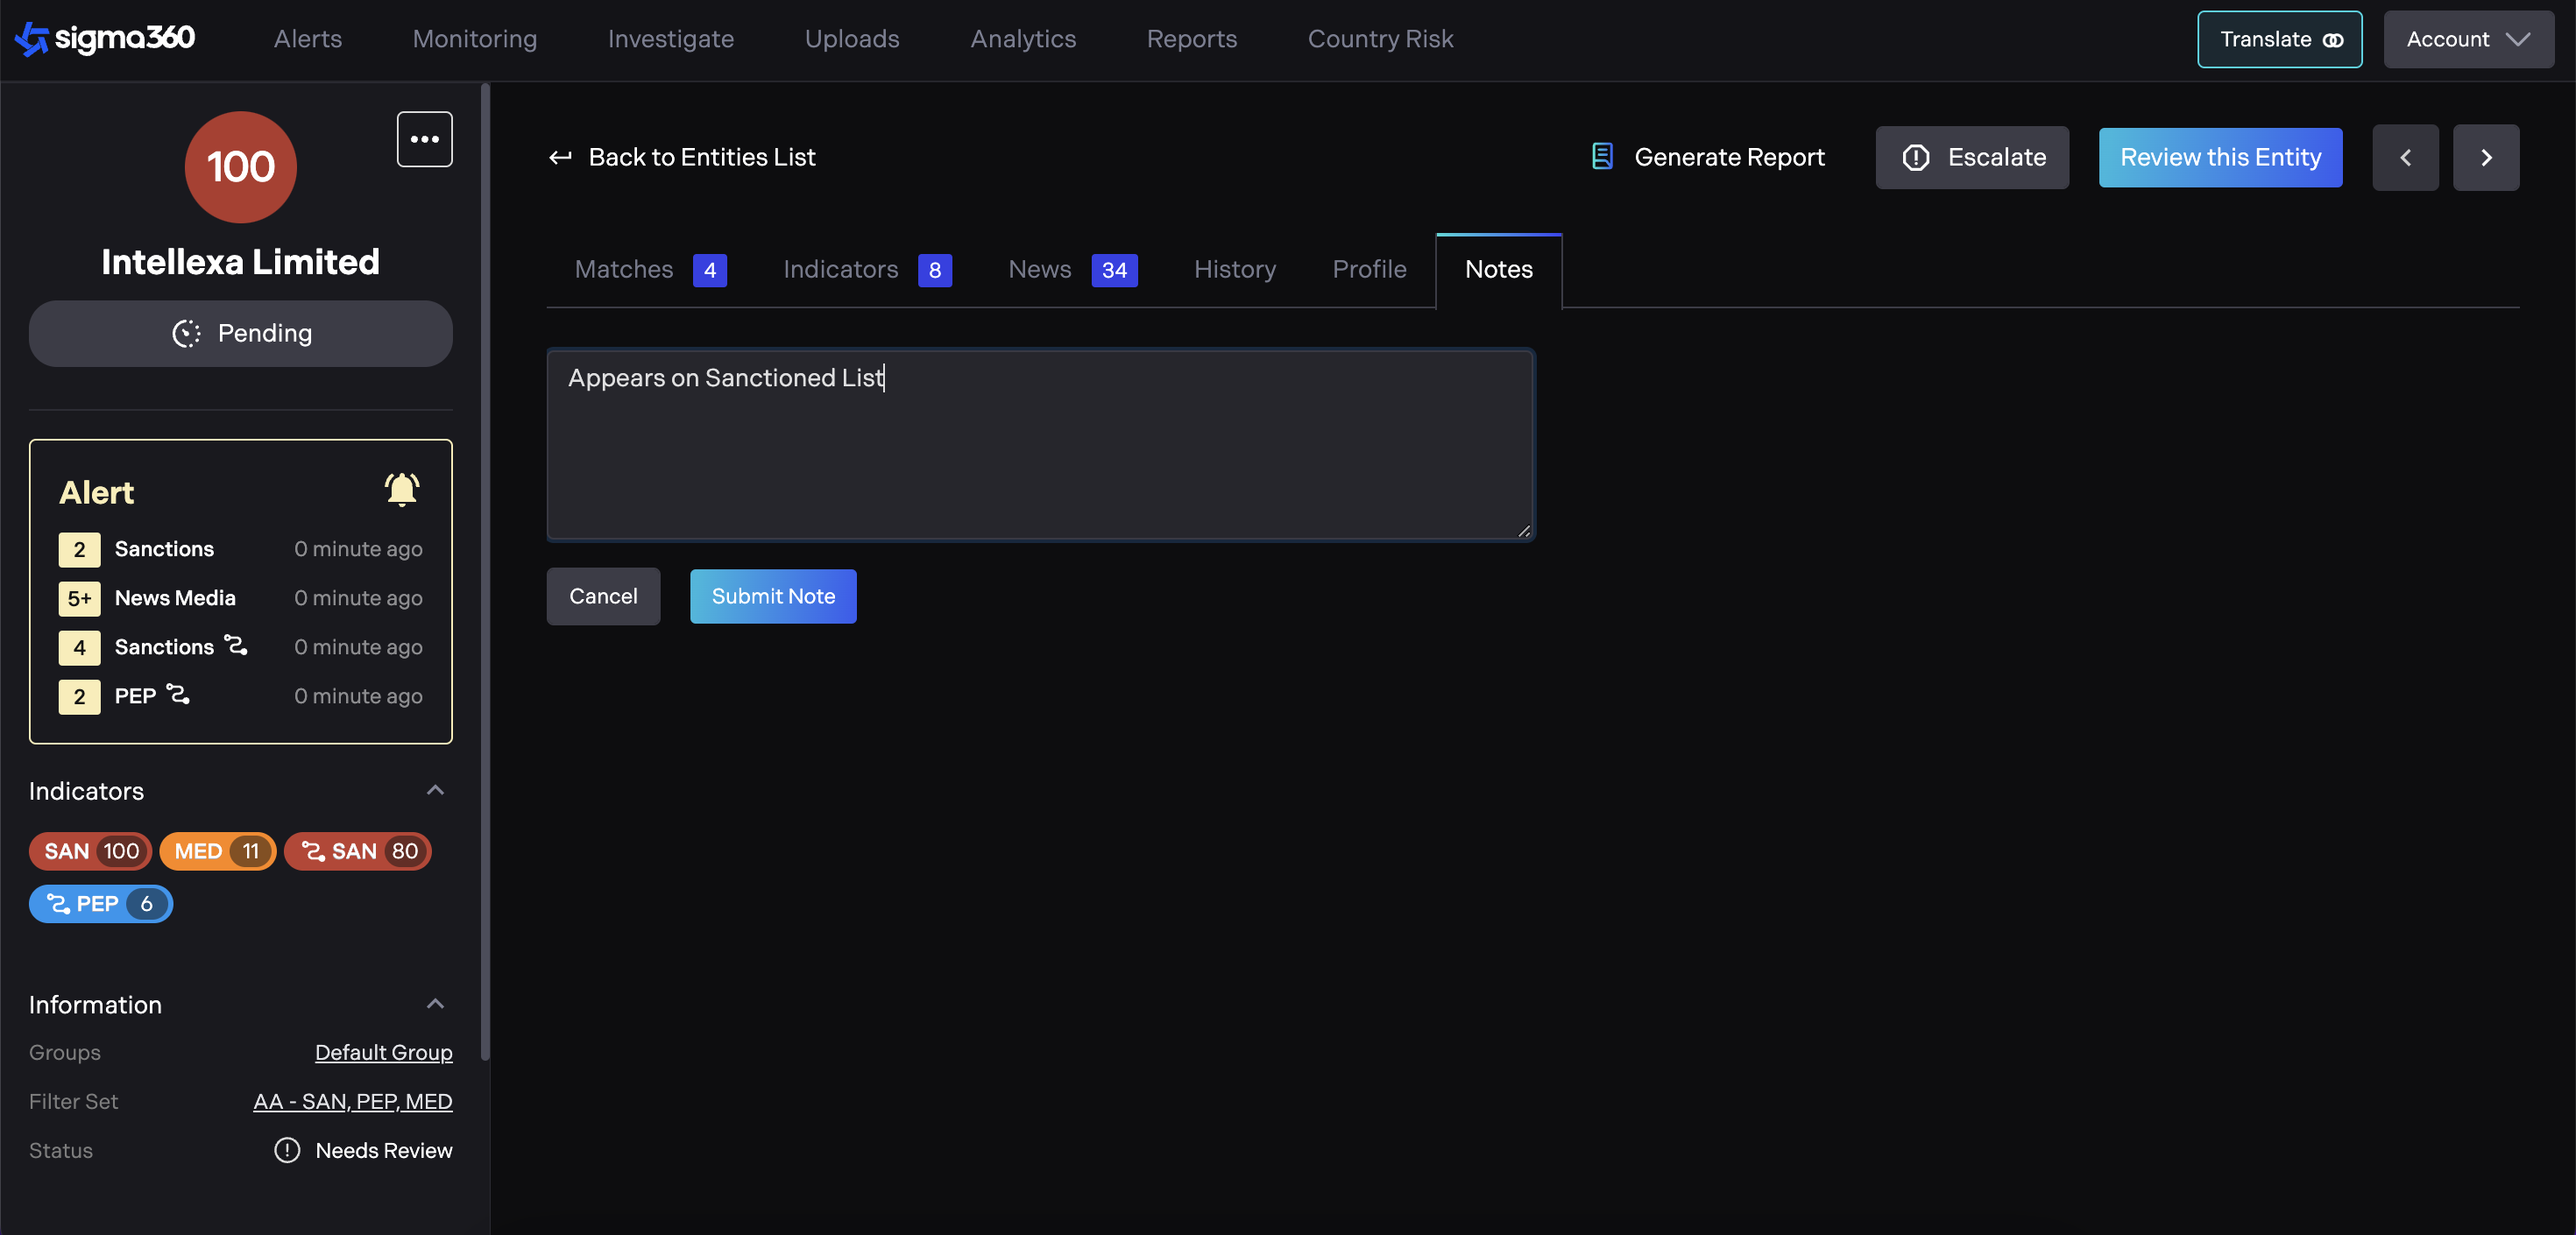
When finishing a review, the users can also add notes. These notes will appear on the Notes tab.

All created notes across all Entities are displayed on the Monitoring page in the “Notes” column.
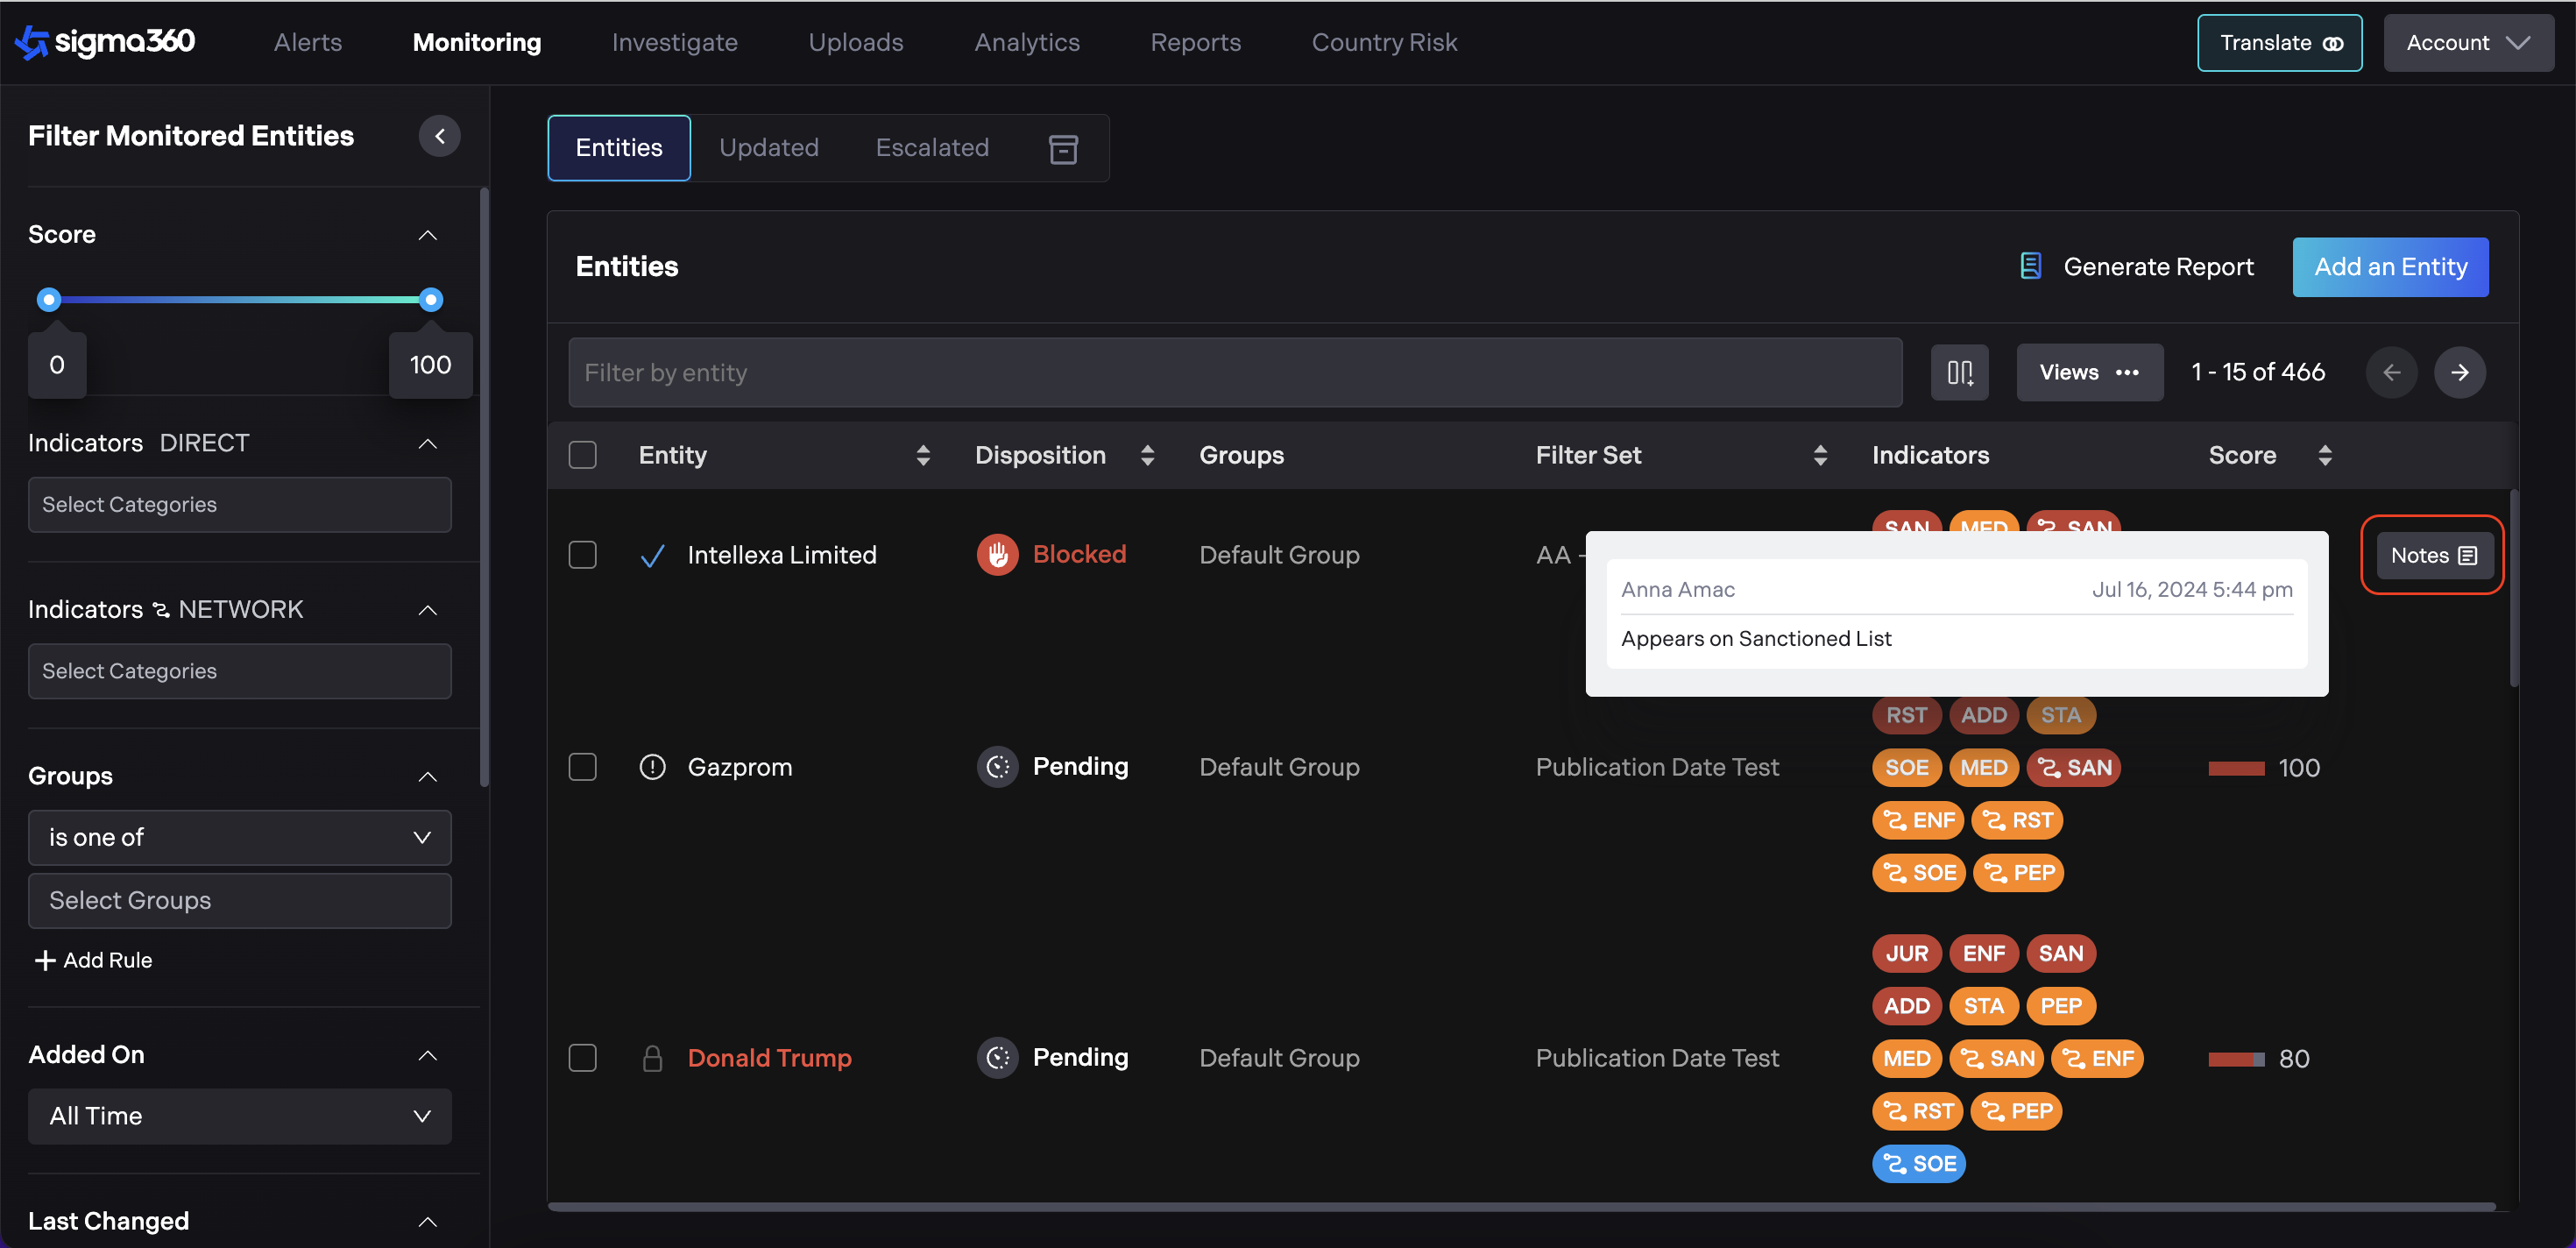
Please note that notes cannot be edited or deleted once created.
History
The History tab records various events related to the monitored entity from its initial upload to the present. These events provide a detailed log of actions and updates.
-
Entity Created: Indicates when an entity is created, specifying the user who created it and listing the initial indicators. This event can be expanded to view what matches and indicators were added.
-
Started Review: Indicates when a review of the entity has started, along with the user who initiated the review.
-
Completed Review: Indicates when a review of the entity has been completed, along with the user who completed the review, as well as records decisions made regarding the entity matches, indicators and news. This event can be expanded to view what matches and indicators were changed.
-
Cancelled Review: Indicates when a review of the entity has been cancelled, along with the user who cancelled it.
-
Data Change: Indicates when data related to the entity has been modified. This event can be expanded to view what data was changed.
-
Entity Disposition Changed To Cleared: Indicates when the entity’s disposition has been changed to cleared, along with the user who made this change.
-
Entity Disposition Changed To Blocked: Indicates when the entity’s disposition has been changed to blocked, along with the user who made this change.
-
Entity Refreshed After Review: Indicates when the entity has been refreshed following a review.
-
Entity Escalated: Indicates when an entity is escalated, showing the user who performed the action.
-
Entity De-escalated: Indicates when an entity is de-escalated, showing the user who performed the action.
-
Alert Opened: Indicates when an alert is opened.
-
Alert Closed: Indicates when an alert is closed.
-
Filter Set Change: Indicates changes in the filter set, showing the user who made the change and the Indicators affected. This event can be expanded to view what matches and indicators were added or removed.
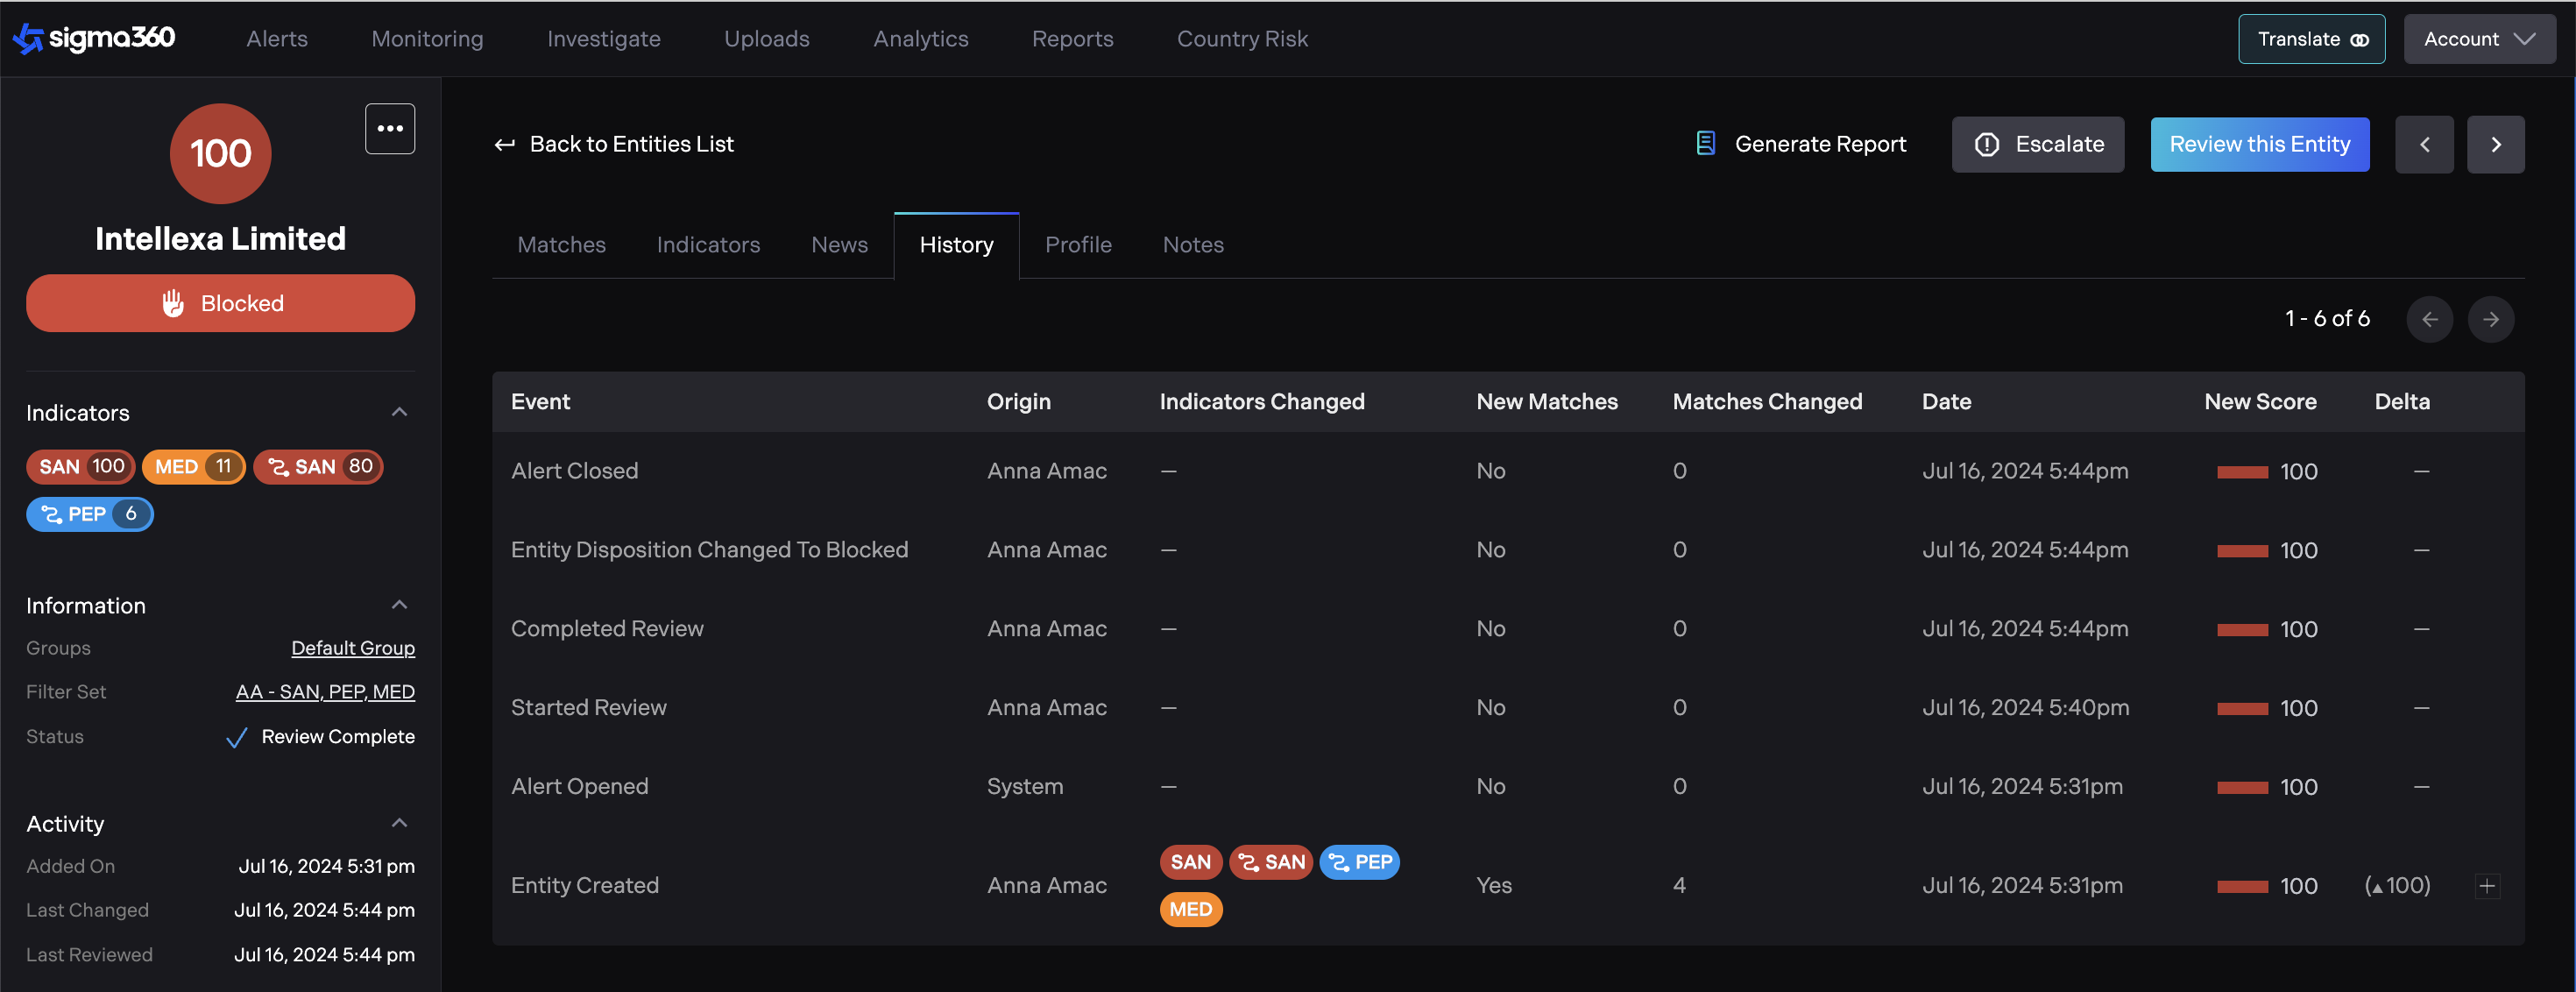
Each event entry includes the following details:
-
Origin: The user or system that initiated the event.
-
Indicators Changed: Lists the indicators that were added, removed, or modified during the event.
-
New Matches: Indicates whether new matches were found as a result of the event.
-
Matches Changed: Shows the number of matches that were affected.
-
Date: The timestamp of the event.
-
New Score: The updated score after the event.
-
Delta: The change in the score resulting from the event.